I’m sure that you’ve heard that there are indeterminate and determinate tomatoes, but did you know that there are also different types of potatoes as well? Whichever variety you choose will make a difference in how you care for the crops as they grow, as well as what type of harvest you can expect to get at the end of the growing season.
You’ve probably heard that in order to grow potatoes, they need to be hilled to have a successful harvest. While that is the case with some varieties, others don’t need to be hilled at all. This is great news for people who want to plant and grow potatoes in smaller grow bags, containers, or in spaces where hilling just isn’t possible.
Then there is the different length of time that it takes for the potatoes to be ready for harvesting. (This is usually called “days to maturity”.) Some varieties are early-season potatoes, some are mid-season, and others are late-season varieties.
Knowing whether your potato plants are determinate or indeterminate, as well as the length of their growing season, can be the difference between healthy plants and a successful harvest, or a crop that fails to meet your expectations while causing you more work in the long run!
Determinate Potatoes
Determinate potatoes produce a single layer of tubers just underneath the surface of the soil. (The tubers are what turn into the potatoes you harvest.) Because of their horizontal growth, determinate potatoes do not need to be mounded or hilled.

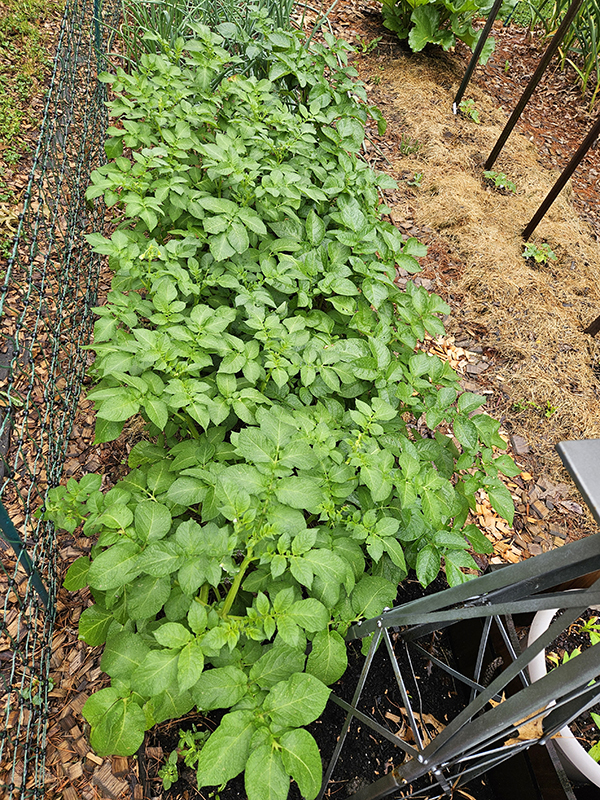
They typically grow shorter, bushier plants, which makes them perfect for growing in shorter grow bags, containers, or in locations where you can’t mound the plants. They are also a great choice if you don’t have the extra soil/compost or time to dedicate to hilling potatoes.
Some of the most common determinate tomatoes include Red Pontiac, Yukon Gold, and Kennebec. I typically only grow determinate potatoes. I often use grow bags like these, VIVOSUN 5-Pack 10 Gallon Plant Grow Bags (Product Link), or I plant them directly in the soil. Just make sure that if you use bags, they are at least 10 gallons in capacity.
Indeterminate Potatoes
Indeterminate potatoes, on the other hand, can grow tubers in multiple layers. Because of this, they require mounding for the best harvests. They are great for in-ground growing where additional soil can be added, for potato towers, or for taller grow bags that can “grow” with the plants.

Most indeterminate potato varieties take between 90 and 130 days from planting to harvest. Although there are some mid-season varieties that are closer to the timeframe of determinate potatoes if harvested early. Some examples of indeterminate potatoes are Russet Burbank, Idaho Russet, French Fingerling, and German Butterball.
After the potatoes grow a few inches above the soil, you will need to add more soil and mulch. This process is often called hilling, mounding, or earthing up.
Do Potatoes Grow From Seeds?
Now that you know the difference between determinate and indeterminate potatoes, it’s time to learn how to grow potatoes. This general information applies to all types of potatoes.

Unlike most vegetables and plants that are grown from seeds, potatoes are grown from what’s called “seed potatoes.” These are certified potatoes that are grown for the sole purpose of producing new potato plants. You can find seed potatoes from reputable online sellers, in garden centers, and at most farm stores.
While you can technically grow new plants from grocery store potatoes, it isn’t the best idea. Most of these plants have been sprayed with growth inhibitors. This can alter how they sprout as well as stunt their growth. You also don’t know where the potatoes are originally from in most cases. The only way to know for sure that your potatoes will be healthy and successful is to use certified seed potatoes.
(For a more detailed look at growing and caring for potatoes, especially in grow bags, check out my article, “How To Plant & Grow Seed Potatoes Using Grow Bags”.)
Chitting Seed Potatoes
Before you plant your seed potatoes, they need to be chitted. This is the process of allowing the seed potatoes to sprout before you plant them in the soil. It’s a way of giving the plants a bit of a head start. Both indeterminate and determinate seed potatoes should be chitted.

The best way to explain this is to think of grocery store potatoes. Have you ever brought a bag of potatoes, only to forget them and find them a few weeks later? Most likely, you will see sprouts that come from the eyes (or buds) of the potatoes. (Even though they are sprayed with a growth inhibitor, grocery store potatoes will still sprout under the right conditions.) It’s from these eyes that the new plants grow.
About two weeks before you want to plant your potatoes, place the potatoes in a location that is exposed to light. The temperatures should be around 70º Fahrenheit or warmer. This will help initiate sprouting.
If you have large potatoes (over golf ball size), cut them up into pieces so that each piece has at least 2 to 3 eyes. Set the eyes pointing up toward the light. (I like to set my potatoes in empty egg cartons to allow for airflow.) The cut sides will start to develop a callous, and that will help prevent rotting. Once the potatoes have started to sprout, they are ready for planting!
Planting The Potatoes
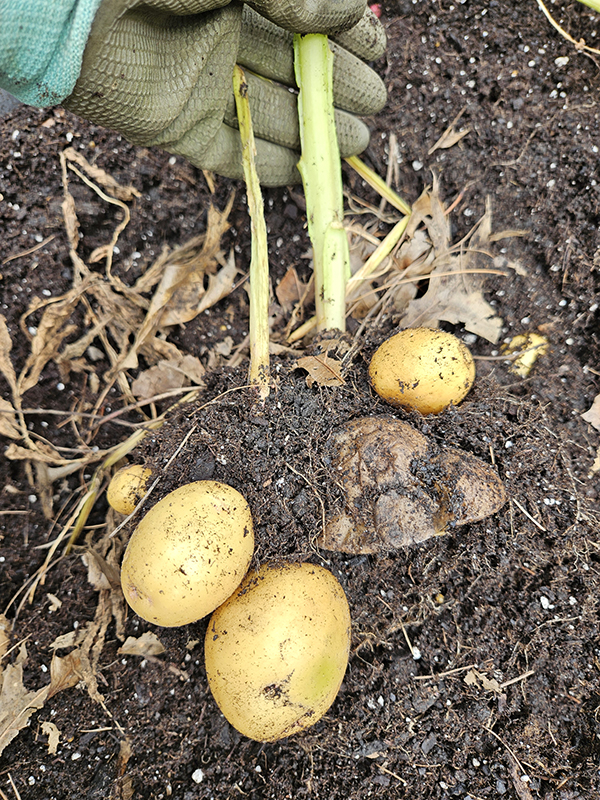
Plant determinate potatoes with the eyes pointing up about 4 inches deep in loose, well-draining soil. Top the soil with a few inches of mulch. Even though they don’t require mounding, you still do not want to expose the tubers to sunlight.

Plant indeterminate potatoes about 4 inches deep in loose soil with the eyes pointing up as well. Add several inches of mulch to the top, just like you would with determinate potatoes.
After you see about six inches of growth above the mulch for indeterminate potatoes, add more soil. Leave just the tops of the plants visible. Continue this process three or four times to get multiple layers of potato tubers.
Continue to water both types of potatoes throughout the growing season. This is especially important while the foliage is growing and when they put out flowers. Plants grown directly in the soil need to be watered less than those in grow bags or containers. Stop watering plants when the foliage begins to die off.
How Long Do Potatoes Take To Mature?
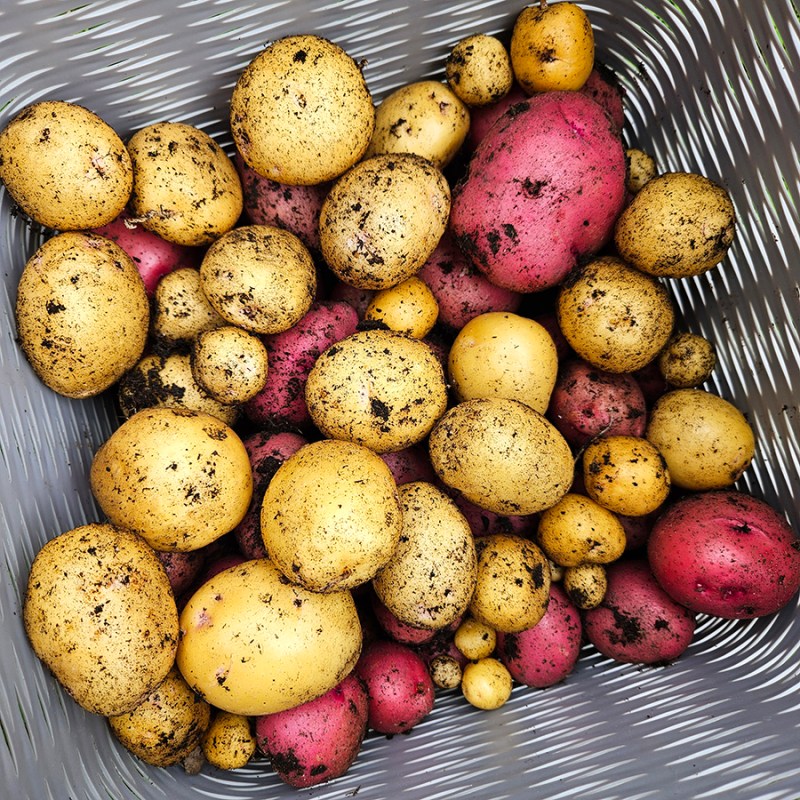
Potato varieties range in skin color, flesh texture and color, and overall size. So, in addition to knowing whether potatoes are determinate or indeterminate, there are also three types of potatoes that are categorized based on how long it takes for them to be ready for harvesting.


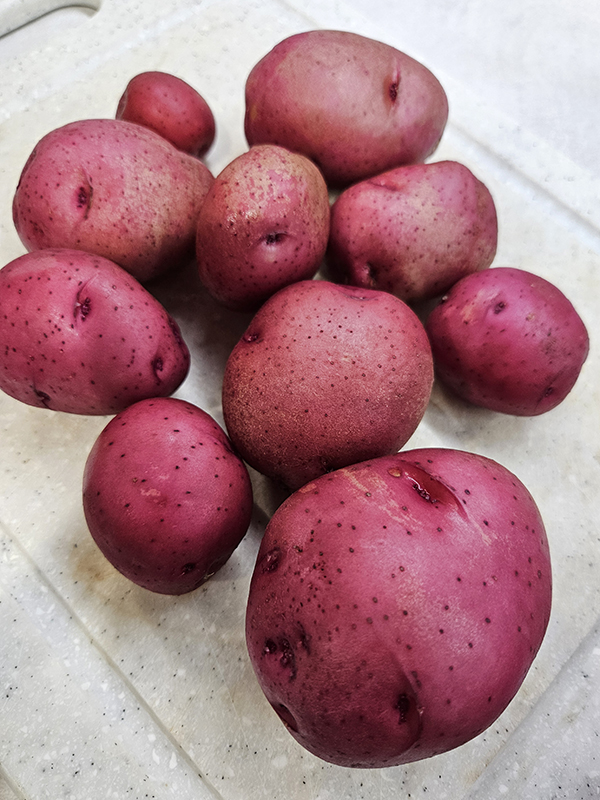
Early-season potatoes are usually the first that get planted in early spring. They take around 60 to 80 days to be ready for harvesting in early summer. They feature thin skins and tender flesh. Because of this, they can only be stored for a short time. Red Norland and Irish Cobbler are both early-season crops.
Mid-season potatoes take around 80 to 100 days to mature. They are usually harvested mid-summer and can be stored for around a month after curing. Yukon Gold and Red Pontiac are probably the most common mid-season potatoes.
Late-season potatoes take the longest to become mature, taking around 100 to 130 days. Most late-season potatoes are harvested during the fall before frost occurs. Despite their long growing timeframe, they are the best for long-term storage, lasting up to 3 months. Kennebec and Katahdin are two types of late-season potatoes. Many russet potatoes are also late-season.
Harvesting Determinate and Indeterminate Potatoes
You can harvest potatoes at any point during their growth for the most part. It just depends on how big you want the potatoes to be. Ideally, the tubers should be at least the size of a golf ball for what’s considered “new potatoes” or “baby potatoes”. Harvest these potatoes about 2 to 3 weeks after the plants finish flowering. For fully mature tubers, wait about 2 to 3 weeks after the foliage dies back completely.

If the weather is rainy, wait to dig up plants. You want the soil as dry as possible when harvesting. Trying to work with moist soil can be really difficult and leaves the potatoes a mess.
If using grow bags, lay the bags on their side and press on all sides to help loosen the soil. You should then be able to dump out the plants and soil to easily dig out the potatoes. (I like to dump mine into a wheelbarrow so I can reuse the soil.)
For those planted in the ground or in raised beds, use either a shovel or a pitchfork to dig around the plants. Take care not to puncture any growing tubers. Once the soil is loosened all around the plants, you should be able to dig around and find the potatoes. It’s like a mini treasure hunt!
Curing And Storage
Once the determinate and indeterminate potatoes are harvested, you need to let the skins dry out for a few days before storage. This is called “curing”. Don’t wash the potatoes before storage unless you are going to use them right away. Just brush off any excess dirt.
Place them in a mesh bag or a cardboard box in a cool, dark place for about two weeks. Potatoes require air circulation for curing and storage. I put mine in these Hanging Mesh Bags (Product Link).
For long-term storage after curing, keep them in a humid, dark place that is around 40º Fahrenheit. Any temperatures much warmer than that will cause the potatoes to sprout. If they start to sprout, remove the sprouts and use them fairly quickly. Avoid any source of light to prevent greening.
Check on the stored potatoes every couple of weeks to make sure none have sprouted, started to rot, or become shriveled and dried. Remove them immediately if they have.
Hopefully, you will now be able to choose the best type of potato for your garden and not waste time hilling if it isn’t even needed!
Until next time, thanks for stopping by!
– Chelsea
*This post may contain affiliate links. These are products I have used personally and highly recommend. As an Amazon Associate, I may earn a small commission from qualifying purchases if you purchase items through my links. These links and the ads on this page help to support my family and our semi homestead, so Thank You!
Discover more from Semi Homestead Life
Subscribe to get the latest posts sent to your email.