
If you are looking for basic information about what type of canning equipment you need in order to harvest and preserve your garden produce, then you’ve come to the right place!
Canning – it’s a subject that can scare many beginner and advanced gardeners. However, it really doesn’t have to be that scary of a process. In fact, once you get started, it can actually become somewhat addicting (in a good way, of course!).

I recently wrote about the basics of canning. Within that article, I was going to include all of the equipment that is needed in order to process most garden produce. However, the article started to get WAY too long so I decided to break it up into two separate articles.
In this article, I’m going to walk you through the most basic canning items you might need so you can safely and properly can your garden goodies. Trust me, it is so nice to be able to walk to your pantry or basement in the middle of the winter and grab a jar of fresh produce that you grew or purchased locally.
Home-canned produce is fresher and usually healthier than what you would buy in the grocery store. In addition, it just seems to taste better! And, you know exactly what went into (or onto) the items you are preserving.
The Basic Canning Equipment Needed For Preserving Your Garden Produce
There are a few basic items that you are going to need in order to can your produce safely and successfully. Within those categories are several different brands and price points. The key is to use products that are certified and made specifically for home canning.
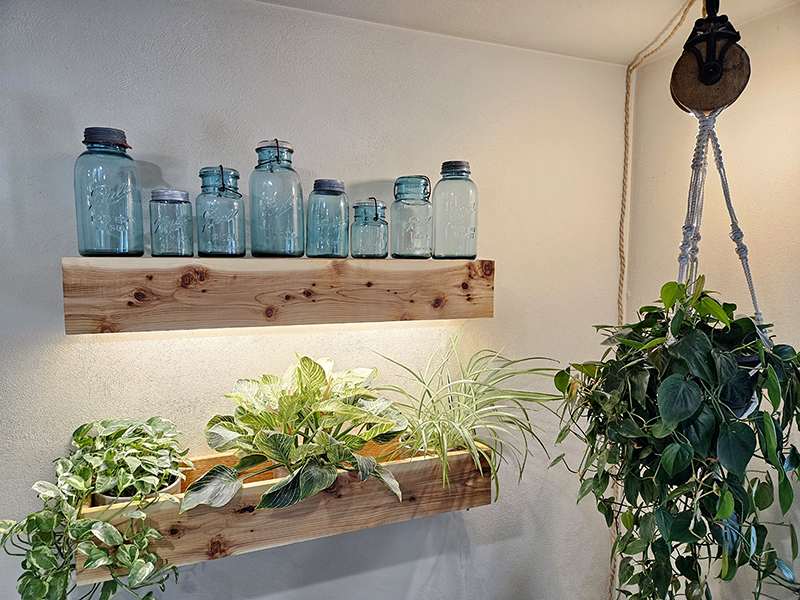
Yes, it can be very nostalgic to use those old glass canning jars you found in your grandmother’s basement. However, you are taking a chance by having those older jars break or crack while processing, ruining entire batches of hard work.
The call is yours to make though. Personally, I prefer to use both my late Grandmother’s older jars as display pieces in my home as opposed to use for actual canning!
While you can also freeze, dehydrate, or even freeze-dry your garden produce, I am going to focus on water bath canning or pressure canning for this article. To read those two canning processes broken down into simple, easy-to-understand steps to make it less intimidating, head over to my corresponding article, “Canning Basics – Two Great Ways To Preserve The Garden.”
Water Bath Canners – Basic Canning Equipment
For water bath canning, you can really use any large pot as long as the filled jars can be covered with at least an inch of water once boiling. You also need a rack for the jars to sit on, but you can purchase those separately if you already own a pot big enough.

There are water bath canners sold specifically for the sole purpose of canning. I have two such canners. One is a stovetop canner like my grandmothers would’ve used. It came with a rack when I purchased it and is nice and large. It can process 7 quarts or 9 pints at a time. (Product Link: Granite Ware Water Bath Canner)
However, my favorite water bath canner to use is my Ball electric canner. Not only does it not involve heating my kitchen up by using my stove, but it just makes the overall process much easier. It is a bit of an investment, but I highly suggest it, especially if you plan on processing a lot of produce. You can process 7 quarts or 8 pints at a time with my specific model. (Product Link: Ball Electric Canner)
Pressure Canners
For pressure canners, there are several different brands out there. I have a Presto Pressure Canner and it works really well. This type of basic water bath canner can process 7 quarts or 20 pints at a time. The pints are short enough that they can be stacked in two rows. (Product link: Presto Pressure Canner)
However, the downside to stovetop pressure canners is that they involve constantly watching the pressure gauge to make sure you are maintaining the correct pressure. This usually means you are constantly adjusting your stove heat accordingly. Often, I don’t feel safe to leave the kitchen because if the pressure drops too low, the processing time has to be started all over again. In addition, the use of the stove for usually a few hours at a time will really heat up your house!

So this year, I was gifted an electric pressure canner for my birthday. Again, it has a rather steep upfront cost. But, it might be worth it depending on how much produce you plan to process. For me, it was worth it! (Product Link: Presto Electric Pressure Canner)
The benefits of the electric canner are that it handles adjusting the pressure automatically while walking you through the entire process step by step. It almost makes the process foolproof and thus a lot safer than traditional pressure canners.
The only real negative is that I can process 5 quarts at a time. However, since I don’t have to babysit the canner or adjust the gas on my stove constantly, it’s more than worth it!
Canning Jars
The next piece of equipment you need is canning jars. Unfortunately, it isn’t safe to just take your empty and clean jar of store-bought jelly and can with it.
You want to use jars that are specifically made for canning and processing food for long-term storage. Of course, Ball is one of the most popular brands out there. However, there are plenty of other brands that you can use as well.
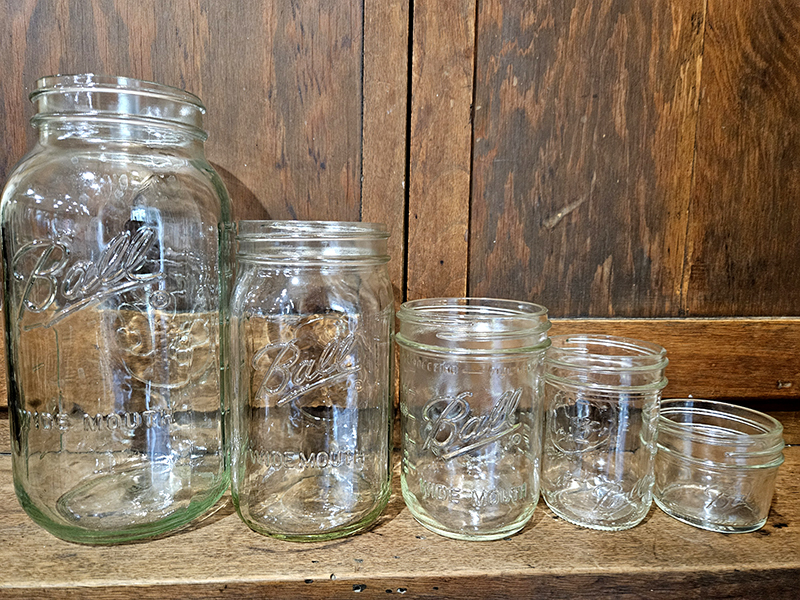
The jars come in several different sizes including half-gallon, quart, pint, half-pint, and quarter-pint. The most common ones are quart and pint. The smaller two sizes are typically used for jams and jellies.
The larger jars also come with two different-sized openings: regular and wide mouth. Most of my canning jars are wide-mouth because I find it easier to get produce inside the jars. Otherwise, there really isn’t a difference between the two, and is only personal preference.
All About The Lids – Basic Canning Equipment
The jars need to have lids. The lids come in two pieces, the flats and the bands. The flat is the part that seals to the top of the jar. The flats are a one-time-use product and cannot be reused.
You need to make sure that you get the right size of flats to match your jar openings. If you only own regular mouth jars, then you need to purchase regular mouth lids. The same goes for wide mouth jars.

The band is what holds the flat in place while you are processing the food. After the 12 or 24-hour cooling-off period, the bands should be removed for long-term storage. Leaving them on can cause you to get a false seal. Plus, you don’t have to purchase as many since they can be reused as long as they aren’t rusty or warped.
Other Canning Equipment
There are a few other basic canning equipment or tools you might need to help make the process easier. The first is a jar lifter. These are used for lifting hot jars in and out of the canners.
The next is a wide-mouth, food-safe funnel. The funnel allows you to easily fill jars with less mess than you might make otherwise. (I’m still plenty messy even when I use mine though!)
You also need to have a non-abrasive tool that removes the bubbles from the jars after they are filled. As you fill jars, air can get trapped between the food pieces and you need to remove as much of this as possible before adding your lids.

I also highly suggest purchasing a large ladle or scoop. A lot of canning recipes require you to add liquid or the produce itself is just easier to add with a ladle. I have a large one that can fill a half pint with one scoop. It makes the process of filling the jars go much quicker. (Product Link: Prepworks Canning Scoop)
Besides the ingredients to make canning products, a couple of dish towels, and maybe a paper towel or two, that’s about all you really need to process most canning recipes.
Until next time, thanks for stopping by!
– Chelsea
*This post may contain affiliate links. These are products I have used personally and highly recommend. As an Amazon Associate, I may earn a small commission from qualifying purchases if you purchase items through my links. These links and the ads on this page help to support my family and our semi homestead, so Thank You!
Discover more from Semi Homestead Life
Subscribe to get the latest posts sent to your email.