If you love traditional cinnamon rolls but don’t always have the time or energy to make them, then try these cinnamon roll muffins instead! They have all the same flavors but without all of the hassle!
There’s nothing that can top an ooey gooey, fresh from the oven homemade cinnamon roll in the morning. However, these muffins come pretty darn close! It’s a way for me to spoil my family while at the same time allowing me to sleep in just a little bit longer than if I were making traditional cinnamon rolls.
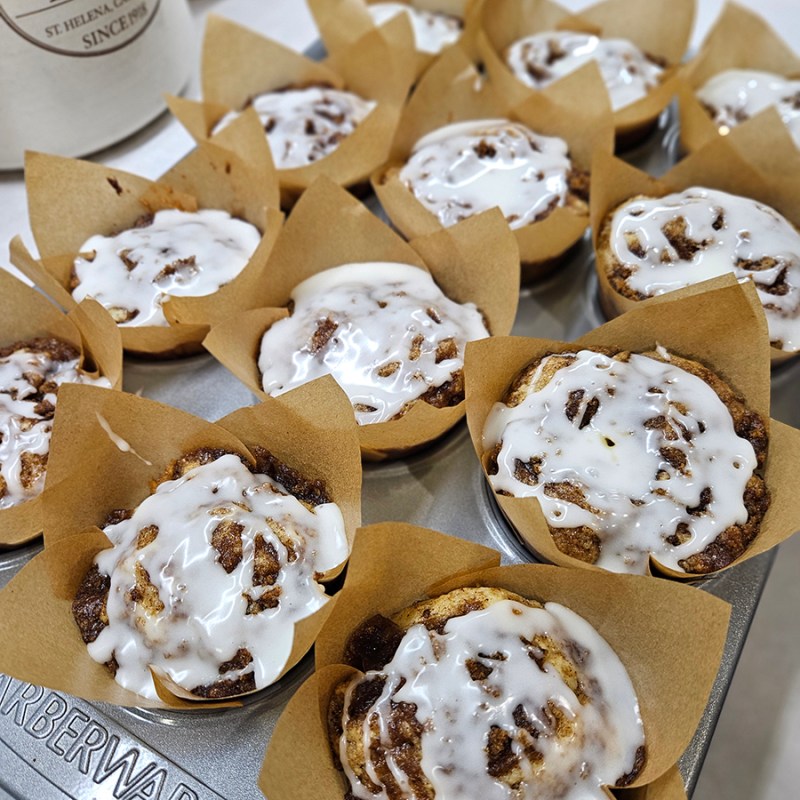
The key to these cinnamon rolls is having ribbons of cinnamon flavor running throughout the entire muffin. That way, you get a blast of warm flavor with each bite!
In just around 30 to 40 minutes, you can go from raw ingredients to sweet glazed breakfast goodness! Even though the ingredient list is a bit longer due to the separate batter, topping, and glaze, they are made using simple ingredients that you likely already have on hand in your pantry.
They are a family favorite in our home and one that I like to make when our family is craving an easy sweet breakfast.
How To Make Cinnamon Roll Muffins
*Scroll down to the bottom of this post to see the full recipe, including exact measurements and amounts. You can also print out the instructions. I go into a bit more detail about the recipe here first, just in case you need it.

Ingredients
Most of the ingredients are pretty self-explanatory and items that you likely already have on hand in your pantry. You will be making three separate items: the cinnamon roll muffin batter, the topping, and the frosting glaze.
For the batter, you are going to need dry ingredients that include flour, baking powder, salt, and sugar. Next are the wet ingredients that include melted butter (cooled slightly), an egg, milk (any percentage works but we usually have 2% on hand), and vanilla.
For the topping, you need packed brown sugar (I usually use light, but dark will also work), cinnamon, and melted butter. The glaze consists of powdered sugar, milk, and vanilla. And that’s it!
Instructions For Cinnamon Roll Muffins
First, preheat your oven to 375º. While that is heating up, you can start working on the batter. Mix your dry ingredients in a large bowl using a whisk. Once they are all combined, set the bowl aside for a few minutes.

Move on to your wet ingredients and combine all of those in a separate smaller bowl. You want to mix these well now since you don’t want to overmix your batter once you add them to the dry ingredients.
The key to good, fluffy muffins is to not overmix your batter. Doing so will end up with a muffin that is dense and not as pleasant to eat.
Once the wet ingredients are well combined, add them to your dry ingredients. Again, make sure not to overmix. It’s ok if there are lumps in the batter. You just want to mix until all of the dry ingredients are incorporated. Set the bowl aside.
The Topping Mixture
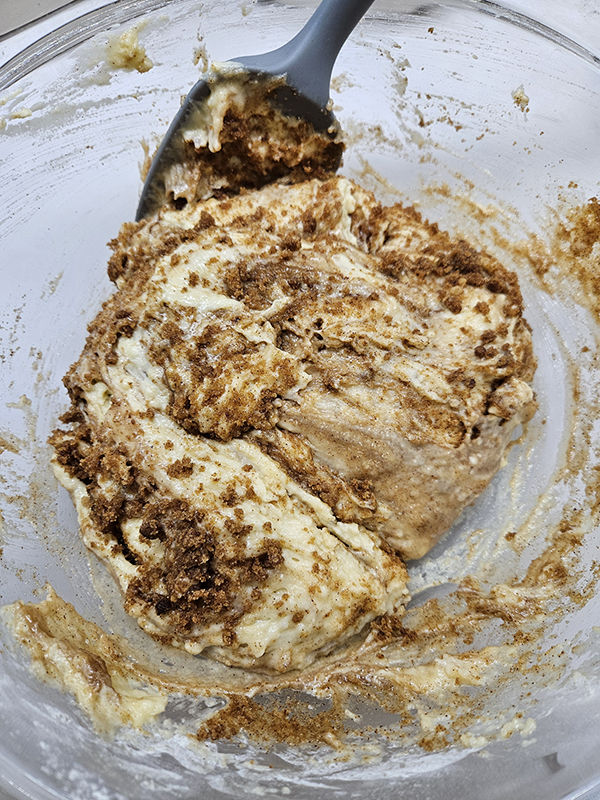
Now it’s time to make the topping mixture. The title “topping” is a bit misleading because about 2/3 of this mixture will end up in your batter. The rest is the actual topping.
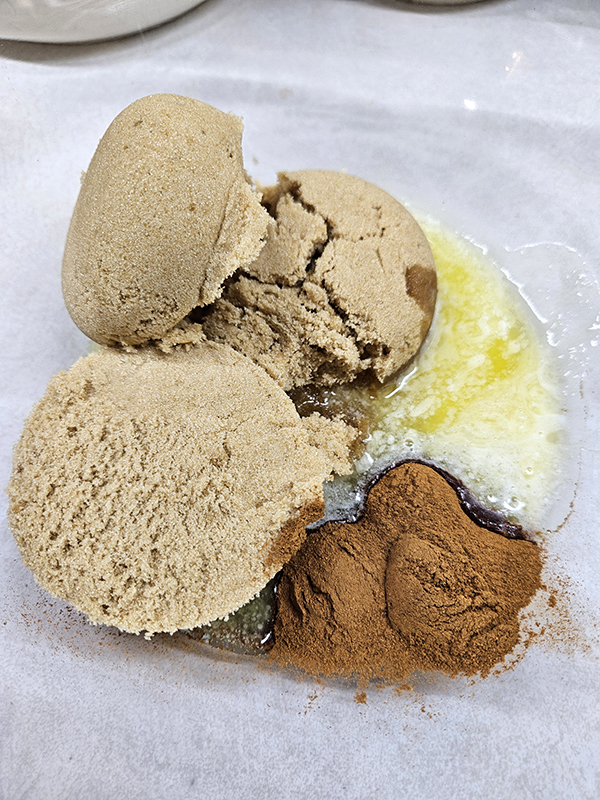
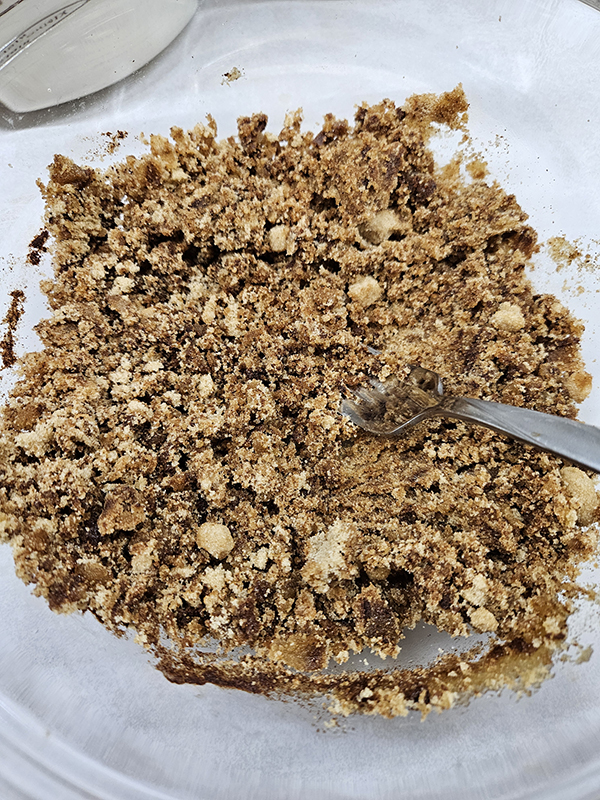
Combine together the packed brown sugar, cinnamon, and melted butter in a small bowl. You want to mix it well until the topping resembles crumbly wet sand.
Take around 2/3 of the mixture and add it into your bowl with your batter. Now, since I said earlier that overmixing is bad for muffin batter, we only want to carefully fold the topping into the batter. The goal is to get ribbons of topping here and there throughout the batter. You don’t want to fully incorporate the topping.
Preparing The Muffin Tin
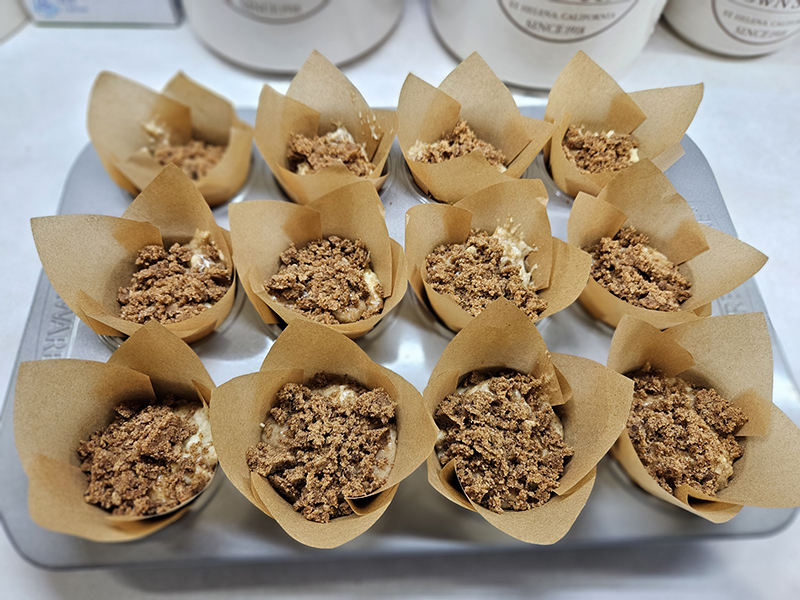
The next step is to prepare your muffin tin. Now, this recipe creates tall, fluffy cinnamon roll muffins. Because of this, I highly recommend getting these fun tall paper liners. You can get a pack of 200 for around $10-15 on Amazon. The liners help to contain all of the cinnamon goodness in this recipe. Plus they make the finished muffins look like they came from a store-front bakery! (Product Link: Natural Tulip Cupcake Liners)

If you don’t have tall liners or don’t want to mess with them then please note that the topping will likely overflow your muffin tins a bit. There is nothing wrong with that happening, and I have made them multiple times that way. It’s just something to keep in mind.
I suggest either reducing the amount of batter you add to the cups or placing a baking sheet at the bottom of your oven to catch any overflowing topping. Just be sure to grease your muffin tin well. Trust me, they might look like a mess but they will still be delicious!
Baking The Cinnamon Roll Muffins
Once your muffin tin is prepared, it’s time to fill it. I use a large, 3-tablespoon cookie scoop to place the batter into each muffin liner. It provides the perfect amount for each cupcake liner. (Product Link: Progressive Prep Solutions Cookie Scoop)
If you are not using tall liners, consider adding a bit less batter to each muffin cup, more around 2 tablespoons. You might have some extra batter left over if going this route. (That just means you can bake even more muffins once the first batch is done!)
Now the fun part! Take the leftover topping and sprinkle it on top of each muffin. There’s no exact measuring here, just try to make them as even as possible.
Place the cinnamon roll muffins into the preheated oven and bake for 12 to 15 minutes. Meanwhile, it’s time to make the glaze.
Glaze And Enjoy!
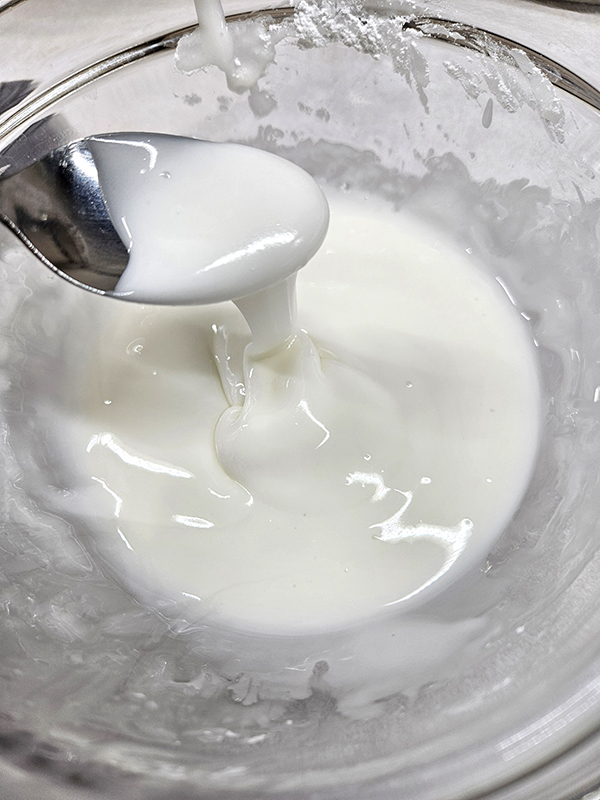
In a small bowl, add your powdered sugar, milk, and vanilla. You want a slightly thick glaze so it will stick to the top of the muffins but not so thick that you can’t pour it. Add more milk until you reach your desired consistency. Set the glaze aside until the muffins are done.

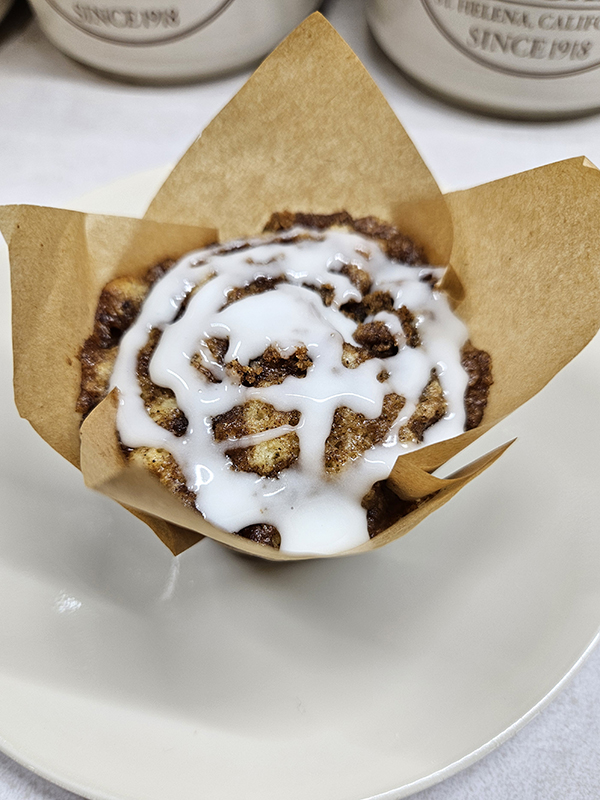
When the time is up, check on the muffins. The tops will still look a bit gooey when you take them out; that’s just the melted topping. You should be able to poke a toothpick into the middle of one and have it come out clean.
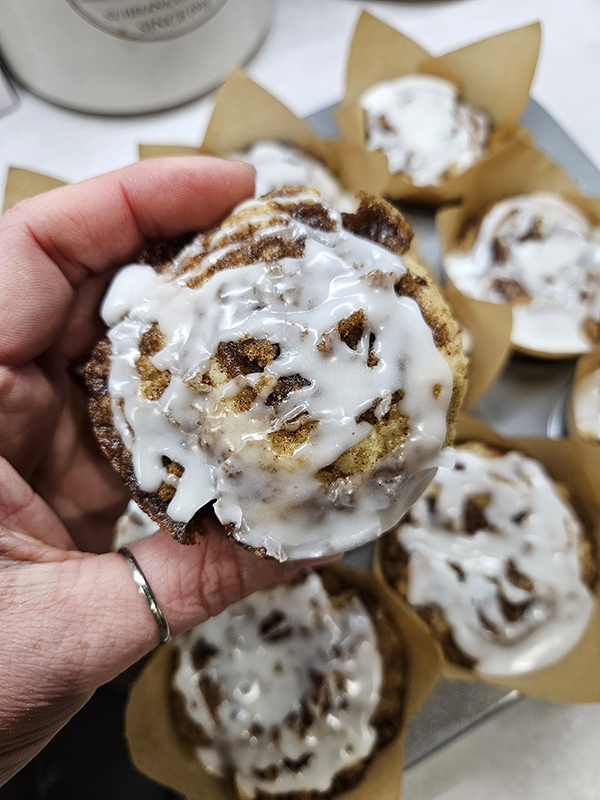
Allow the cinnamon roll muffins to cool slightly, then drizzle on your glaze. Again, no need to be fancy here! The messier, the better tasting is what I usually find out! Any leftover muffins can be kept in an airtight container in your refrigerator. Just warm them up in your microwave before consuming them (I even like them straight from the fridge!).
I hope you enjoy these delicious cinnamon roll muffins as much as my family and I do!
Until next time, thanks for stopping by!
– Chelsea
*This post may contain affiliate links. These are products I have used personally and highly recommend. As an Amazon Associate, I may earn a small commission from qualifying purchases if you purchase items through my links. These links and the ads on this page help to support my family and our semi homestead, so Thank You!

Cinnamon Roll Muffins
Ingredients
Muffin Batter
- 2 cups flour
- 1 Tbsp baking powder
- 1/2 tsp salt
- 1/3 cup sugar
- 1/4 cup melted butter cooled slightly
- 1 whole egg
- 1 cup milk
- 1/2 tsp vanilla
Topping Crumble
- 1 cup light brown sugar packed
- 3 tsp cinnamon
- 3 Tbsp melted butter
Frosting Glaze
- 1 cup powdered sugar sifted
- 1 Tbsp milk more or less
- 1/2 tsp vanilla
Instructions
- Preheat oven to 375º Fahrenheit.
- In a large bowl, mix together flour, baking powder, salt, and sugar. Set aside.
- In a smaller bowl, combine melted butter, egg, milk, and vanilla. Mix thoroughly. Add the liquid ingredients to the dry, mixing only until just combined. It's ok if there are still clumps in the batter. Set aside.
- Combine the topping ingredients in a small bowl. Once well mixed, add about 2/3 of the topping into the batter bowl. Slowly fold in the topping until there are ribbons of it going throughout. It should not be completely mixed in!
- Add tall cupcake liners to a muffin tin. Scoop 3 Tbsp of batter into each muffin liner. Evenly sprinkle the rest of the topping onto the tops of each muffin. **Please see the note below if you are not using tall muffin liners.
- Bake the muffins for 12 to 15 minutes until a toothpick comes out clean.
- While the muffins are baking, make your frosting glaze. Add powdered sugar, milk, and vanilla to a small bowl and combine until smooth. Add a bit more milk if the glaze seems a bit too thick for your liking.
- Once the time is up, remove the muffins from the oven. The tops may look gooey from the melted topping. Allow the cinnamon roll muffins to cool slightly before adding your glaze. Enjoy!
Notes
Discover more from Semi Homestead Life
Subscribe to get the latest posts sent to your email.