
Skip the grocery store lines and stock your pantry this summer by dehydrating your own dill weed to keep and use all year long.
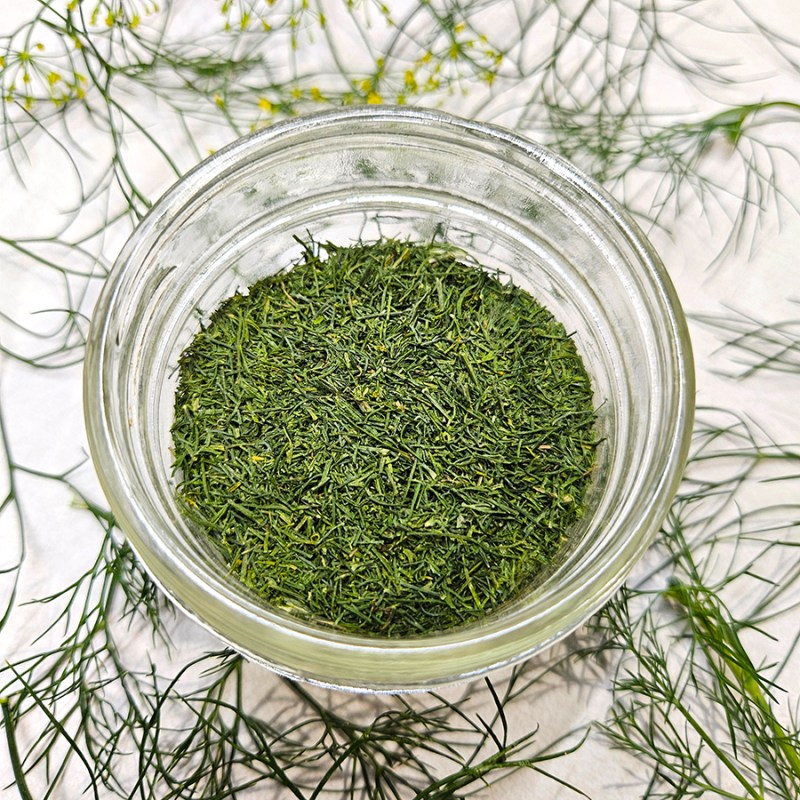
We always grow dill in our garden during the warm summer months. Not only is it super easy to grow, but nothing compares to the flavors of fresh dill when canning pickles or making dill dips.
However, once our cucumber crop starts to die back and we have pickles coming out of our ears, we are often left with a ton of dill plants going to seed in the garden. I do harvest some of the flower heads as well as the fronds for freezing (a great alternative to using fresh dill), but that still leaves me with a ton of dill left.
Instead of letting it all go to waste, you can dehydrate the dill instead to create shelf-stable dried dill weed. It’s a simple process that only requires a dehydrator or an oven at a very low temperature and a bit of time.
And since we know what products we do or don’t use on our plants, I can rest assured that the dill weed I dry is a high-quality product, safe from all that extra gunk that can be on mass-produced products.
4 Steps For Dehydrating Dill Weed
Before we get into drying dill weed, you need to learn what the different parts of a dill plant are. First, you have the long central stem that the dill grows from. From the stem, you will see several offshoots. These offshoots have fern-like, tiny leaves that are often referred to as “fronds” or “sprigs”.

Towards the top of the plant, you will also see flower heads coming off the central stem. These are also called the “inflorescences”.
They are basically a cluster of tiny flowers that are produced from a stem. The flowers are yellow in color and start to darken as they age and dry out naturally. Eventually, the flowers will turn into seeds (aka: dill seed).
In order to get “dill weed”, we need to harvest and dry out the fronds. The feathery leaves are the parts you want to harvest for dehydrating, not the thick central stem or the flower heads.
Step 1: Harvest The Dill
Now that you know exactly what you are looking to harvest, you have two main options. You can either harvest the entire plant – flowers and all – or you can cut off just the individual frond stems.
Since I grow quite a bit of dill and leave plenty behind for the caterpillars and bugs, I like to harvest the whole plant. Either way, use a pair of small scissors or pruning snips to cut the stem or fronds off. (These are the small pruning snips I use for pretty much all my pruning and deadheading – Product Link: Fiskars 6″ Pruning Snips.)

Harvest the dill early in the morning after the dew has dried from the plants. Don’t wait until the plants start to get scorched from the mid-day sun. It is also said that the flavor of the dill will be stronger when harvested earlier in the morning. I’ve never personally tested this to see if it’s true, but better safe than sorry, I suppose!
Also, make sure you have time to get the dill into the dehydrator soon after you harvest it. The fronds start to get wilted quickly and can be more difficult to work with if you wait too long.
Step 2: Prep The Fronds
If you purchase the dill from a grocery store, farmer’s market, or some place where you aren’t sure what their gardening practices are, wash and dry your dill fully. Use cold running water and place the fronds on paper towels or a kitchen towel to dry. You can also use a salad spinner if you have one of those to speed up the drying process.
However, since we harvest dill from our own garden, I skip this step. If you are still worried about bugs and dust on your dill, go ahead and wash them in running water. It’s just a step that I don’t consider to be needed for our homegrown dill.
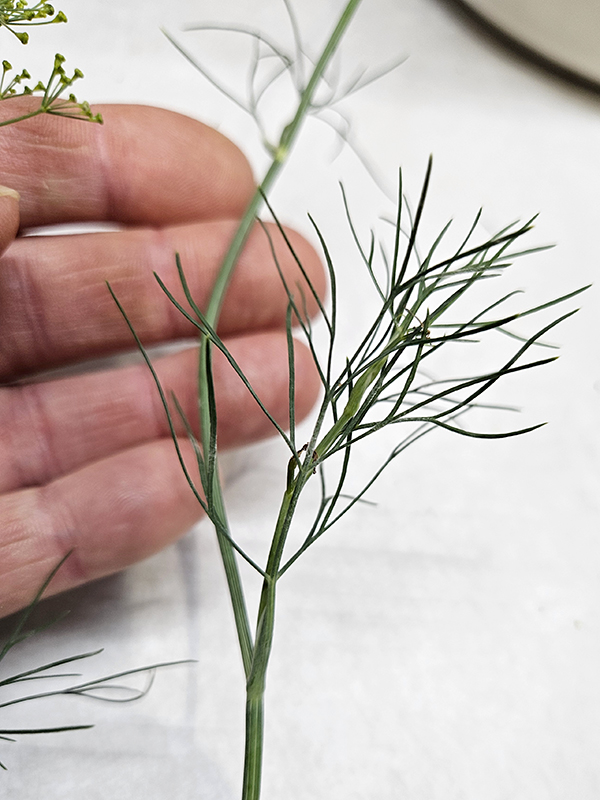
After the dill is dry, it’s time to trim it up. If you harvested only the dill fronds, the dill should be small enough to fit into the dehydrator. Just remove any thicker stems from the fronds.
If you harvested the entire stem of dill, cut each of the fronds off the main stem. The main stem is too thick, and it won’t turn into good dill weed once dried. Also, remove any flower heads left on the stems as well.
Discard or compost any fronds that have started to dry up or show signs of damage. These are usually the fronds at the bottom of the plant since they are the oldest and largest.
Step 3: Dehydrating The Dill Weed
Now it’s time to actually dehydrate the dill fronds. Place the fronds in a single layer in your dehydrator. It’s ok if the fronds overlap as long as they aren’t matted down together. You still want proper airflow to get all around the dill.
Since the dill fronds are still intact, you don’t need to use silicone dehydrator mats. The mesh trays will work just fine for dehydrating the dill weed.

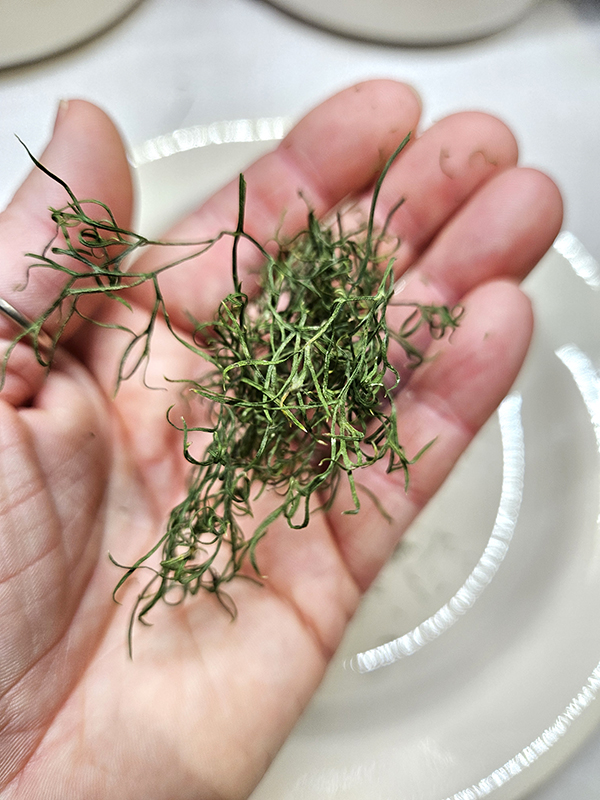
Set your dehydrator to 95º Fahrenheit (35º Celsius) for 3 to 4 hours. The dill weed will be fully dried when you can easily crumble it in your hands, and it breaks down into tiny pieces. If it feels flexible as opposed to brittle, allow it to dehydrate for another 30 minutes and check again.
Step 4: Long-Term Storage – Dehydrating Dill Weed
Use your hands to crumble the dill into tiny pieces once it is fully dry. I found that rubbing it between my two hands at first does a pretty good job. Then I just pinch the dill between my fingers to break it down even more.
You can also rub the dill over a mesh strainer to separate out the larger stem pieces if you’d like. I personally don’t mind a few larger pieces here and there. Once the dill is all crumbled, remove any big pieces of stem or flowers you might’ve missed.
Lastly, it’s time to store your dill weed so it can stay in your pantry for long-term storage. Keep the dill in an air-tight, food-safe container. Add one of those desiccant packets for extra moisture protection. (Product Link: Dry & Dry 2 Gram Silica Gel Packets Desiccants)
I use a vacuum sealer attachment for canning jars to seal my dehydrated goods. (Crispy Dehydrated Zucchini Chips are another garden favorite in this household!)

You can use regular mason jars of any size since the attachment has options for both wide mouth and regular mouth jars. Just use a new canning flat for the lid. (This is the attachment I got. We don’t have a FoodSaver brand vacuum sealer, but it works with the one we have – Product Link: FoodSaver Plastic Jar Sealer for Vacuum Sealer.)
Store the container in a cool, dark location. Use the dill weed within 12 months for the best flavor and freshness.
Alternatives To Dehydrating Dill Weed
If you don’t have a dehydrator, you can also dry dill using your oven. Preheat the oven to as low as it can go (around 170º to 220º Fahrenheit if possible). Line a baking sheet with parchment paper, then add your dill fronds on top.
Once the oven is preheated, bake the dill for one to two hours. Check the dill every 30 minutes after the first hour. If the dill is dry, remove the baking sheet. Allow the dill to cool, then crush it and store it. If it isn’t dry, allow the dill to “bake” for 30 more minutes and check again.
You can also air dry the dill by hanging the stems in a cool, dry location. However, this option doesn’t always result in success. That’s why using the dehydrator is my favorite method. It’s a set-it-and-forget-it process, which is my favorite! Enjoy!
Until next time, thanks for stopping by!
– Chelsea
*This post may contain affiliate links. These are products I have used personally and highly recommend. As an Amazon Associate, I may earn a small commission from qualifying purchases if you purchase items through my links. These links and the ads on this page help to support my family and our semi homestead, so Thank You!

Dehydrating Dill Weed
Ingredients
- Dill fronds
Instructions
- Harvest or gather your dill. You are only going to be using the fern-like fronds to create the dill weed.
- Wash and dry the dill fronds if desired. Separate the fronds from the main stem and remove any flower heads so you are just left with the individual fronds.
- Place the fronds on the mesh racks in your dehydrator. Set the dehydrator to 95ª Fahrenheit for three to four hours. The dill will be fully dried when you can easily crumble it in your hands, and it breaks down into tiny pieces. If it feels flexible as opposed to brittle, allow it to dehydrate for another 30 minutes and check again.
- Once fully dried, remove the dill and crumble it using your hands. Separate out any large pieces. Store the dried dill weed in an air-tight container. Use a glass jar and a vacuum sealer if you have one. Keep the jar in a cool, dark location. Use the dill weed within 12 months for the best flavor and freshness.
Notes
Discover more from Semi Homestead Life
Subscribe to get the latest posts sent to your email.