
If you are looking for a different yet delicious way to enjoy your freshly harvested zucchini, then try your hand at making these crispy, dehydrated zucchini chips. They are the perfect keto-friendly, low-carb alternative to traditional potato chips, yet can be made right in your dehydrator with no frying involved!

If you are like me, then you are probably swimming in harvested zucchini from your garden. (That’s what happens when you plant nine zucchini plants – but I’m not complaining!)
By the middle of summer, hopefully, your summer squash plants are producing well and staying healthy. As long as you can fight off the squash bugs and squash vine borers, then your plants are probably at their maximum production, which means you might be swimming in zucchini!
Or, maybe you have a sweet neighbor who is kind enough to share a few zucchinis with you from their garden. It could even be that you weren’t able to pass up an amazing buy-one-get-one deal at your local farmer’s market.
However you get your zucchini, chances are you are tired of the same old zucchini bread or even garlic butter zucchini mash (my personal favorite). If that’s the case, then I have another great way to help use up all those zucchinis and create a low-carb, shelf-stable snack!
How To Make Crispy Dehydrated Zucchini Chips
*Scroll down to the bottom of this post to see the full recipe, including exact measurements and amounts. You can also print out the instructions. I go into a bit more detail about the recipe here first, just in case you need it.

Ingredients
The list of ingredients for this recipe really depends on what flavor profile you are going for with your chips. I love the flavor of garlic and think it pairs so well with zucchini, so I normally just use garlic salt for seasoning.
However, you can use any pairing of seasonings that you like. It might be one of those instances where you need to play around and try a bunch of toppings before you find one that you really enjoy snacking on.
Some other delicious alternatives are Italian seasoning, taco seasoning, salt and vinegar (soak the slices in vinegar before dehydrating), red pepper flakes, or simply salt and pepper.
Besides the seasonings, you just need your zucchini and oil. We normally use olive oil, but you can use your favorite kind. When it comes to your zucchini, harvest them before they get too large. A width of about two to three inches is ideal since the larger a zucchini gets, the more seeds it has. We don’t mind them, but some people might not enjoy their texture.

Special Equipment Needed
As for equipment, you really do need a good dehydrator. While you can make these in your oven at a very low temperature, you can sometimes end up with uneven baking or even burnt chips. So a dehydrator is really the way to go.
I got mine off of Amazon (surprise surprise), and it is great for making everything from banana chips to beef jerky to dehydrated mullein leaves. It has six trays and can fit almost 6.5 square feet of dehydrating area. (Product Link: COSORI Food Dehydrator)
Some advantages of using a dehydrator are that they are energy efficient and can go to a lower temperature than most ovens. They allow you to dehydrate more food at the same time due to their stacked trays. A dehydrator also doesn’t heat up your entire kitchen for the multiple hours it takes to safely dehydrate foods. While it might be a bit of an investment, it is definitely worth it in my opinion!
Instructions For Crispy Dehydrated Zucchini Chips
Step 1: Slice The Zucchini
The first step is to wash and thoroughly dry your zucchinis. The more moisture that is on the fruit, the longer it will take to dehydrate. After that, you need to slice up you chips.


Now you can go the old-fashioned way and cut each slice by hand using a sharp knife. However, I prefer to use a mandoline. It makes the job fast and easy, and you end up with consistently sized chips every time!
Along with the mandoline, I also wear a knife-safe glove. This is probably pretty self-explanatory, but it’s to make sure I don’t have to worry about adding an extra, unwanted ingredient to the zucchini chips when I get down to the nub! It also allows my kids to help without having to worry about their hands either.
(Here is the glove I use any time I use a mandoline. Of course, I’m not wearing the glove for the photos, but I assure you I put it on after taking the pictures! Product Link: NoCry Premium Cut Resistant Gloves Food Grade.)
You want your zucchini slices to be around 1/8 of an inch in size. The thicker the slices are, the longer they will take to dehydrate. In addition, they might not get as crispy.
Step 2: Season
Next, add your oil and seasonings. Place the zucchini chips in a large bowl or even a gallon-sized ziplock bag. Pour in the small amount of olive oil and gently stir or shake to distribute the oil. The oil will help the dry seasonings stick to the slices better than if you were to dehydrate them plain.
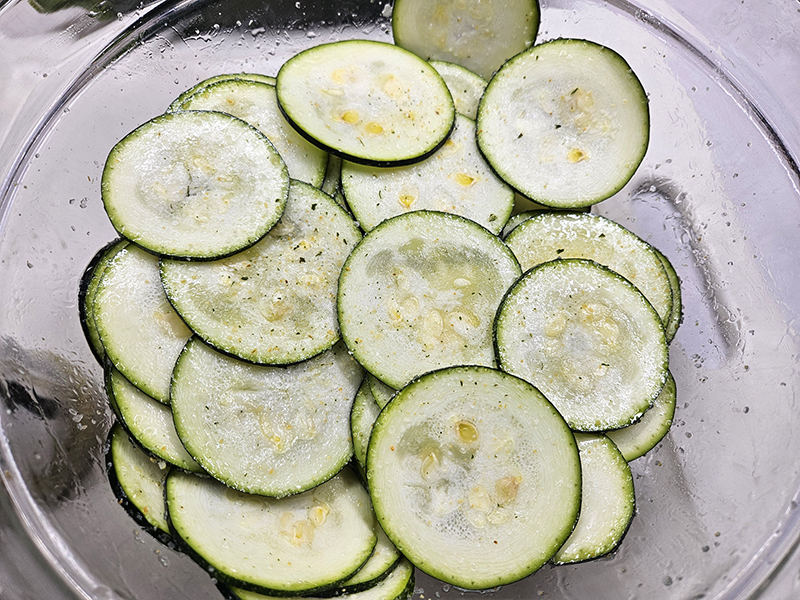
Don’t go overboard on your oil. You can end up with soggy chips that never dry out properly. (Besides, who wants to eat a mouthful of oil!)
Now add your seasonings and gently stir or shake to distribute. Again, I usually pick garlic salt since that is my go-to seasoning for pretty much everything. If you want to try a few different seasonings, separate the chips into separate bowls and season accordingly. Just like with the oil, go light on the seasonings because a little goes a long way.
Step 4: Dehydrate & Store
Once the chips are properly seasoned, lay them out on your dehydrator trays. The slices can overlap slightly, but make sure they are in a single layer. As the slices dry out, they will shrink some, so really pack them in there to begin with.
When all of the zucchini slices are on the trays, close the door and set the dehydrator for 135º Fahrenheit. Allow the slices to dehydrate for about 6 to 7 hours.
To check if they are done or not, take one of the slices out and allow it to come to room temperature. As the chips cool, they will crisp up if they are dehydrated fully. A chip should snap in half when it is ready for storage.
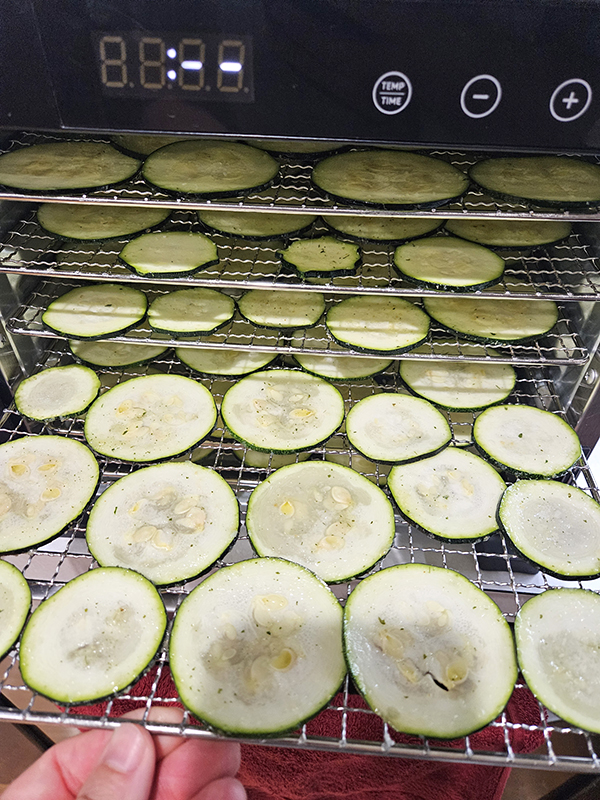

As with anything you dehydrate, the exact time will depend on the thickness of the food, the moisture content of that particular food, and the temperature you set the dehydrator at. Check the slices after 6 hours and every 30 minutes to an hour thereafter.
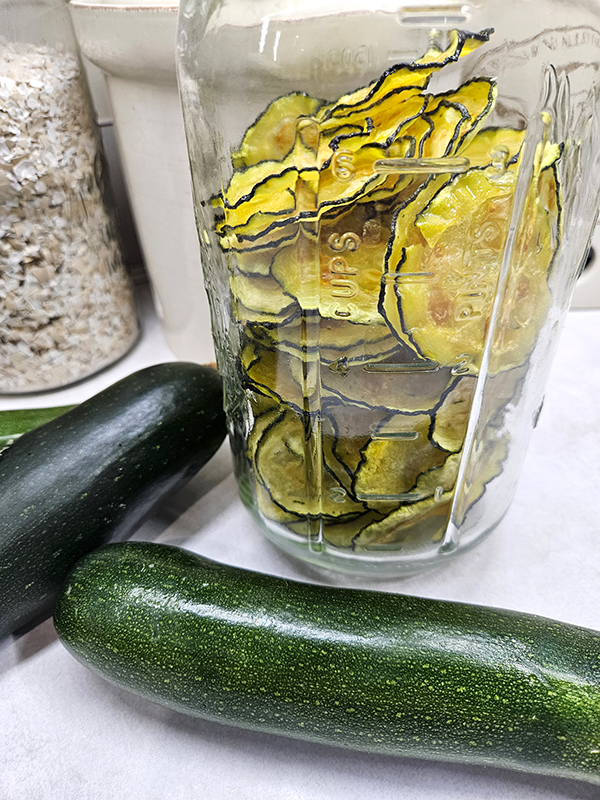
Allow the dehydrated crispy zucchini chips to come to room temperature, then store in a glass airtight container. We like to use a large Ball canning jar or something similar. This is key to allowing them to retain their crispness. Shake the jar occasionally and watch for any signs of moisture buildup on the jar, especially after the first few days.
The crispy zucchini chips should stay fresh and crispy at room temperature for 2 to 4 months, depending on storage conditions. Enjoy!
Until next time, thanks for stopping by!
– Chelsea
*This post may contain affiliate links. These are products I have used personally and highly recommend. As an Amazon Associate, I may earn a small commission from qualifying purchases if you purchase items through my links. These links and the ads on this page help to support my family and our semi homestead, so Thank You!
Crispy Dehydrated Zucchini Chips
Ingredients
- 2 to 3 medium-sized zucchini
- 1 Tbsp olive oil (or similar oil)
- ½ to 1 tsp garlic salt (or other dry seasoning)
Instructions
- Wash and thoroughly dry your zucchinis. Slice the zucchini either by hand using a sharp knife or using a mandoline. Aim for around 1/8" thick slices.
- Add the slices to a large bowl or gallon-sized zip lock bag. Pour in the olive oil and stir or gently shake to distribute the oil. Don't go overboard on your oil. This can end up with soggy chips that never dry out properly.
- Add the garlic salt or other seasonings and stir or gently shake.
- Lay the zucchini slices out on the dehydrator trays. The slices can overlap slightly, but make sure they are in a single layer. As the slices dry out, they will shrink some, so really pack them in there to begin with.
- Close the door and set the dehydrator tor 135º Fahrenheit. Allow the slices to dehydrate for about 6 to 7 hours. (See note below on dehydrating time.)
- To check if they are done or not, take one of the slices out and allow it to come to room temperature. As the chips cool, they will crisp up if they are dehydrated fully. A chip should snap in half when it is ready for storage.
- Store the cooled, dehydrated crispy zucchini chips in a glass airtight container at room temperature. Shake the jar occasionally and watch for any signs of moisture buildup on the jar, especially after the first few days.
Notes
- The dehydrating time will depend on the thickness of the zucchini slices, the moisture content of that particular food, and the temperature you set the dehydrator at. Check the slices after 6 hours and every 30 minutes to an hour thereafter.
Discover more from Semi Homestead Life
Subscribe to get the latest posts sent to your email.
I bet they are delicious in the air fryer as well!