Homemade soft and fluffy dinner rolls that are easy to make with just a few simple pantry ingredients, and can be on the table in about 2 hours.
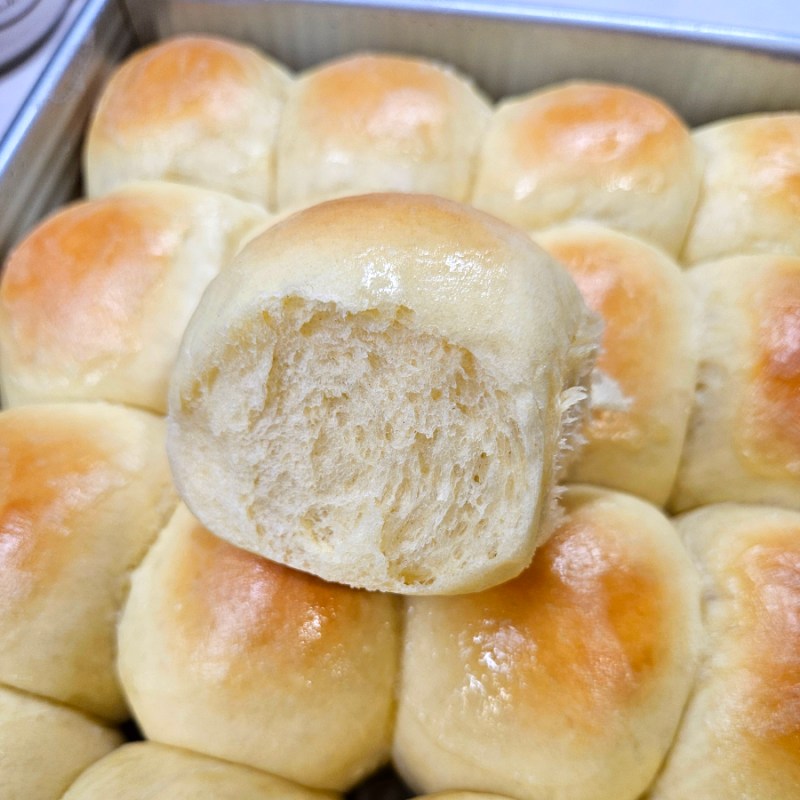
To have the perfect dinner roll, it needs to be soft and tender with a pillowy texture. At the same time, the roll needs to be able to handle a nice pat of melting butter. It should also be able to complement any dinner while being able to stand alone as a meal staple. Besides, aren’t rolls the main course for many kids and toddlers at large family gatherings?
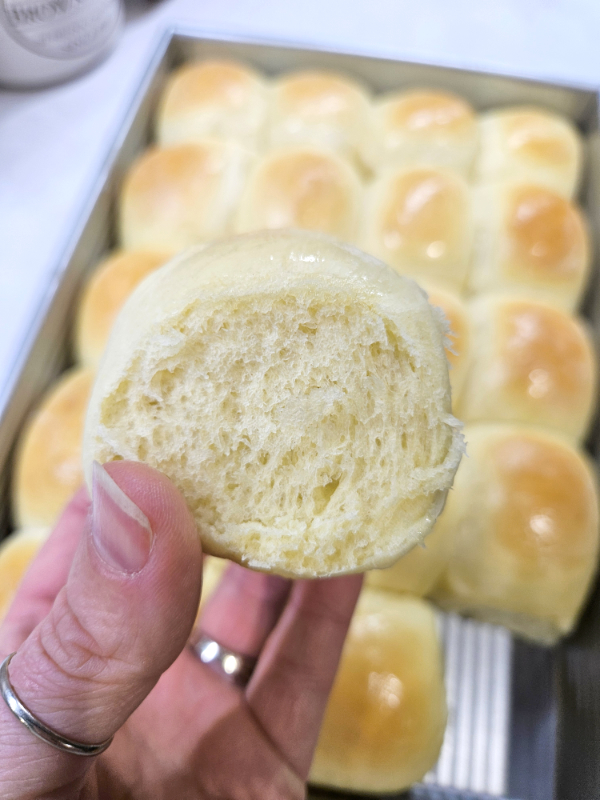
If you are just starting out baking bread and using yeast, the idea of making dinner rolls can be a bit intimidating. The biggest struggle is learning that doughs are based on the feel and look of the dough as opposed to exact ingredient measurements.
Thankfully, these rolls are not only what I consider to be the perfect dinner roll texture and flavor, but they are also great for beginners. I will walk you through exactly how the dough should feel, as well as show you what it should look like in pictures. That way, you can rest assured that your dinner rolls will be the talk of the table!
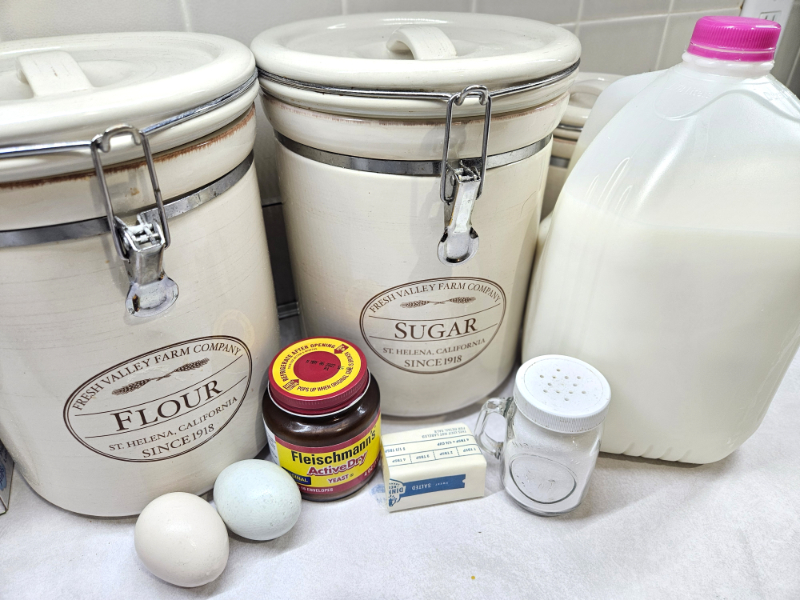
Ingredients For Easy Homemade Dinner Rolls
In order to create soft and buttery rolls, the dough needs to be rich in fats like milk, butter, and eggs. These ingredients help to create an enriched dough that will stay light and fluffy while also being more shelf stable than a leaner dough like what’s in artisan breads. Here are the seven pantry staple ingredients you will need for my easy homemade dinner rolls:
- Active Yeast – The yeast is what allows the rolls to get nice and fluffy. You can use either active yeast or instant yeast. If you use instant, just skip the part where you wait to allow the yeast to foam.
- Milk – To help activate the yeast, you want the milk to be warm. Heat your milk until it reaches 105 to 115º Fahrenheit (F). If the milk is too hot, it can kill the yeast. If it is too cool, then the yeast won’t activate properly.
- Granulated Sugar – I normally use granulated sugar, but you can also use brown sugar. It will add a slight hint of caramel flavor to the rolls. (It’s a great swap if you are making Hawaiian Rolls.)
- Eggs – Let your eggs come to room temperature before adding them to the dough.
- Butter – You can use either salted or unsalted butter. The recipe is written using salted, but if you only have unsalted on hand, then just add a pinch more salt. You will also use a bit more butter for adding to the top of the rolls after baking. (Optional but highly recommended!)
- Salt – The salt is really the only main seasoning in the rolls.
- All-Purpose Flour – We use unbleached flour for our baked goods, but any type of all-purpose flour works just fine.
Instructions For Easy Homemade Dinner Rolls
Don’t be intimidated by how long the instructions look to make my easy homemade dinner rolls. The main process is broken down into five main steps:
- Step 1: Bringing the dough together (probably the “hardest” part)
- Step 2: Allowing the dough to double in size (also known as “proofing”)
- Step 3: Shaping the rolls
- Step 4: A quicker second rise
- Step 5: Baking
Step 1: Make The Dough
In the bowl of a stand mixer, add your yeast, warm milk, and ½ a teaspoon of sugar. Just take the sugar from the ¼ cup amount.


I use a microwave to warm my milk up slightly, but you can also use a stove. Just be sure to stir the milk after heating and that it isn’t more than 115º F, or you might end up killing your yeast. I have a Digital Instant Read Thermometer (Product Link) that I use to check the temp.
Allow the yeast mixture to sit for 5 to 10 minutes or until it is nice and foamy. If your yeast isn’t foamy after 10 minutes, it could be because of a couple of reasons. First, your yeast might be old. Yeast is alive and needs to be kept in a refrigerator after opening. If your yeast has expired, it might not rise properly. Second, your milk might have been too hot, and the yeast was killed. Try again with a second batch or new yeast.
Once the yeast is nice and foamy, add the rest of the sugar, the eggs, salt, melted butter, and about 3 cups of flour. Mix on low speed using a dough hook until well combined. Once that is combined, add another cup of flour and mix.

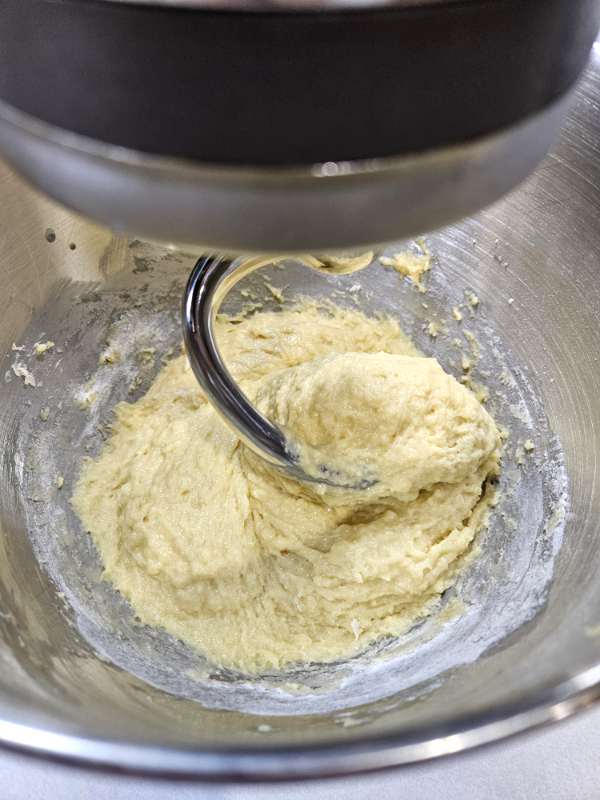
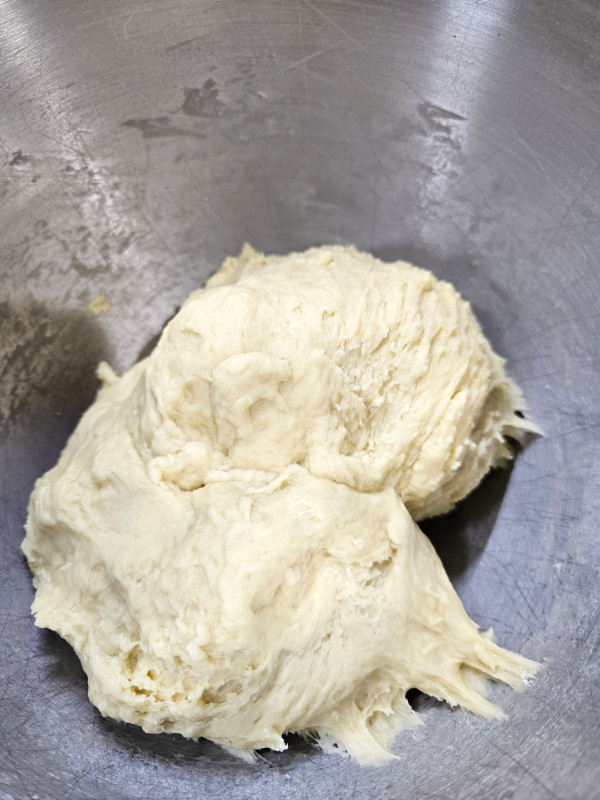
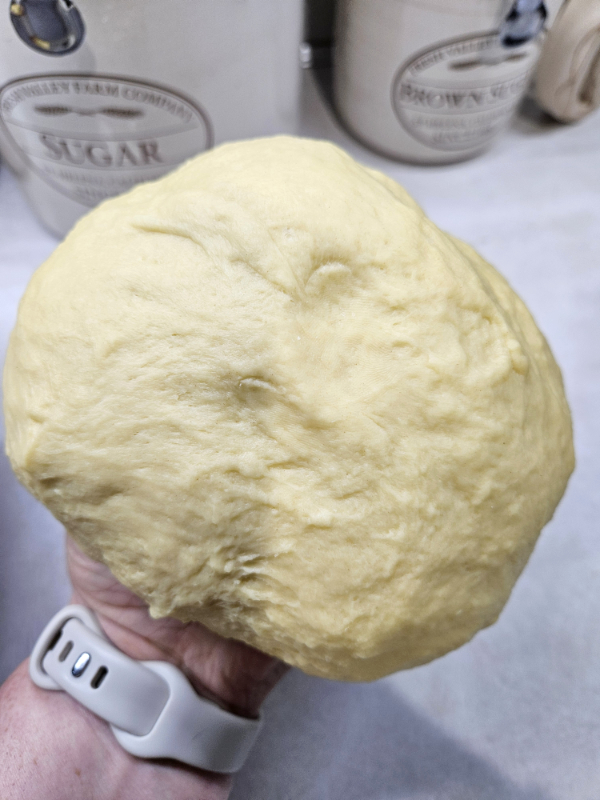
To get the perfect texture, the dough should pull away from the sides of the bowl. It’s ok if it is still sticking some to the bottom, though. In addition, touch the dough with your finger. It should not feel sticky, and your finger should come away clean.
If your dough still seems sticky, add a bit more flour. Only add about ¼ cup at a time to prevent the dough from becoming too dry. Repeat as needed.
Step 2: The First Rise
Continue kneading the dough on low speed for about 3 to 4 minutes. If you are not using a stand mixer for this part of the process, hand-knead for 5 to 10 minutes.
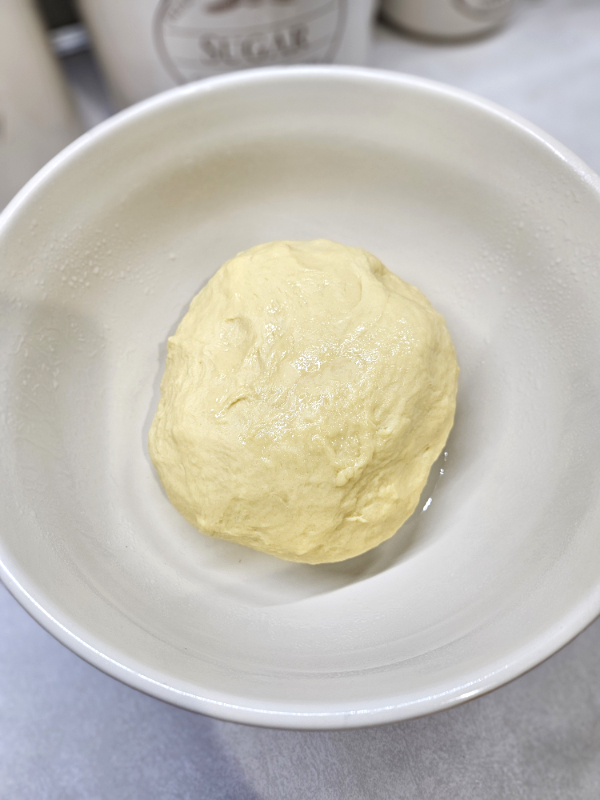

Next, place the dough in a lightly oiled bowl and cover with plastic wrap or a dish towel. (I like to spritz my bowl with olive oil before placing the dough in. I also flip it once to get both sides of the dough lightly oiled.)
Place the bowl in a warm area until doubled. This usually takes about an hour. To help speed up the process, place the bowl in your oven with the door closed and turn on the light. The light should be enough to help heat up the closed oven. Just don’t forget it is in there! My oven actually has a “bread proof” feature, so I usually use that and can get my dough to double in about 45 minutes.
Step 3: Shaping – Easy Homemade Dinner Rolls
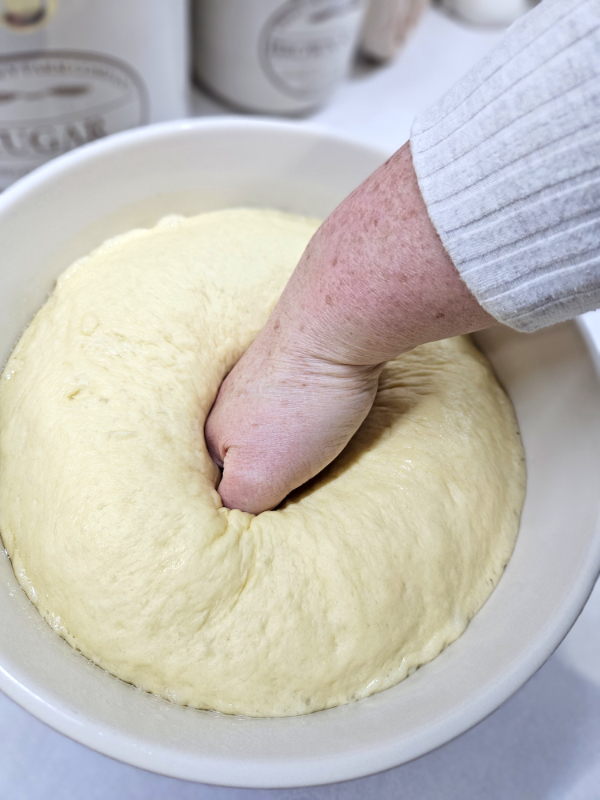
Once the dough has doubled, punch it down using your fist. (My kids like to help with this part!) Divide the dough into 20 equal-sized pieces. To get larger rolls, divide the dough into 16 pieces. You can eyeball this part of the process if you want, but I like to be a bit more precise.

I use an inexpensive kitchen scale and weigh the entire mass of dough first. This Nicewell Food Scale (Product Link) is close to the one I have, but a newer version. I then divide that number by 20 (or 16), so I know how much each piece should weigh. That will help you get those uniform rolls after baking.
Next, form each dough piece into a ball, pinching the bottom as needed. I do this by placing one dough chunk on a clean countertop. I then cup my hand around the top/sides of the dough and move my hand in a small circle. This will create a round ball.
Steps 4 & 5: Second Rise And Baking
Place each dough ball into a greased 9 x 13″ pan. A USA Pan Brand 9 x 13″ Baking Pan (Product Link) is my go-to for all my baked goods.
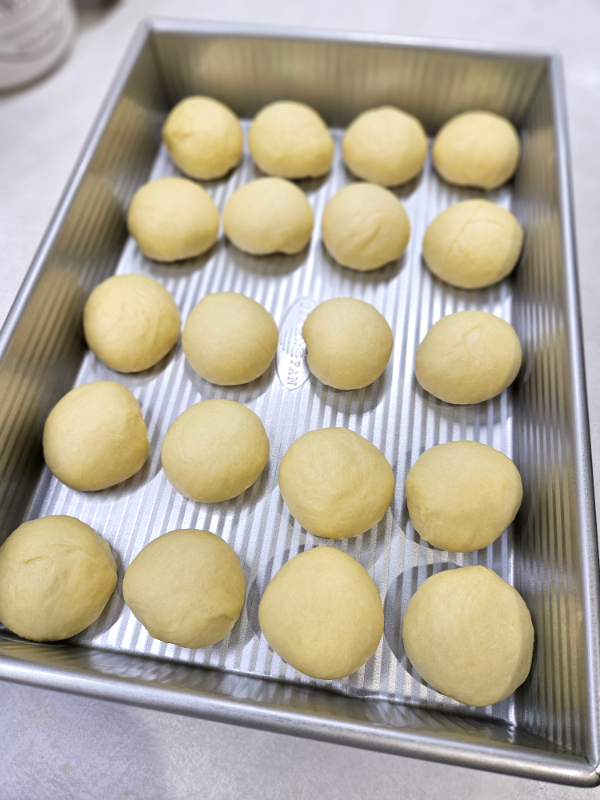

If you are baking 20 rolls, they will go in 5 rows of 4. If you are doing 16 rolls, you’ll wind up with 4 rows of 4. These rolls will be a bit more rectangular than traditional rolls. Cover the pan with the dishcloth or plastic wrap that has been lightly sprayed with oil.
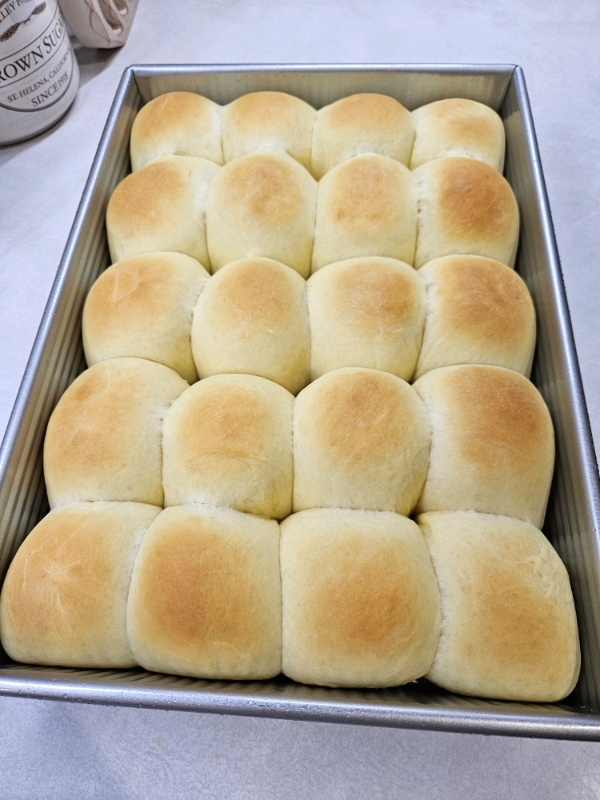
Preheat your oven to 375º Fahrenheit. While the oven is warming up, place the pan on the stovetop where it’s nice and toasty. Allow the rolls to rise until they are touching one another, like in my photo. Once they are touching, they are ready for baking.
Remove the cover and bake the rolls for 12 to 15 minutes or until the tops are golden brown. After baking, brush the tops with melted butter. (Optional, but highly recommended!) Enjoy!
Frequently Asked Questions – Easy Homemade Dinner Rolls
How do you store the baked dinner rolls? After baking, allow the rolls to cool to room temperature. Then, store them in an airtight container at room temperature for up to a week.

Can you freeze the dinner rolls? While freshly baked goods are always best the day they are made, you can definitely freeze these rolls for up to 3 months. To freeze the easy homemade dinner rolls, allow them to cool, then wrap the rolls tightly in foil or place them in a freezer-safe ziplock bag.
Can the dinner rolls be made ahead of time? Yes! To make the rolls ahead of time, prepare the rolls as instructed right before the second rise. (So they should be divided and shaped in the 9×13″ pan.) Cover them with foil or a lid and place the entire pan in the refrigerator. Remove the pan about an hour before you want to bake them and allow them to come to room temperature. Bake as directed.
What if I want sweet rolls? If you want a sweeter roll, try my Hawaiian Rolls With A Sweet Honey Glaze recipe.
Until next time, thanks for stopping by!
– Chelsea
*This post may contain affiliate links. These are products I have used personally and highly recommend. As an Amazon Associate, I may earn a small commission from qualifying purchases if you purchase items through my links. These links and the ads on this page help to support my family and our semi homestead, so Thank You!

Easy Homemade Dinner Rolls
Ingredients
- 2 ¼ tsp active yeast
- 1 cup milk (heated to 105º-115º F)
- ¼ cup granulated sugar
- 2 large eggs
- 4 Tbsp butter, melted (Plus a bit more for brushing on top after baking)
- 1 tsp salt
- 4 to 4 ½ cups all-purpose flour
Instructions
- In a stand mixer, add the yeast, warm milk, and ½ teaspoon of sugar. (Just take the sugar from the ¼ cup amount.) Allow the mixture to sit for 5 to 10 minutes or until the yeast is nice and foamy.
- Once the yeast is foamy, add the eggs, sugar, salt, butter, and 3 cups of flour. Mix until well combined. Add 1 cup more of flour and mix.
- If needed, add more flour, ¼ cup at a time, until the dough pulls away from the sides of the bowl. The dough should feel soft and not sticky. If it sticks to the bottom of the bowl some, that is ok.
- Continue kneading the dough for 3 to 4 minutes. Place the dough in a lightly oiled bowl and cover with plastic wrap or a dish towel. Place in a warm area until doubled. (This usually takes about an hour.)
- Once the dough has doubled, punch down and divide into 20 equal-sized pieces. Form each piece into a roll shape, pinching the bottom as needed. Place each one into a greased 9×13 pan in 5 rows of 4.
- Cover the pan with the dishcloth or plastic wrap that has been lightly sprayed with oil and allow to rise until the rolls are touching one another. While the rolls are rising, preheat your oven to 375º Fahrenheit.
- Once they are touching, remove the cover and bake for 12 to 15 minutes or until the tops are golden brown. Optional: Brush the tops with melted butter after baking. Enjoy!