When it comes to keeping your cast iron cookware looking and working its best, you need to know how to season and reseason them properly.
Whether you purchase a brand-new cast iron skillet from the store or pick up a rusty one at a yard sale, chances are that your pan needs a little TLC to get it working and cooking properly. Even a well-loved and used cast iron piece can use seasoning occasionally.
Yes, most modern companies state that their pans are already pre-seasoned. However, it’s still a good idea to give them a good cleaning when you bring them home. This cleaning process can strip off some of that initial seasoning.
Acidic foods, excessive heat, and even scraping can also start to strip off the seasoning of cast iron pans. So it’s a good idea to know how to do this simple process when the time comes.
Learn the simple steps I take to season and reseason all of my new cast iron cookware as well as those I’ve inherited, refinished, or restored.
Why & How To Season and Reseason Cast Iron Cookware
What Does It Mean To Season and Reseason Cast Iron Cookware?
These two terms may sound almost identical, but seasoning and reseasoning are slightly different when it comes to cast iron pans. They are often used interchangeably, and they both mean protecting your cast iron cookware with oils or fats and high heat.

Both seasoning and reseasoning create that iconic dark black color you typically associate with cast iron. At the same time, the processes allow any cooked foods to be released from the cooking surface, making them non-stick.
What Is Seasoning
No, I’m not talking about salt, pepper, and other spices when I refer to seasoning cast iron skillets.
Seasoning is actually the initial process of adding a protective layer of oil or fat to help fill in the pores on an iron skillet. You then bake the oil or fat onto the pan using your oven. This process helps to create an all-over protective layer or base on the pan.
If you want to know a more technical explanation for what happens, then here you go: Once oils or fats reach a high enough temperature (often referred to as “smoke point”), a process called “polymerization” occurs. Basically, the oils change from a liquid into a surface that is molecularly bonded to the iron of the pan.
Polymerization is what creates the non-stick surface. Without this process, the iron cookware will quickly corrode and rust thanks to moisture and oxygen in the air.
Newer cast iron pans like Lodge-brand cookware typically come pre-seasoned. This means that the initial seasoning process has already happened. But if you’ve ever restored an old, rusty cast iron skillet or refinished a modern-day cast iron skillet, then you need to season those pans before use. (Product Link: Lodge 12″ Preseasoned Cast Iron Skillet)
Reseasoning
Reseasoning refers to the reapplication of additional oils or fats after use to keep the pan in ideal conditions. The goal with reseasoning is to continually build up the layers of oil and fats over time for an amazingly smooth and lasting non-stick, protective surface.
Sometimes, the food itself does the reseasoning for you, like when you are cooking bacon. As the bacon cooks, the fats in the meat will help to seal the cooking surface.
However, sometimes you need to reapply the oil or fat manually. This can happen if you cook something that still sticks to the pan and you need to scrape it off. A light coating of oil after you clean and dry the pan is all it needs to go back to being non-stick and protected.
3 Steps To Initally Season A Cast Iron Pan – Season And Reseason Cast Iron
Step 1: Wash The Pan
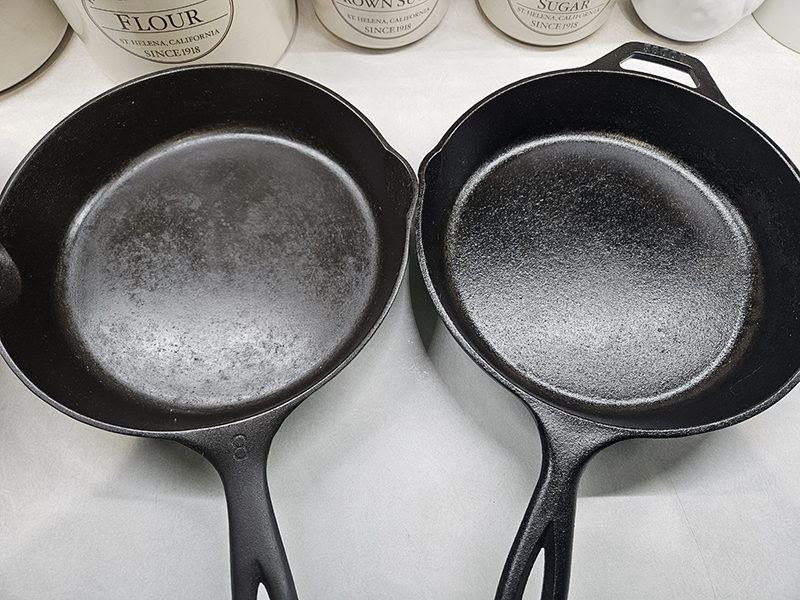
Even if you keep your cast iron reseasoned after each use or if you have a brand new one, it’s still a good idea to season the pans occasionally. This is especially needed after a thorough cleaning where you use harsh soaps or if you cook with an acidic product that might strip most of the seasoning off of the pan.

The first step is to preheat your oven to 400º Fahrenheit. As the oven warms up, get out your scrub brush and give the skillet a good hand washing using soap and water. Yes, some people swear that you shouldn’t use soaps to wash cast iron, but it’s ok in this case since we are going to be seasoning it after it dries.
Don’t be afraid to get a little tough on the pan, especially if it has lots of dried-on gunk or old grease and rusk. A scouring pad or fine steel wool will help with the process if you have one of those. (For times when you need a more intense restoring process, see my article, “How To Easily Restore Cast Iron Cookware Using Your Oven“) (Product Link: Scotch-Brite Heavy Duty Scour Pads)
Once you have washed the pan completely from top to bottom, dry it off as much as possible. Moisture is the enemy of cast iron, so you want the pan to be as dry as possible before adding your oil or fat. Heating the pan on the stove can help speed up the drying process.
Step 2: Applying The Oil
When the pan is completely dry, you can start to add your oil or fat. What type of products work best with cast iron? Well, if you were to ask 10 different people you might end up with 10 different suggestions.

The most popular choices for oiling or greasing cast iron cookware are tallow, bacon grease, vegetable oil, or shortening. Some prefer to use grapeseed oil, canola oil, or avocado oil. Personally, I like to use any of the first few suggestions.
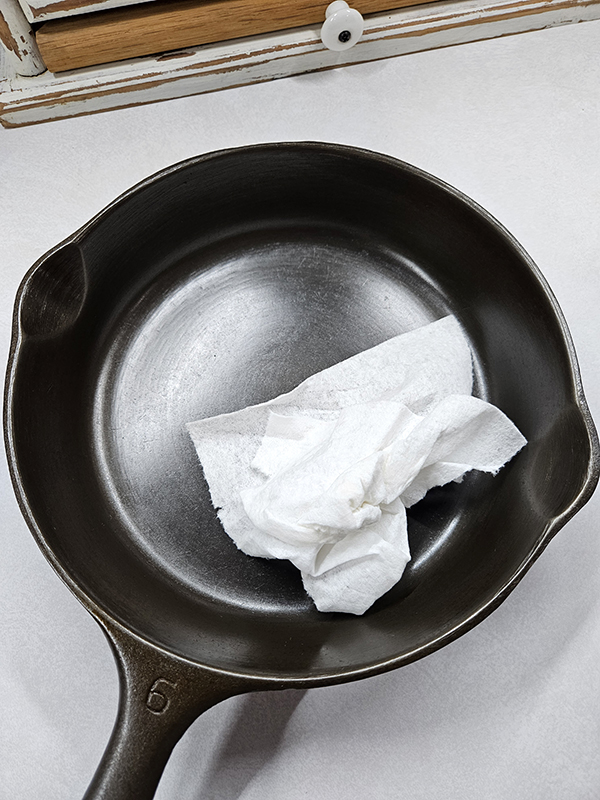
Use a paper towel and put a thin layer of oil on the entire pan – top, bottom, sides, and handle. You don’t want a thick layer of oil. Otherwise, the pan will become sticky after baking. Wipe off any excess oil with a clean paper towel or cloth.
Step 3: Baking & Cooling
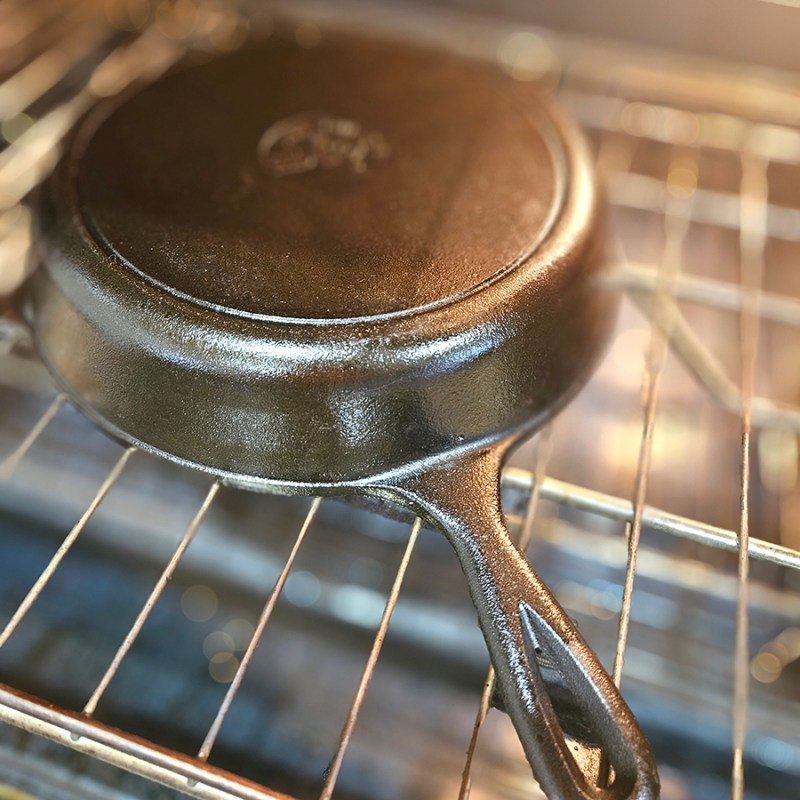
After your oven is preheated and your skillet is covered with a thin layer of oil, it’s time for baking. Place the skillet upside down in the middle rack of your oven. If you are worried about drips, place a baking sheet or piece of aluminum foil at the bottom of your oven.
Bake the pan for an hour. Don’t be surprised if you see the pan smoking during this hour. This is just the polymerization process happening. Once it is done smoking or the time is up, turn off the oven and allow the pan to come to room temperature naturally.

Once the oven is cool, remove the pan and wipe it down with a clean paper towel or dishcloth to remove any excess oil. You can repeat the oiling, baking, and cooling process a few times if desired. This may be required to get a good layer of oil for recently refinished or restored pans. Your pan is now ready for use!
Reseasoning The Pan After Each Use
Now that you have properly seasoned the pan, it’s time to use it. The more you use your cast iron cookware the better they will get. Cooking foods with high-fat contents like ribeye steaks or bacon will help to naturally reseason the pans as they cook.
However, most of the time you still need to reseason the pan after each use. This simple step will make a huge difference in the non-stick ability of your pan.

Once you are done cooking, scrape off as much of the bits of food and extra oil as you can. Sometimes a simple wipe with a paper towel will be enough to clean the pan. Other times, you will need to wash it.
If needed, wash the warm cast iron skillet soon after using it in hot water. Washing while the pan is hot will help the stuck-on bits come off more easily. Some people like to use a scrub brush and coarse salt to get the stuck-on food off.
Washing The Pan
However, I like to stick my warm skillet in the sink and fill just the bottom up with about half an inch of hot water. I allow it to sit for a minute or two, then I take a scrubber or cloth to it. No soap required. (These simple pan scrapers are my favorite to use, just make sure they don’t melt – Product link: 5-piece Pan Scraper)
In no time at all, I’ll have the cooking surface clean and smooth again. Just be sure to NEVER put your cast iron cookware in the dishwasher; that’s a huge no-no!

Make sure to dry the cast iron cookware off thoroughly after washing or cleaning. Once it is dry, apply a thin coat of oil to protect the cooking surface. I do this reseasoning process every time I cook if the skillet doesn’t have that smooth, shiny look to it after use.
Store your reseasoned cast iron in a dry location and make sure to use it often. That’s really all there is to seasoning and reseasoning cast iron cookware!
Until next time, thanks for stopping by!
– Chelsea
*This post may contain affiliate links. These are products I have used personally and highly recommend. As an Amazon Associate, I may earn a small commission from qualifying purchases if you purchase items through my links. These links and the ads on this page help to support my family and our semi homestead, so Thank You!
Discover more from Semi Homestead Life
Subscribe to get the latest posts sent to your email.