
If you’ve got the itch for bringing new baby chicks home but aren’t sure exactly what goes into those first week or so of raising them, then this article is for you!
Spring is here which means it’s baby chick season! Those cute little fluffballs start arriving in farm stores in early spring and their peeping can be heard for the next few months.
If you ever frequent those farm stores, it’s hard to ignore those cute little cheeps. Next thing you know, you are looking into the brooders to see the little chicks running around one minute and then stopping to take a cat nap the next. Before you know it, you’ve got a box in your hand and new babies to care for. Now what?!

Backyard chicken keeping has been gaining in popularity each year. It seems like more and more people are discovering how rewarding it can be to walk out to the backyard and gather their own breakfast. And once they’ve tried freshly laid chicken eggs, it’s hard to go back to those pale store-bought eggs.
If you are considering keeping chickens for the first time or just want a bit of a refresher, I’ve put together a list of my top 5+ tips on bringing baby chicks home. Hopefully they will make your life much easier and keep the chicks quietly peeping away!
5 Tips On Bringing Baby Chicks Home
#1: Setting Up A Brooder
When you bring your baby chicks home from the store or when they arrive in the mail, they need a place to live indoors. (This obviously isn’t the case with chicks that are raised by a broody hen.)
In most cases, you need to keep baby chicks indoors for the first few weeks of their lives. Until they are 6 weeks old, the chicks only have their soft and fluffy downy feathers. Once they hit about 6 weeks, those soft feathers are replaced with their real feathers. Only then can the chicks regulate their own body temperature.
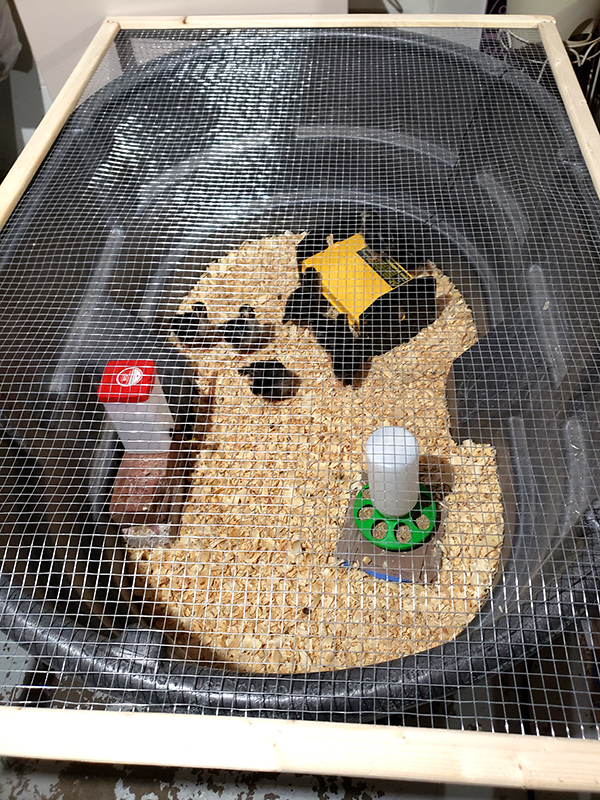
So in order to keep those chicks safe and warm, they need to be kept in a brooder. (It also helps keep your house cleaner and you more sane!) You can use about anything when it comes to a brooder. Ideally, there should be around half to one square foot of space per chick in your brooder.
What We’ve Used
The first year we had chicks, we used a large livestock water tank. It worked great aside from it being a bit of a pain to move around. We just had to make a cover for it for when the chicks started to grow into rowdy teenagers. So we made a simple frame using 1x lumber and hardware cloth.
This year, we are using a puppy playpen as a brooder. It is the perfect size for a few chicks, is easy to set up, and comes with a mesh cover. This is the one we ended up purchasing – Product Link: Portable Pet Playpin. The only thing we’ve had to adjust with ours is wrapping a blanket around the outside half of it to help prevent drafts since ours is set up in the unfinished portion of our basement.
#2: Provide Warmth – Bringing Baby Chicks Home
The main purpose of a brooder is to keep the chicks warm and toasty but most of the time you still need supplemental heat. When the chicks first arrive and until they are over a week old, the temperature inside your brooder should be around 95º Fahrenheit. The temperature should then decrease by 5º each week until they can go outside when the temperature reaches 55º.

Some people like to use heat lamps in their brooder space to accomplish those temperatures. However, I don’t suggest this method due to the chance of fires. I know that several people have used heat lamps for years without issues, but I personally am not comfortable making that choice in our home.
Instead, I like to use a radiant heater. Radiant heaters produce uniform heat on the bottom of the device without the risk of fire. The chicks can huddle under the heat plate to stay warm, similar to how they would huddle under a momma hen.
I have an older Ecoglow heater from Brinesa that still works great. However, the newer versions are a lot easier to adjust the height as the chicks grow. (Product Link: Ecoglow Heater from Brinsea)
#3: Litter vs Bedding
Whether you like to refer to it as bedding or litter, the purpose of this next item is to give the chicks a safe place to do their business. Chickens don’t actually “bed down” or need soft comfortable spaces to sleep in. Instead, they need a place for their droppings, so that is why I tend to call it litter.
You can use wood chips and many do successfully from day one. However, during the chicks’ first week, I like to use something different.

First, I use a layer of puppy pads followed by newspapers. Don’t use newspapers as the top layer in your brooder though. They get really slick when they are wet and do not properly absorb droppings. So on top of the newspapers, I use a couple of layers of paper towels.
I just purchase whatever paper towels are the cheapest and use those. Then, each night, I replace the paper towels and sometimes the newspapers if needed. I typically only use up about two rolls of paper towels for one week, so it’s not that wasteful. These items can then be added right to your compost pile.
I have a few reasons for using paper towels during the first week. First, they are absorbent and soak up the droppings or spilled water. But also, it gives the young chicks a chance to easily distinguish between their food and their litter. Again, you can use wood chips right away, but I have had great success using paper towels.
#4: Food And Water – Bringing Baby Chicks Home
Chicks need a constant supply of food and water when they are very young. And yes, they will make a huge mess! There really is no good way around this but you can minimize it with a few tricks.
I use a treadle feeder for my adult chickens and have zero feed waste. I highly recommend treadle feeders; The savings in feed costs make up for the steeper initial price. But for the little chicks, I use a smaller open feeder. (Product Link: Grandpa’s Treadle Feeder)
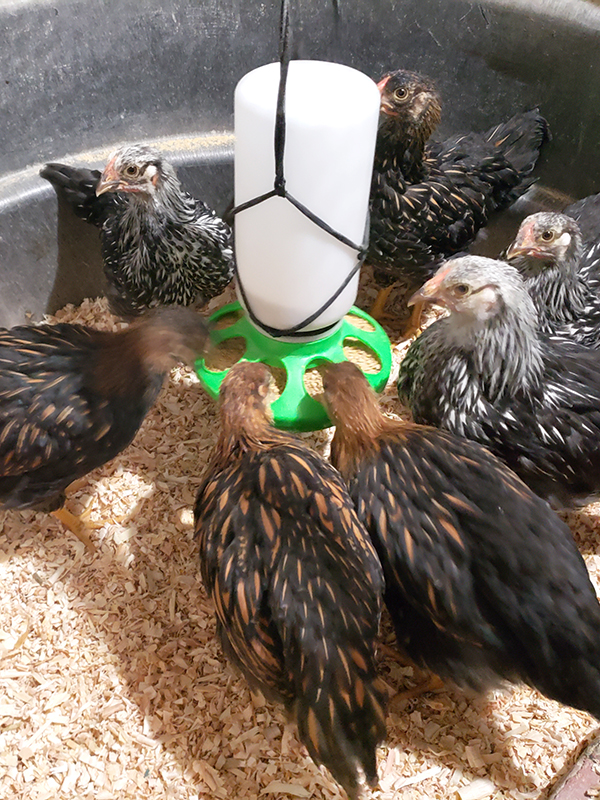
At first, I leave the feeder at ground level so the chicks have easy access. The chick feeder I use has legs that can be extended to raise the feeder up as the chicks grow. If the legs don’t work to prevent food spillage, then I have had great success with hanging feeders. The swinging motion makes it harder for the chicks to scoop the seed onto the litter.
As for feed, you can use either medicated chick feed or non-medicated feed. That choice is completely personal and up to you and your household. Just be sure to check with your chick breeder in case the chicks were vaccinated before using medicated feed.
Water Options
In addition to feeders, chicks need a constant supply of fresh water. In the first few days after the chicks arrive, I add electrolytes specifically made for chicks to their water to help them adjust. After about day 3 or 4, I switch to plain water. Just be sure to change it daily no matter what you use. (Product Link: Chicken Electrolytes)
The waterer I use early on also has legs that can be extended to raise the waterer off the ground. However, after a week or two, I switch the waterer to a nipple waterer since that is what my adult chickens use. (Product Links: Roosty’s Chicken Waterer And Feeder and Rent-A-Coop Nipple Chicken Waterer)
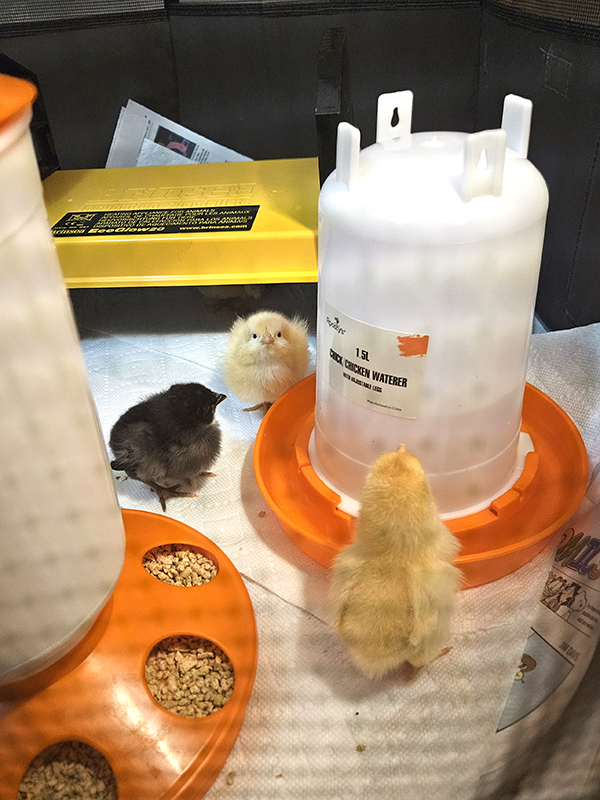
If you have issues with the chicks finding the water source, take each one and gently press their beaks into the water. It doesn’t take them long to figure out what is going on. And once one gets the hang of it, the others will soon follow suit. (Monkey see monkey do!)
#5: Miscellaneous Tips – Bringing Baby Chicks Home
This is my last catch-all category. During the chicks’ first week home, they only need darkness for around 6 hours each night. To help accomplish this, I use an Alexa-capable lightbulb and create a routine in my Alexa app. (Product Link: Sengled Smart WiFi Light Bulbs)
Little chicks nap so much during the day that they don’t need a super long period of darkness at night during the first week. So I have a light turn on around 5:00 am and then have it turn to a very dim red-toned light around 11:00 pm. After the first week, this time can be extended.
I also like to set up an inexpensive mini indoor camera to keep an eye on the chicks when I can’t physically be there. The camera I use has sound so I can listen in and hear their quiet, content cheeping. It just helps to give me peace of mind since my brooder setup is in the unfinished part of our basement. (Product Link: Blink Mini Indoor Camera)
Don’t forget to practice biosecurity both for you and them. Don’t keep the brooder in a place that has strong smells or high moisture levels (like your kitchen or bathroom). And make sure to wash your hands thoroughly after handling the chicks or any items the chicks touch.

Enjoy Those Chicks!
Give chicks a few hours to adjust to your home before handling much. After that, make sure to talk to them and spend time with them outside of the brooder if you can. You want them to get used to being around you and your voice. My kids’ favorite part of having chicks is getting to play with them!
Lastly, enjoy them small and cute while you can . . . They will be tiny messy dinosaurs before you know it!
To read more chicken-related tips, check out my articles, “Chicken Coop Features For Healthy and Safe Birds” and “4 Must-Have Products For Raising Chickens For Busy Families”.
Until next time, thanks for stopping by!
– Chelsea
*This post may contain affiliate links. These are products I have used personally and highly recommend. As an Amazon Associate, I may earn a small commission from qualifying purchases if you purchase items through my links. These links and the ads on this page help to support my family and our semi homestead, so Thank You!
Discover more from Semi Homestead Life
Subscribe to get the latest posts sent to your email.