If you are looking to harvest huge onion bulbs this summer, then you need to start by planting onion sets this spring. Onions are typically grown from either sets or seeds. Both onion seeds and sets have advantages and disadvantages.
Onion sets are essentially young onions that have been started as seeds, grown for a while, and then harvested early. Planting them will give you a head start on producing large onion bulbs in a short amount of time.
On the other hand, onion seeds are definitely less expensive and you have a wider choice of varieties. However, onion seeds take a long time to grow and mature.
Often, they get zapped by cold weather long before they have a chance to reach full maturity. While they are still edible, young bulbs don’t store as well as mature bulbs do. In order to have success with seeds, they need to be started indoors long before the growing season starts for most climates.
And while you can grow onions using either seeds or sets, onion sets are typically the best option for planting if you want large onions in the same growing season.
Types Of Onion Sets
Onion sets are either short day, long day, or intermediate. Which type you grow depends on your location and climate.
Those in the south typically grow short-day onions. These begin the bulbing process when the length of sunlight reaches 10 to 12 hours. With short-day onions, the earlier you are able to plant them, the bigger the mature bulbs get.
You can grow long-day onions in the Northern climates. They don’t begin the bulbing process until the length of sunlight is more around 14 to 16 hours. Long-day onions are great for storing for a long period of time.

Intermediate onions are exactly what they sound like. They are in between both short and long-day onions. These onions start to bulb when the length of sunlight is around 12 to 14 hours (surprise surprise). They grow well in the middle of the United States and will produce good-sized bulbs that are typically sweeter. They are a good choice when you are unsure of which type you should grow.
If you purchase onions locally, the store should carry the right type of variety for your climate and growing location. However, if you purchase online from a reputable grower, be sure to choose the right type for your climate.
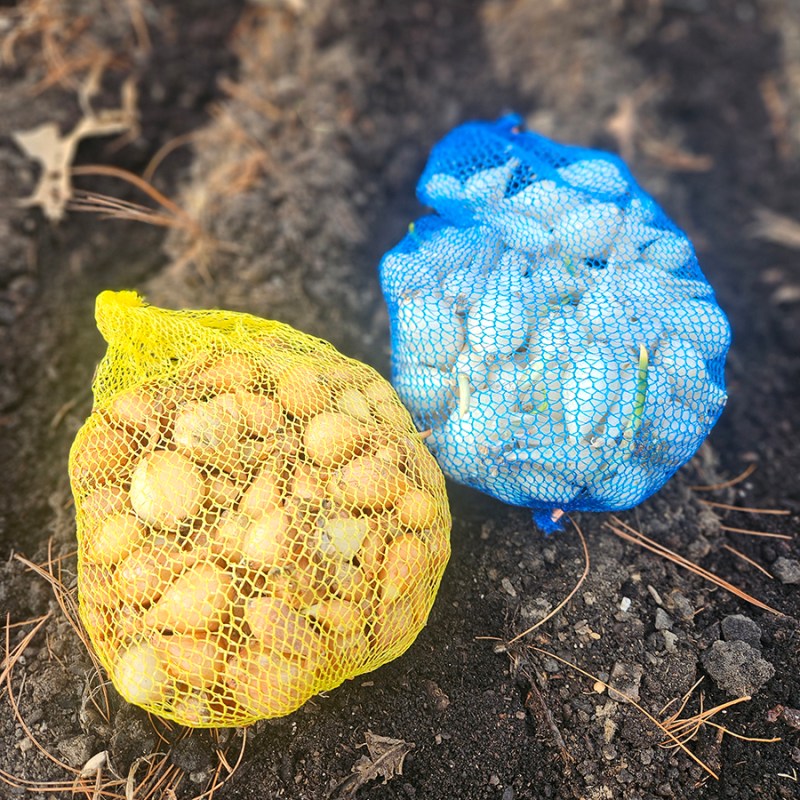
Since I am in Illinois, I can grow either intermediate onions or long-day onions. The two varieties I purchased from a local farm store this year are both long-day onions: yellow Stuttgarter onions, which is an heirloom variety, and white Ebenezer onions.
Onion Colors
Besides the different growing types of onions, there are also three different color options. Not only does the color of the skins vary, but their flavor profiles and uses do as well.
Yellow onions are most commonly grown in home gardens. They have a milder flavor and work well whether it is for cooking or eating fresh. When they are sauteed or cooked down, they don’t turn to mush as some onions do.
White onions have a bolder flavor that works well for cooking. They are also excellent for salsas and salads that could use a little bite.
Red onions are usually consumed fresh or grilled. They have a very strong flavor that can be a bit much for some people (myself included!). However, their red color makes for a beautiful contrast to other food choices.
Tips For Easily Planting And Growing Onion Sets
Choosing Your Onion Sets
Once you have your onion sets in hand, you want to go through them all. It’s likely that you will end up with a few that are not as healthy and would be better off not being planted.
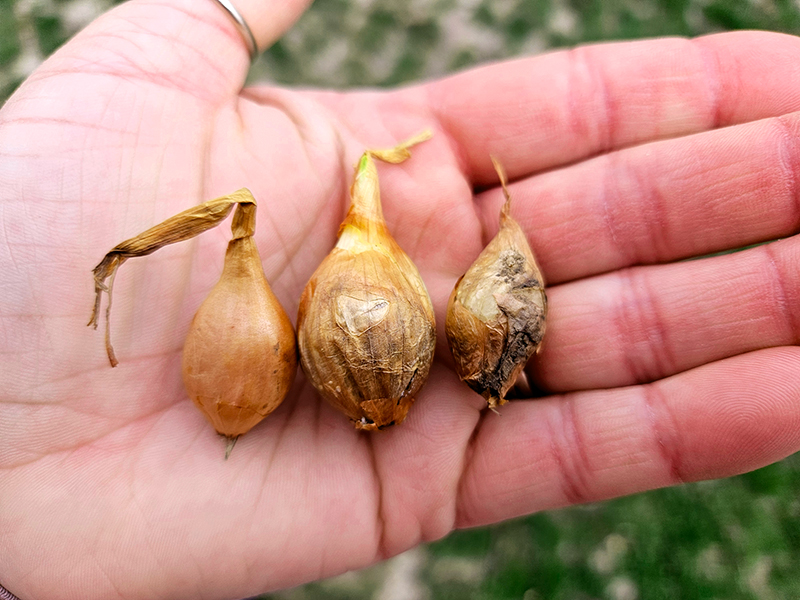
Choose bulbs that are firm and have no signs of mold or rot. You also don’t want the sets to be too large right off the bat. This increases the chance that they go to seed earlier in the growing season. Choose sets that are around 3/4 of an inch in diameter for the ideal size.
Preparing The Soil
Choose a location in your garden or backyard that receives full sun. Since you plant in the spring, keep in mind the foliage of surrounding trees and plants will fill in and might shade out your onion plants.
Onions require loose, well-draining soil in order to grow into big bulbs. Take the time to amend the soil if needed now so you can enjoy larger bulbs in the summer.
If you have very heavy soil like clay, amend it with plenty of compost and even some sand. When we first created our garden, it took several years of adding compost as well as using cover crops to help loosen the soil to a point where it is nice and healthy.
As soon as the ground can be worked, you can plant onion sets. However, if it looks like the extended forecast drops below freezing, hold off for another week or so. For my growing locations, this means I can plant onion sets in late March or April typically.
Planting The Onion Sets
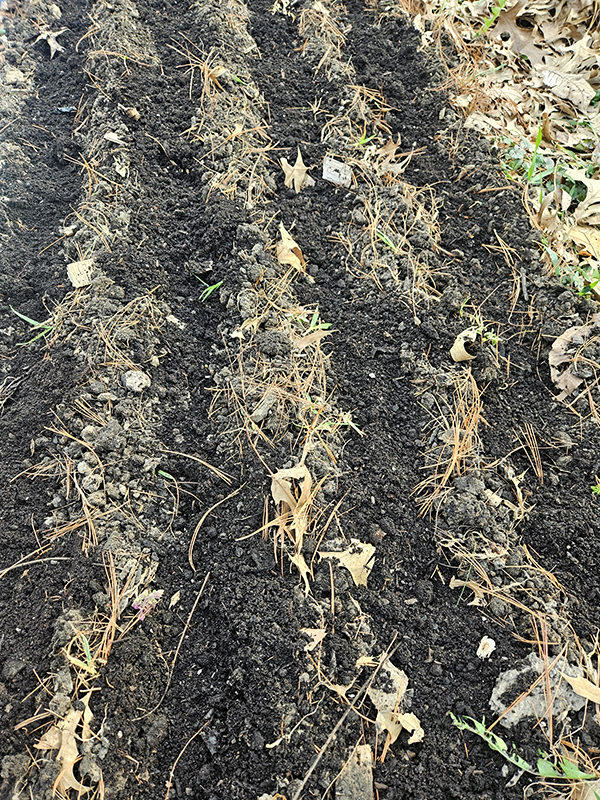
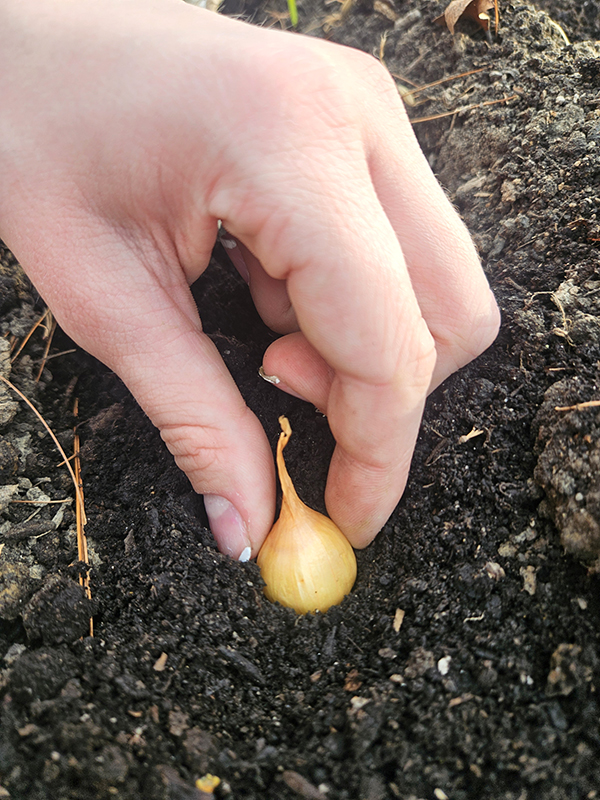
One of the easiest ways to plant onion sets is to create a trench in the soil. I used my late Grandma’s two-sided garden hoe to make quick work of making the trench. You want the trench to be about 2 to 3 inches deep.
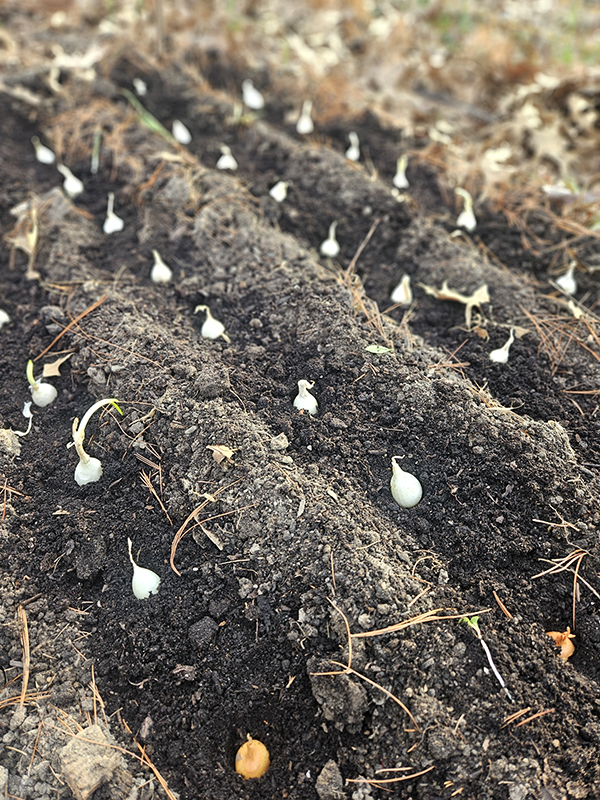
Then, to provide the sets with a perfect boost of nutrients, add a good inch or so of compost into the bottom of the trench. Place the onion sets into the compost so the top can be covered with about an inch or two of soil. You want the pointy end of the set to be facing up. Space sets about 4 to 6 inches apart from one another.
While some suggest spacing additional rows 12 to 18 inches apart, I’ve found that you can get by with spacing them closer together as long as you stay on top of their nutrient and water needs. For example, in one of my growing rows, I was able to get four rows of onion sets to make the most of my garden space.
Maintaining Onion Sets
Once the onion sets sprout and start to show above the soil, you want to add some type of mulch. We like to use grass clippings since they are free and readily available. You can also use shredded leaves or straw as well. The mulch will help to retain moisture in the soil and keep weeds at bay.
Fertilize onions every couple of weeks with nitrogen for bigger bulb growth. Once you start to see the onions growing above the soil, stop fertilizing. Do not cover the bulbs back up with soil.
Usually, normal weekly rainfall is enough to keep bulbs growing. The mulch will also help keep the soil moist. However, give them a good drink if the weekly forecast doesn’t call for rain.
Before long, those little onion sets will be turned into huge bulbs that will be ready for harvesting and storing!
Until next time, thanks for stopping by!
– Chelsea