I recently learned all about having a raised row garden and all of its great benefits. So in 2022, I took the plunge and converted my traditional garden into a raised row garden.
Row gardening is basically the concept that you have specific slightly raised areas of your garden that are for growing while the others are kept as walking areas. The walking rows stay walking areas each year and the growing rows stay growing areas each year.
Using raised rows helps to cut back on the need for tilling. It also helps eliminate at least 50% of the weeding associated with traditional gardening since the walking areas shouldn’t grow weeds. It also saves money in the long run because instead of adding mulch or cover crops to the entire garden space, you are only covering the growing rows.
Since our soil is made up of mostly clay, it is super dense. If you walk on it at all, it compacts and makes it really hard to work with the following year. So needless to say, I was rather drawn to the idea of having specific walking and growing areas.
So in 2022, my husband and I went to work on converting my traditional garden to a raised-row garden system. And I’m so glad we did!
How We Converted A Traditional Garden To Raised Rows
The Pre-Planning
I knew that the process would be a bit time-consuming, but I also knew that the benefits would outweigh all of the extra work I’d need to do to get it set up. Once the initial layout is done and created, subsequent years only get easier and easier.
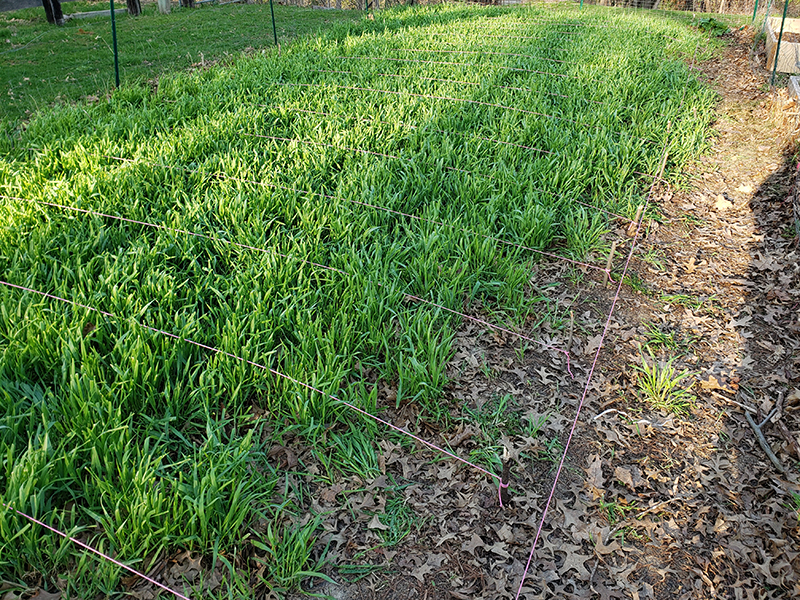
The first part of the conversion process started in the fall of 2021 after I’d cleared out the garden for the year. I made sure to plant a cover crop of annual rye all over the entire garden space. Not only would the cover crop help to keep weeds at bay, but it would also help to add organic matter and hopefully help loosen up my dense clay soil.
The cover crop grew and protected my soil during the fall. When winter came around, the rye went dormant. Once spring hits and the ground starts to thaw out, it comes out of dormancy and starts to grow again. That was the easy part of the process!

One Last Till
The next step to creating a raised row garden was to give the entire space one last till. Here is where we (i.e., I) made a mistake. Instead of being smart and tilling the entire garden, I only had my husband till the walking row areas and not the growing rows.
Why? Well, because I had already mapped out my row layout with yarn (see photos above) and didn’t want to have to do all of that over again. It actually created more work and was more of a pain in the long run, but live and learn! So if you go to do this, just be sure to till the entire garden space and THEN lay out your rows!
Anyway, we aimed for growing rows that were about 24″ wide and about the same width for the walking areas. The garden definitely isn’t exact, but it is close enough and works for us. The last row in the very back of my garden ended up being more like 36″ wide, oh well! Perfectly imperfect, right?!

Creating The Growing Rows – Raised Row Garden
Next came the more manual part of the process, which was to create the actual rows.
First, I laid down a couple of inches of compost onto the top of the (non-tilled) growing rows. While we had a compost bin, I didn’t have enough finished compost to use. So we just purchased some from a local landscaper. I was definitely glad to have a good wheelbarrow during this whole process! (I have one with two front wheels and it makes the moving process so much easier.)
Then, we used the soil that we tilled up in the walking paths and shoveled it onto the compost layer. This made the base for our growing rows. This not only saved us money from not having to purchase a ton of extra soil, but it would also help to create a level distinction between the two types of rows (the walking rows being lower and the growing rows being raised up . . . hence the name “raised row garden.”
The next step was to add another layer of compost onto the top of the soil in the growing rows. A good watering down and the growing rows were at last ready!
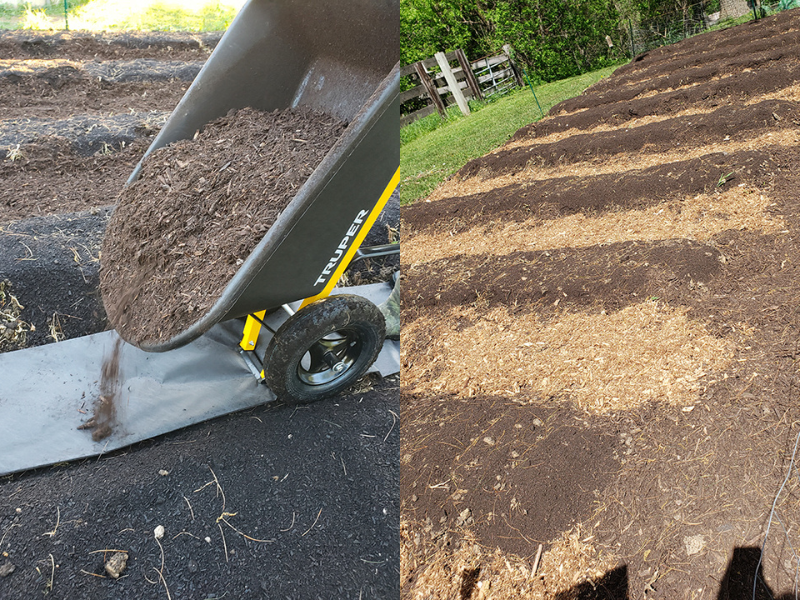
Right: A layer of cedar chips in between the growing rows. It’s getting closer!
The Walking Rows
We then started on the walking rows. We purchased fairly heavy-duty landscape fabric to lay down as the base of our walking rows. The fabric was folded in half to add even extra protection. (Honestly, we folded it because I didn’t want to cut down the fabric length for every row so we folded it instead. The added protection is a bonus.)
On top of the landscape fabric, I added a thick layer of finely chopped cedar chips, but you can use other types of mulch. Just be sure to use something that doesn’t contain dyes or might be toxic since it will be right next to your plants.
To top it all off, I added thicker cedar chips that just gave the walking rows a nicer, cleaner look. (We purchased both kinds of cedar mulch at Lowe’s.) And boy did the garden smell good at this point because of all the cedar!
If I were to do it again, I likely wouldn’t have added the landscape fabric. As the cedar chips break down, the fabric starts to come up in places and doesn’t do as well as it did in the beginning. But I do think that the fabric helped to stop most weeds from growing back through the chips. So it’s kind of a toss-up on whether it helped or was more of a nuisance.

The entire project wasn’t the cheapest in the world just because we needed to purchase a lot of compost as well as several bags of cedar chips. If you were able to get your hands on some inexpensive wood chips and compost, then your garden conversion wouldn’t be too bad cost-wise.
The Finished Raised Row Garden
As for my garden in 2022, I loved having the growing rows. It took a bit of getting used to as far as planning my garden layout was concerned, but the limited space actually helped me visualize the plants growing as opposed to being a bit overwhelmed with all that wide open space I used to have.
I ended up with ten growing rows and my three raised beds. We also use grow bags in between the raised beds. (In the wide-angle photo above, the cedar chips aren’t around the raised beds yet. We eventually surrounded those to make the garden seem tidier and cleaner.)
In each growing row, I can get multiple tomato plants, two rows of green beans each, several flower plants, 3 to 4 rows of sweet corn, etc. So really, the rows didn’t limit me much on space.
The lack of weeding and never having to worry about compacting the already dense soil when I walk around is as much of a reason to convert the garden as any for us! I definitely don’t regret making the switch after having a growing season under my belt. And I love how the garden space looks now!

Additional Articles And Help
At the end of your growing season, there are a few different ways you can care for your growing rows and walking rows. For the most part, treat it like you would any traditional garden. (Article coming soon on this topic!)
As for the springtime, how you care for the growing rows will depend on what you do in the fall. I have an article that breaks it all down for you so you can prep your garden for planting: “Growing Rows In Spring – What To Do Before Planting The Garden”.
For all the benefits I have found with having dedicated growing rows and walking rows, check out my article, “Advantages Of Using Growing Rows In Your Vegetable Garden”.
If you decide that this is a process you’d be interested in trying and you have any questions, be sure to shoot me an email or message. I’d love to help!
Until next time, thanks for stopping by!
– Chelsea
Wondering how your prep the garden the following year with the rows of mulch between. Is it easy to keep the rows the following year? Or do you have to start all over again the following year?
You don’t need to start all over thankfully! Just treat the growing rows like you would a traditional garden. For the growing areas in the fall, you can leave them as is after clearing out the garden, you can add a mulch like shredded leaves on top of the rows, or you can plant some type of cover crop. (We do a combo of the mulch and the cover crop usually.) The walking areas stay as-is. When spring comes around, the prep work will depend on what you did in the fall for the growing rows. If you did nothing, you will likely have to weed and/or till. If you added mulch, leave it as is if the ground is workable or till. If you planted a cover crop, mow it down to kill it or till. For the walking areas, we usually just need to remove any piles of leaves that accumulate there over fall/winter and then we add a few bags of fresh cedar mulch on top of the old, but you don’t have to do that every year. You may have a random weed here or there in the walking areas to remove but otherwise that’s it!