Congratulations! You’ve made it to Part 2 of my Starting Garden Seeds Indoors Series! If you’ve made it to this post, then chances are that you have sown your seeds and those little ones have already germinated. Now it’s time to find out how to continue growing and maintaining those seedlings!
We left off in part one with your seeds just having germinated. You saw those little green leaves popping up through the soil, and you have removed the clear plastic cover. Now what?
In this post, you will learn how I care for my seedlings and get them prepared for heading outside in the garden. The steps you take now will play a role in how well those seedlings succeed outside in the elements.
If plants fail to get the proper nutrients and lighting, then chances are they will grow to be thin, leggy, and not very healthy. Unfortunately, unhealthy plants, especially young ones, are usually more susceptible to pests and diseases.
So let’s find out how to get those little seedlings off to the best start possible. Don’t worry, it’s not difficult as long as you follow a few of my simple tips.
Growing & Maintaining – Part 2 of Starting Seeds Indoors
It’s definitely exciting to see little green growth coming up from the soil. Whether it is your first time starting seeds or your tenth, the excitement doesn’t go away!
There is just something so special about taking something from its basic, most simple form and creating an entirely new plant from it. However, to make sure your seedlings continue to grow and stay healthy, you will want to keep these next tips in mind. (For a full guide on starting seeds indoors for beginners, check out “Indoor Seed Starting 101 – A Complete Beginner’s Guide”.)

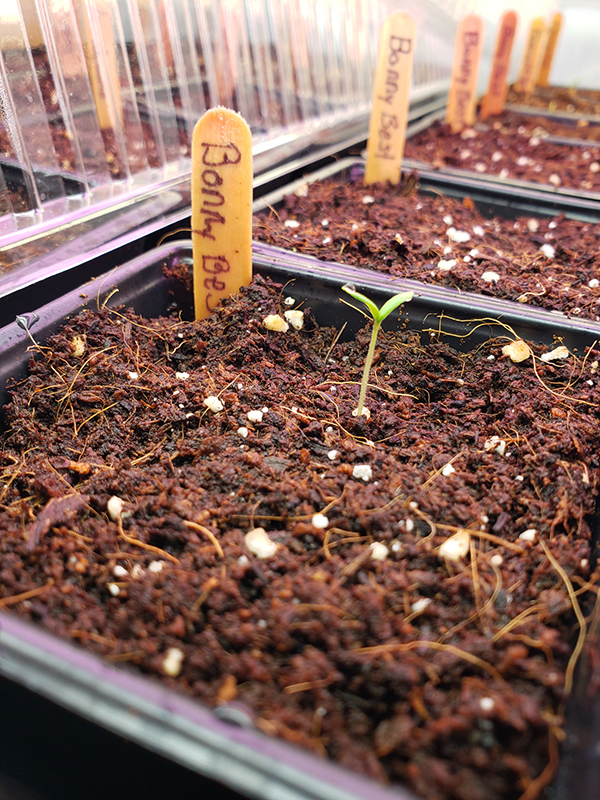
Cotyledon Leaves
With most seedlings, the first growth will be a tiny stem and one or two little leaves. These little first leaves are called the cotyledon leaves.
Cotyledon leaves tend to all look the same from plant to plant, so don’t be surprised if your tomato plants look just like your cucumber (this is also where prior labeling is super important!). As the seedlings grow, the plant’s true leaves will start to grow.
As the seedling grows, the cotyledon leaves will turn a pale green and eventually yellow. At some point, the leaves will fall off altogether, so don’t be surprised when this happens. Nothing is wrong with your plant, it is just growing like it should be!
Lighting
After the seeds germinate, you need to turn your LED lights on. It doesn’t matter if only one of your seedlings has germinated and the rest are still under the soil.
If one of them has popped up through the soil, turn those lights on. It won’t hurt the non-germinated seeds to have the lights on. However, your seedlings that have germinated will need the light to start growing healthy.
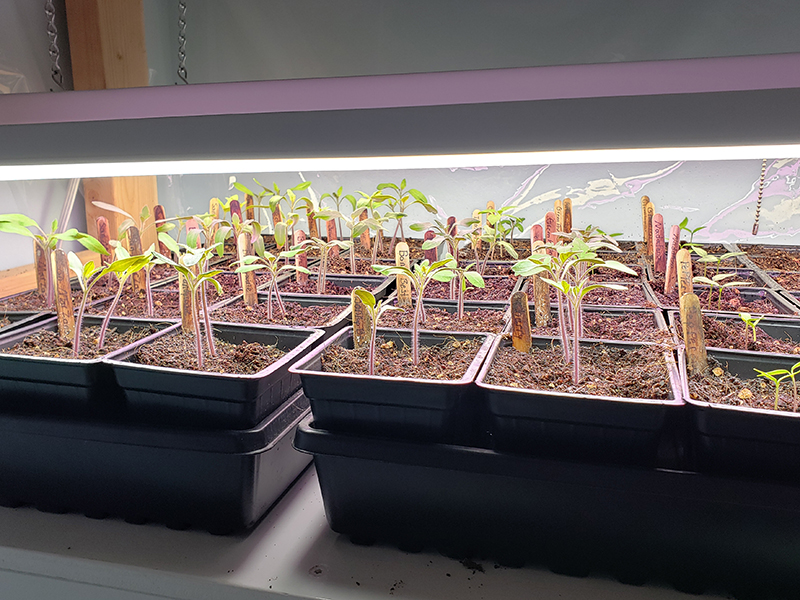
Be sure to keep your lights only a few inches above the seedlings. Again, this will help the plants to grow slowly and create thick and sturdy stems.
Having your lights up too high above the plants will cause the seedlings to grow quickly and reach for the lights, creating thin and leggy plants. While this isn’t the end of the world for plants like tomatoes, you still want to strive to give plants the best head start to growth as possible.
Confession Time: Unfortunately, the grow lights I have right now do not have long chains, and I didn’t have the chance to get new ones. So my seedlings this year are a bit on the leggy side. They should end up being fine, especially the tomatoes since I can just plant them in the ground deeper so they can create nice and sturdy roots.
Watering – Starting Seeds Indoors Part 2
As the seedlings grow, you are going to need to keep the soil moistened. The frequency in which you water them will depend on several factors: the size of your container, the size of the plant, how many plants are in each cell, the type of soil you are using, the temperature in the location you are keeping them in, etc.

A good way to tell if the containers need to be watered is to pick them up after a good watering. Notice how heavy the cells are. After maybe two days, pick up the same cell. Is it a lot lighter? If the cells feel heavy and full, you are good to go and there is still plenty of moisture in the soil.
If the cells are very lightweight and feel almost empty, the plants likely need to be watered. This is just a process that you will start to learn and get a feel for as you go along. It is always better to slightly underwater the seedlings as opposed to drowning them.
I tend to opt for bottom watering with indoor seedlings. I simply add an inch or two of warm water to the bottom tray and set the containers in. The containers will soak up the water as needed. Remove any excess water that still stands after about 30 minutes or add more if needed prior to the 30 minutes being over. Bottom watering will also make the process of fertilizing easier, too (see next tip).
Fertilizing
One of the drawbacks of using seed-starting soil is that they are typically very lacking in the nutrient department. Once your seedlings have a few sets of true leaves, you will want to feed those seedlings.

Just like you and I need food and nutrients in order to survive, those seedlings need it as well. As the plants grow, they will use up the resources in the soil to the point where there is none left. Just like with us if we go hungry, the plants will start to suffer and weaken without those nutrients.
The way we feed plants is by using fertilizers. When it comes to vegetable seedlings though, you want to use the fertilizer at half to a quarter the strength of a regular dose of fertilizer. So if a container says to add a half cup of fertilizer for every gallon of water, add only a quarter cup instead. (Product Link: Miracle-Gro Fertilizer)
Fertilize seedlings every couple of weeks for best results, always at half or less strength. You can use everything from commercial fertilizers to compost tea. The point is to make sure the seedlings get those nutrients.
Thinning Seedlings – Starting Seeds Indoors Part 2
Another thing you will need to do when your seedlings have at least one to two sets of true leaves is to thin out your containers. If you planted multiple seeds per cell, you likely want to thin those seedlings down so you have only one plant growing per cell.
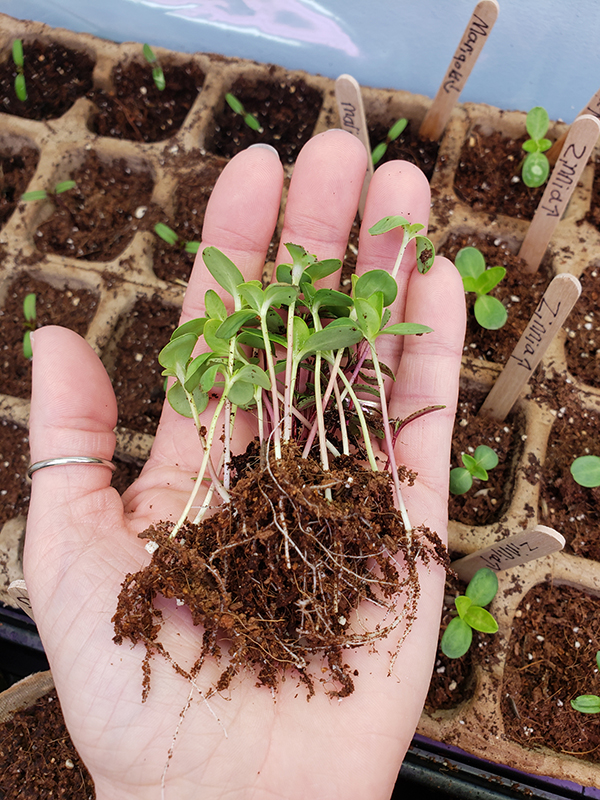
Again, this has to do with the amount of resources available to plants in each cell: water, soil, nutrients, space, etc. Plants will do better with their own space (kind of like my kids!).
You can either transplant those seedlings into their own pots or you can add them to your compost bin or the trash. For example, I transplanted most of my tomato plants since I had three plants per cell. Now, each one has its own cell to grow in.
Keep the strongest and healthiest plant if you are planning on thinning seedlings instead of transferring them. Also, it is best to cut the seedlings off at the soil line. This will avoid disturbing the roots and the soil of the seedling you plan on keeping.
The Next Step
The next step to starting your seeds indoors is to harden off your plants. Be sure to check out the last and final post, Part 3 on starting your garden seeds indoors for information about hardening off plants and getting them into the ground.
It isn’t quite as simple as just going right from the growing rack to the garden. But don’t worry, it is still easy! If you missed Part 1, be sure to go back and check that post out as well.
Until next time, thanks for stopping by!
– Chelsea
*This post may contain affiliate links. These are products I have used personally and highly recommend. As an Amazon Associate, I may earn a small commission from qualifying purchases if you purchase items through my links. These links and the ads on this page help to support my family and our semi homestead, so Thank You!
Discover more from Semi Homestead Life
Subscribe to get the latest posts sent to your email.