If you’ve always wanted to try starting garden seeds indoors but have never known where to begin or really how it works, then this Indoor Seed Starting 101 Guide is perfect for you, the beginner!

In this article, I am going to talk about everything you need to know to successfully start your seeds indoors – no greenhouse required! Think of it as a wise teacher, walking you through the whole process step-by-step.
Starting seeds indoors doesn’t have to be intimidating. It’s actually a really simple process that can be done within most people’s homes. If you have a space where you can dedicate a couple of containers and a light for a few months, then you can start seeds indoors.
Not only will I go into what supplies you need, but also the whole planting and growing process. Then there’s also the part of hardening of these young seedlings.
The sections in this article will also include links to supporting articles (if applicable) where you can deep dive into each particular topic, if you so choose. So let’s grab a packet of seeds and get growing!
What Seeds To Start Indoors – Indoor Seed Starting 101
Not all seeds are right for starting indoors. Some need to be sown directly outside in the garden soil for the best success. Examples of crops that should be directly planted by seed in the garden and not started indoors include sunflowers, sweet corn, green beans, beets, carrots, radishes, dill, and more.

One reason is that some varieties of crops don’t like to have their roots disturbed. So when you go to transplant them outside, they can struggle to establish and grow. Another reason is that the seeds are so easy to germinate and grow outside that if you start them inside, you’re pretty much wasting your time and resources.
Then there are some crops that can be started both indoors or directly sown. For example, I often start cucumbers indoors. When I go to transplant them outside in the garden, I also pop in a few seeds at the same time. Most often, the transplants take a bit to become established. By the time they do, both methods are growing at the same rate.
If you want to go more in-depth on what plants to start indoors, which ones to plant outside, and which can do both, check out my article, “Seeds To Start Indoors In Late Winter & Which Ones To Direct Sow”.
When To Start Seeds
When you start seeds indoors will depend on what your Last Frost Date is and what type of seed you are growing. Let’s briefly break down what I mean.
The Last Frost Date (LFD) is the average date that your location receives its last frost of the winter season. You can find out what your LFD is by visiting The Old Farmer’s Almanac. Just keep in mind this is an average, so you might want to add a week or two to this date.
For example, the LFD for my location is around the end of April/beginning of May. Since the LFD is an average, I aim to transplant my seedlings or directly plant seeds outside about May 15th. This is the date I need to keep in mind to know when to start my seeds indoors.
Once you have your date, look at the back of your seed packet. It will tell you how many weeks to start the seeds indoors before the last frost date. This timeframe will vary depending on the crop and sometimes even the particular variety.
As a general rule of thumb, most seeds need to be started between 4 and 8 weeks before your LFD. Again, this will vary depending on the plant. To make the process easier, I like to start seeds at two different times. Once for the seeds that take longer to germinate and grow, like tomatoes and peppers (those that need about 8 weeks), and then one for faster-growing crops like cucumbers (those that take around 4 weeks).
The Right Equipment – Indoor Seed Starting 101
This is my favorite category when it comes to talking about starting seeds because there is a lot more flexibility in your seed starting setup than most people realize. However, there are still a few basic things you need.
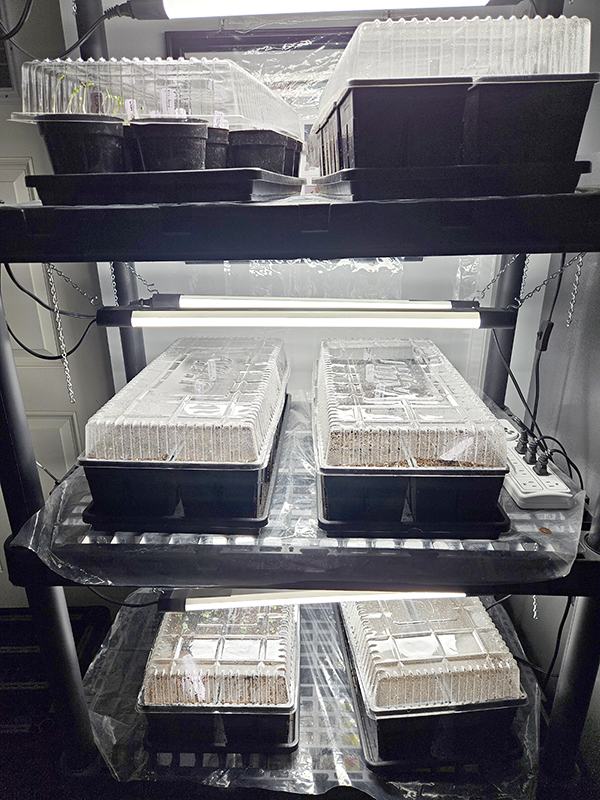
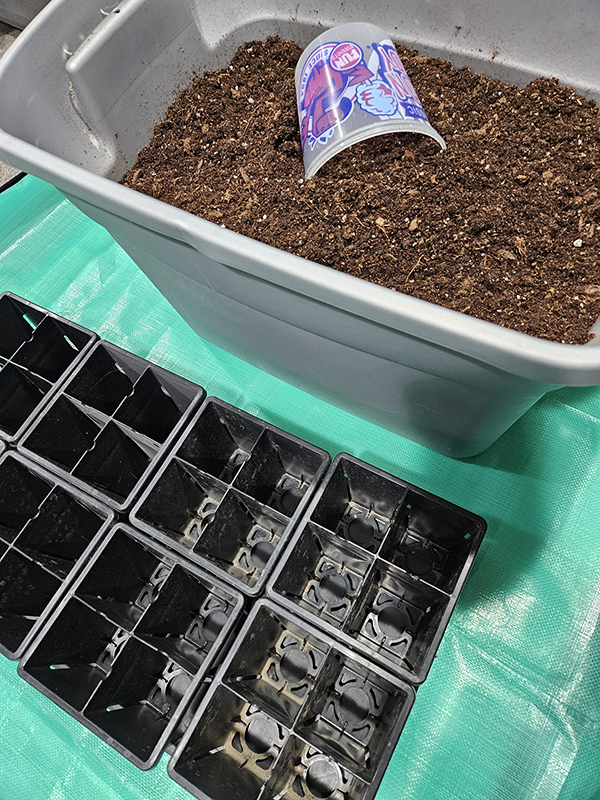
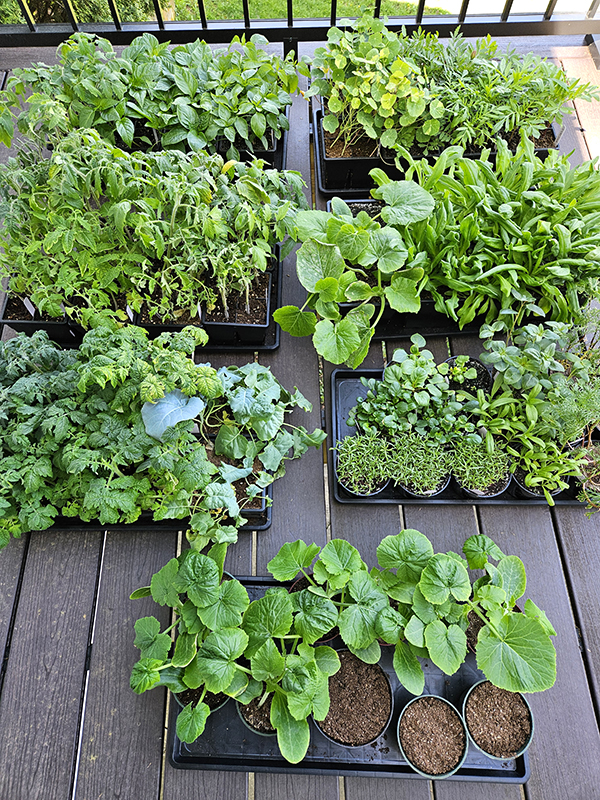
First off, you need containers to hold your soil and seeds. In all honesty, you can use almost any type of container as long as there are drainage holes in the bottom and room for the roots to grow. (I’ve even used empty toilet paper rolls to start seeds!) I do suggest you skip using those teeny tiny 64-cell trays you see in stores since they are just too small to be useful for long.
Now that I’ve been starting seeds for a few years, I have landed on Epic Gardening’s trays. They are made in the USA, durable, and will last me a lifetime. (No more flimsy containers that break after one season!)
I start most of my seeds in their 4-cell trays, where each slot measures 2-3/4″ wide x 4″ deep. Here’s that link for those trays if you are interested: Epic Reusable Seed Starter Tray, 16 pack (Product Link). I then transplant larger seedlings into their 4″ x 4″ containers.
Other Equipment Needed
You will be watering your seedlings often, so you also need a tray or something to set the containers on. Some store-bought containers come with bottom trays to catch drained water and extra soil, but you can use whatever you have on hand.
In addition to the bottom tray, you need something to cover the containers. This can be anything from a clear lid to a piece of plastic wrap. The purpose is to retain the soil’s moisture while the seedlings wait to germinate. Again, some store-bought containers come with lids, but the plastic wrap works just as well.
Next, you need a soilless seed starting soil. It should be lightweight and not have added fertilizers. If you are new to starting seeds, don’t worry about making your own soil mixtures. The bagged products you find in stores work just fine and are what I typically use as a base.
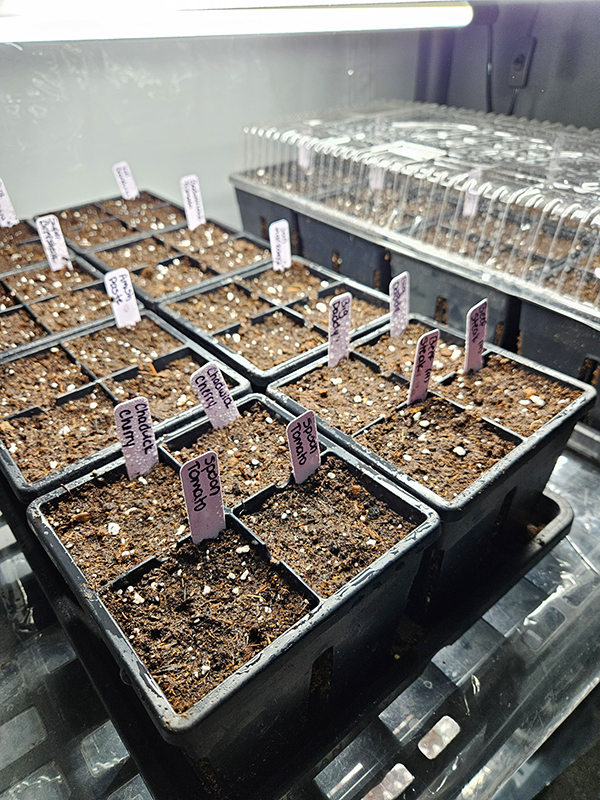
Another product you need is some type of labeling system. It is so easy to lose track of what crops you planted in which containers. I like to use plastic labels for each individual container, and these are the ones I recommend: 4 Inch Plastic Plant Name Tags for Seedlings (Product Link). However, you can also use masking tape and a Sharpie or whatever you prefer.
What About The Lights?
Now there’s the topic of the lights. You DO NOT need specific “grow lights” to successfully start seeds inside. Let me say that again, you do not need to spend loads of money on lights that are marketed as being “grow lights” for starting seeds.
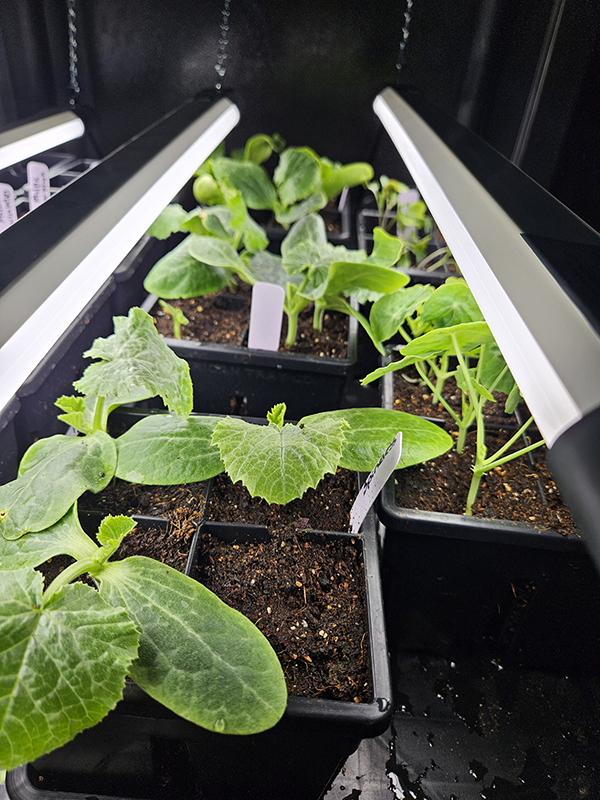
Basic LED or fluorescent shop lights work perfectly well for seed starting. I use inexpensive LED shop lights in my own setup. I purchased my lights at Menards, but you can find them in most big box stores and online.
The lights will need to be raised as the seedlings grow, so either create some sort of stand or hanging apparatus to place your containers on. (Most shop LED lights come with chains to make this process simple.) You can even prop the lights up using bricks.
If you want to read more in-depth about seed starting equipment and what I recommend, visit my article, “Seed Starting Supplies – 5 Things You Need To Start Seeds Indoors”.
Planting The Seeds
So you’ve got your supplies, and you know what variety of seeds to start indoors. Now the next part of the Indoor Seed Starting 101 guide involves actually getting the seeds into the soil. (I do have an entire article devoted just to planting seeds indoors that you can find here, “Starting Your Garden Seeds Indoors Series – Part 1: Sowing”.)
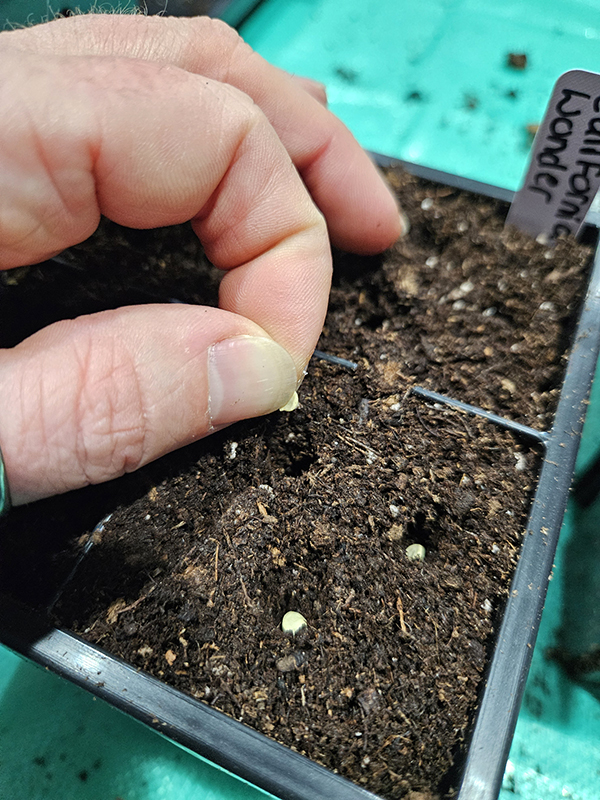
Start by moistening your seed starting soil with warm water. You don’t want the soil dripping wet, just moist enough to somewhat keep its shape if you squeeze it gently. Place the seed starting soil into the containers. I like to do this a few days before I want to plant the seeds. This gives the soil a chance to settle down a bit. Then just top it off with a bit more soil if needed on the day of planting.
Plant your seeds according to the package. Some require a depth of 1/2″, some need light to germinate, some need to be 1/4″ deep, and so forth. You can find this information on the back of your seed packet.
How many seeds you plant depends on the size of your container and what you are growing. In my 2- 3/4 x 4″ containers, I usually plant around 4 seeds if I’m growing something bigger like peppers or tomatoes. Smaller crops can be planted closer together.
Plant more seeds than you plan on transplanting into the garden. The reason for this is that most seed companies can’t guarantee a 100% germination rate. Some seeds just won’t sprout. Even if they do sprout, some might end up puny and weak.
Germination – Indoor Seed Starting 101
To help the soil retain moisture after the seeds are planted, cover the containers with a piece of plastic wrap or a clear lid. Keep the plastic on until the seeds germinate.
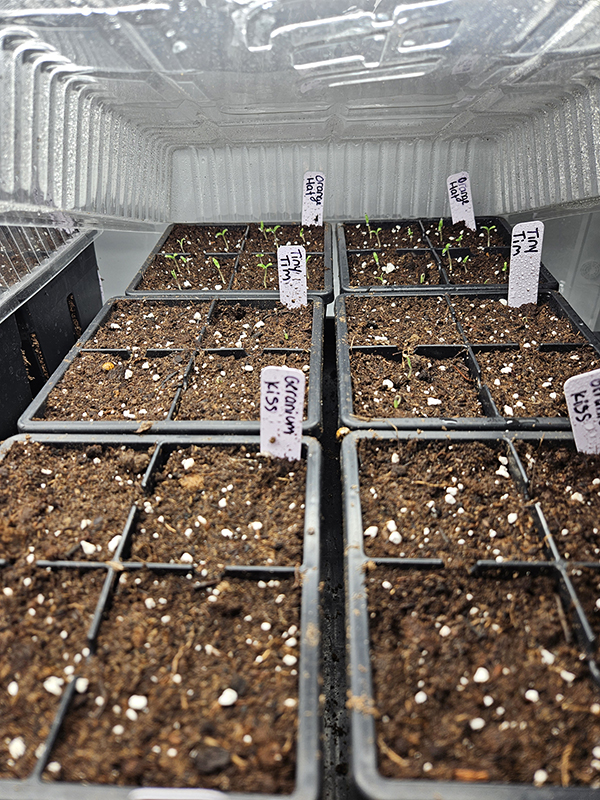
If none of your seeds require light to germinate, you can leave your grow lights off for the time being. If some do, go ahead and turn on the grow lights. The lights should stay on for 12 hours and be turned off for 12 hours. I like to use this timer so I don’t have to mess with remembering to turn them on and off each day: BN-LINK 8 Outlet Surge Protector with 7-Day Digital Timer (Product Link). A smart plugin that you can program will also work.
While you wait for germination to occur, keep the soil lightly moist. I like to mist the soil with water during this timeframe using this 2-liter sprayer, Chapin Handheld Pump Sprayer (Product Link). Use a light mist so as not disturb the soil and seeds. If you see moisture on the plastic, the soil is perfect and doesn’t need more.
Don’t be surprised if you want to spend way too much time checking on your seeds throughout the day. It’s always fun to watch for the first signs of green and any new growth thereafter! As soon as some of the seeds do start to sprout though, remove the plastic covers and turn those lights on. Continue watering the soil as needed.
Keeping Them Alive
Now that your seedlings have sprouted, congratulations! Your goal is now to keep them alive and healthy. (You can now deep dive into part two of my Seed Starting Series, “Starting Your Garden Seeds Indoors Series – Part 2: Growing”.)

To do that, start by making sure the soil stays moist but not dripping. It’s ok to let it dry some in between waterings. In fact, it’s better to underwater as opposed to overwater. For best results, bottom water your containers at this point. Place the containers in warm water for 20 to 30 minutes so the soil can soak up as much water as possible without disturbing the seedling. This will help prevent damping off (where the young seedlings die) and encourage the roots to grow down deep.
Keep the LED lights low, right above the top of the plants. We’re talking just an inch or two above your tallest seedlings. This helps to prevent the seedlings from getting tall and leggy. Use the light’s chain or blocks to raise the lights as the plants grow taller.
After your seedlings grow a few sets of true leaves, start providing some fertilizer. Store-bought fertilizers work just fine for beginners. However, use them at half strength. So if the package calls for 1 tablespoon, use only 1/2 tablespoon. If you are new to using fertilizers, I have a whole article all about that topic, “Understanding Fertilizers – What Does NPK Mean & How To Use It”.
Thinning Seedlings – Indoor Seed Starting 101
One of the hardest parts for most gardeners is thinning seedlings. Thinning is the process of removing the weaker, smaller seedlings so only the strongest ones survive. It’s also to keep the containers from being overcrowded, thus stunting all the plants’ growth.
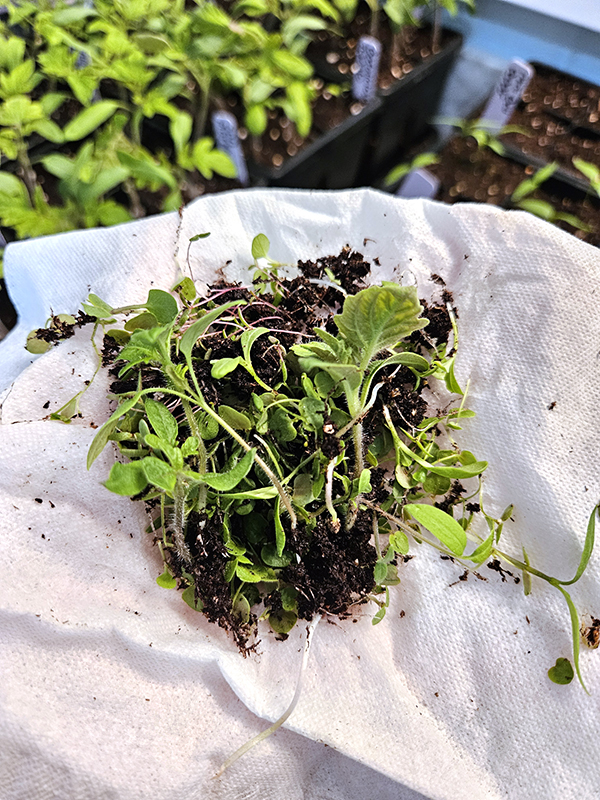
It is hard for most growers, no matter how many years we’ve been doing it! It feels like we are getting rid of our babies that we’ve planted and watched grow for so long now. However, this step is important for the health of your other plants.
Wait to start this process until the seedlings have at least a couple of true leaves. When thinning seedlings, I’ve learned it’s best to cut the plants off right at the soil level. I find this much easier and safer because attempting to pull the entire plant and roots out can disturb the soil and thus the seedlings you want to keep.
For my 2-3/4 x 4″ containers, I usually only keep one to two plants for most crops. I can keep a few more in my 4″ containers.
This is also a good time to replant smaller seedlings or those grown close together into larger containers. (Like me, transplanting from the 2-3/4 containers to 4″ containers.)
Hardening Off Process
Hardening off is the process of getting the seedlings ready for the outdoors. It’s also part 3 in my Seed Starting Series, so check out this article for more in-depth information, “Starting Your Garden Seeds Indoors Series – Part 3: Hardening Off”.
Up until now, your indoor started seedlings have been pampered and sheltered. Controlled temperatures, lights on and off at regular times, proper waterings, and so forth.
However, Mother Nature is nothing like that! Rain, wind, changing temperatures, bugs, and even shade and sun can cause stress to new, young plants. So you have to prepare the seedlings for this transition outside before planting them in the garden.
Steps I Take – Indoor Seed Starting 101
I start the hardening off process while the seedlings are still growing indoors. Set a fan up and have it blow on the plants for a few hours each day. This helps to mimic the wind outside and strengthens the stems.
Then, about two weeks before you want to plant the seedlings outside, start moving the seedlings outside to a protected space when the weather allows. (For me, this timeframe is around late April to early May.) Temperatures should be in the upper 50s to 60ºF during the day. Bring the seedlings back inside at night or if it is going to rain.
Slowly start to transition them to their future growing location, giving them more sun and exposure as days go by. Still water plants as needed and protect them during inclement weather. Eventually, if the temperatures allow, leave them outside all night long.
Time For Planting!
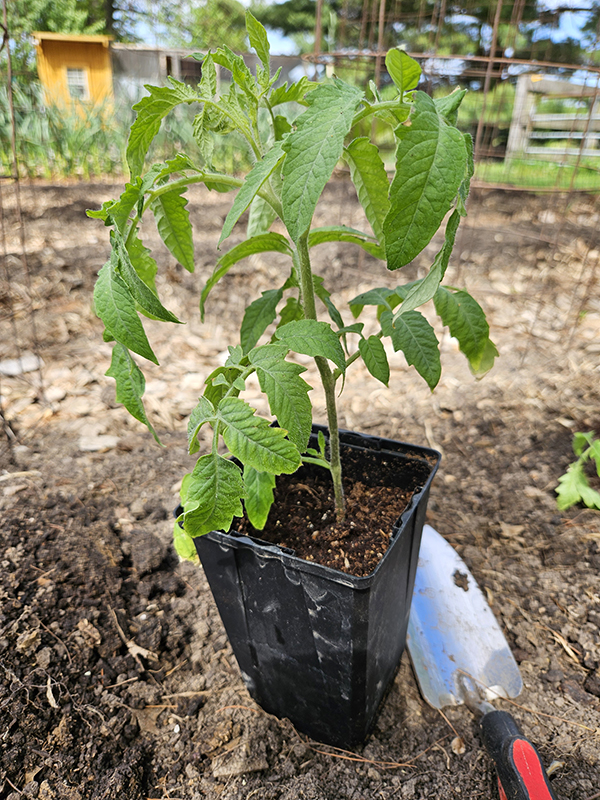
Once your Last Frost Day is over and the extended forecast looks like temperatures are staying in the 60s or above even during the nighttime, get those seedlings planted out in their final location in your garden. There is no point in planting crops early if the soil and air temperatures are still too cold. The plants will only be stunted or fail to establish. (I have all sorts of articles about planting specific crops, so be sure to check those out.)
Hopefully, this Indoor Seed Starting 101 article helps walk you through the whole process step by step. Be sure to check out the linked articles if you need more in-depth information about any particular step or part of the process.
If you are still nervous about starting seeds indoors, just start small. Choose just a couple of crops you enjoy growing and start with those. (Tomatoes are a great, easy crop to try first!) Don’t try starting all your seeds in the first year! It’s ok to still purchase some of your seedlings at garden centers or nurseries. Supporting local businesses is still important!
However, I have a feeling that once you get the hang of indoor seed starting, you will be hooked and want to try all sorts of new and exciting varieties that you might not have had access to if you only had seedlings that the garden centers offer. (And you can start your own saved seeds for an even more fulfilling process! But that’s a discussion for another article!)
Until next time, thanks for stopping by!
– Chelsea