Skip baking multiple batches of chocolate chip cookies and instead make one HUGE, easy-to-make cast iron skillet cookie that’s soft, chewy, and oh so chocolatey!

Are you tired of measuring out multiple individual cookies onto baking sheets and waiting for each batch to bake? If so, then a cast iron skillet cookie is the perfect alternative! You simply mix the ingredients together and add the dough to a large skillet to bake. You don’t even need to chill the dough!
It’s quick, simple, yet just as delicious as traditional cookies! (Even moreso if you ask my kids!) The best part is that you can enjoy the cookie as-is straight from the skillet, smother it in ice cream for an even more decadent treat, drizzle on extra melted chocolate and whipped cream, or top it with frosting for a personalized cookie cake!
Not hungry enough to finish the cookie in one sitting? Simply refrigerate or freeze the leftovers to enjoy whenever the mood strikes for chocolate! It is sure to become a go-to recipe that you will want to have on hand.
WHY MAKE THIS RECIPE?
- Easy To Make – The recipe uses basic, pantry-staple ingredients.
- No Multiple Batches – Only one batch of dough and one bake time.
- It’s Delicious! – I mean, come on! It’s a HUGE chocolate chip cookie! What’s not to love?
What Makes A Cast Iron Skillet Cookie Different?
With traditional cookie dough, you typically need to portion out each individual cookie, making sure they are consistent in size and shape. For most recipes, that also means baking multiple batches of cookies before all of the dough is used up. Not only does this take time, but baking more than one tray of cookies can sometimes lead to inconsistent results.
Sure, individual cookies can be great at times. You can share them easily with friends and family or take them to potlucks or bake sales. It’s also a lot easier to portion control individual-sized cookies. In fact, I love making my Sourdough Discard Chocolate Chip Cookies as a fun sweet treat.
However, sometimes you just want to enjoy the delicious flavors and comforts of a chocolate chip cookie fast and without all the extra fuss and time required. That’s where this easy cast iron skillet cookie comes into play!
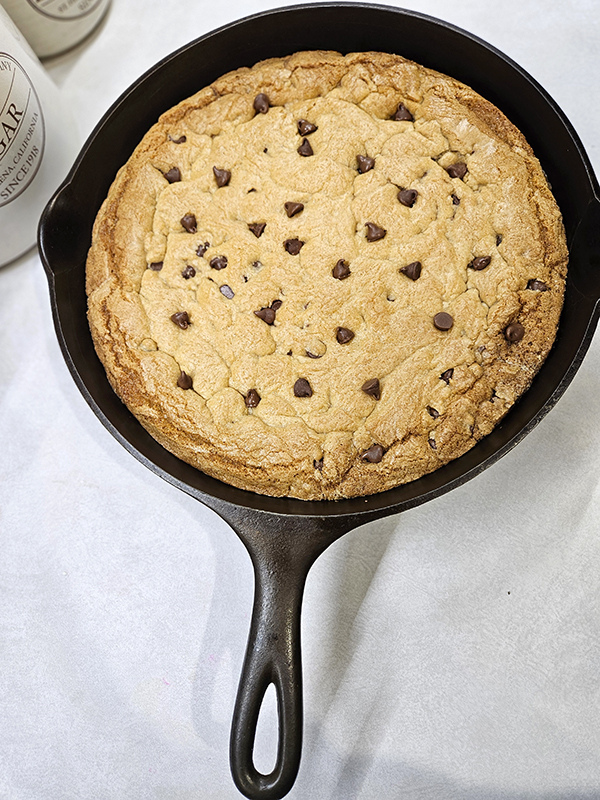
It’s one batch of cookie dough added to one large skillet. The skillet goes into the oven to bake. When it’s done, you are left with a huge cookie to enjoy as you please! So be sure to save, print, or bookmark this recipe because it is one you will want to revisit often!
Recommended Equipment
Besides your typical mixing bowl or stand mixer, you only need one other piece of equipment to make this easy cast iron skillet chocolate chip cookie. That is an oven-safe skillet.
A large, 12-inch cast iron skillet is perfect for this. (Any oven-safe skillet works. However, cast iron is durable, lasts a lifetime, and can go in and out of your oven with no issues at all. I love using my 12″ Lodge skillet for this recipe and so many others (Product Link): Lodge 12 Inch Cast Iron Skillet.
Are you new to cooking with cast iron? Don’t worry, because I have multiple articles about cleaning, restoring, seasoning, and cooking with cast iron. I suggest starting with this article to begin with, “Cooking With Cast Iron – 5 Simple Steps To Cook Like A Pro!”
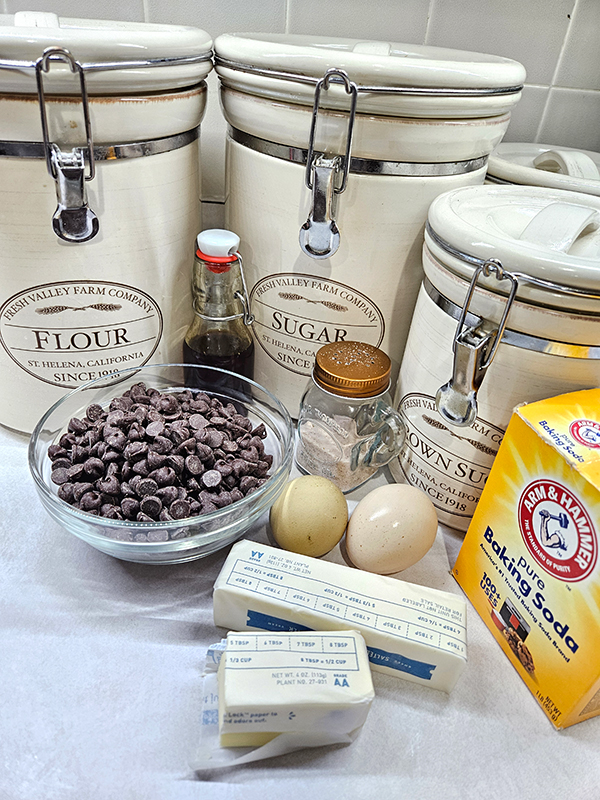
Ingredients For Cast Iron Skillet Cookies
Just like typical chocolate chip cookies, this easy cast iron skillet cookie only requires a few basic pantry ingredients.
- Brown Sugar – The brown sugar helps to add a deeper, caramel-like flavor to the cookie, as well as adding moisture. Use either light or dark brown sugar.
- Granulated Sugar – Granulated sugar provides the cookie with a crispy edge and adds the perfect amount of sweetness.
- Butter – Use either unsalted or salted butter. I usually use salted because that is what we have on hand most often.
- Eggs – Allow your eggs to come to room temperature before using for best results.
- Flour – I recommend using all-purpose flour for this recipe. If you want to use bread flour, you can, but it will result in a chewier cookie.
- Vanilla Extract – Use real vanilla extract, or make your own like I do. (It’s delicious and so easy to do!)
- Baking Soda – The baking soda is the leavening agent in the cookie. Make sure yours isn’t expired, or your cookie might end up flat.
- Salt – A little bit of salt helps to balance out the sweetness from the sugars.
- Chocolate Chips – You can use either semi-sweet or milk chocolate chips. I usually prefer using semi-sweet whenever I make chocolate chip cookies (this cast iron skillet one included). However, it also depends on what I have on hand at the time! You can also use chocolate chunks if you prefer, but I’d stay clear of mini chocolate chips.
Step-By-Step Instructions
Preheat your oven to 350º Fahrenheit. Place about a tablespoon of butter into the bottom of a 12″ cast iron skillet. Set the skillet in the oven to melt the butter while you make the batter. Remove the skillet using pot holders as soon as the butter is melted so you don’t wind up with brown butter.

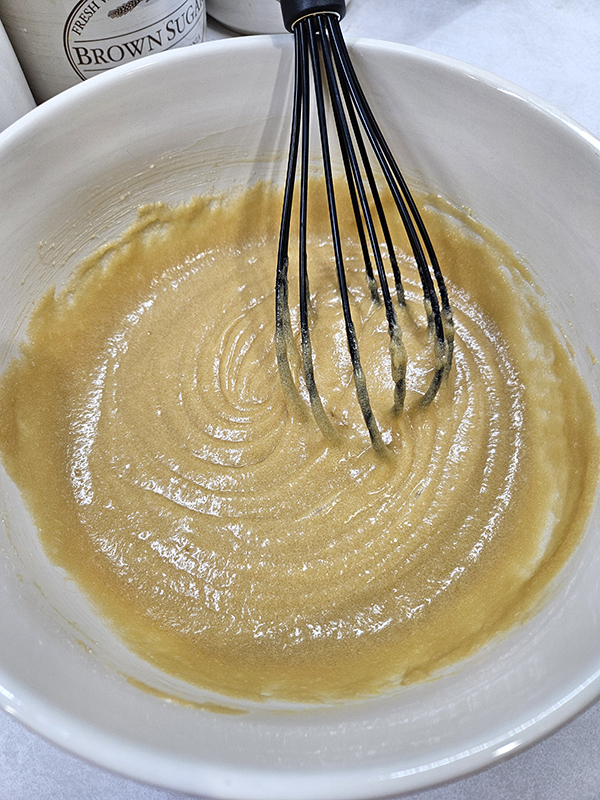
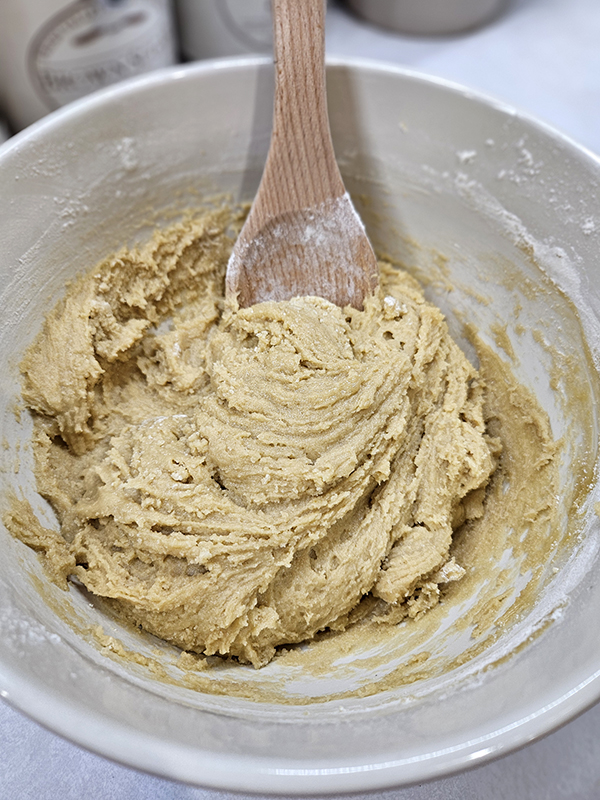
In a large bowl or your stand mixer, cream together the two types of sugar and the butter until it is light and fluffy. Now add your eggs and vanilla and stir until fully incorporated.
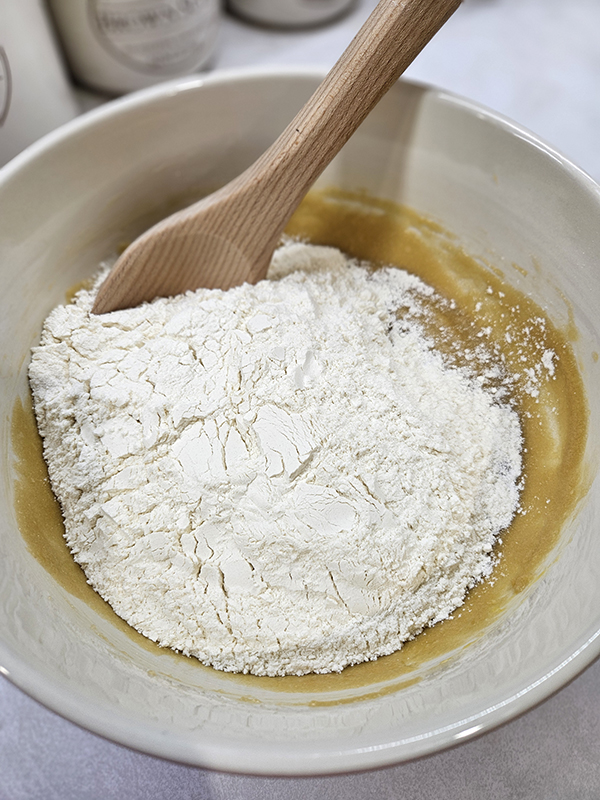
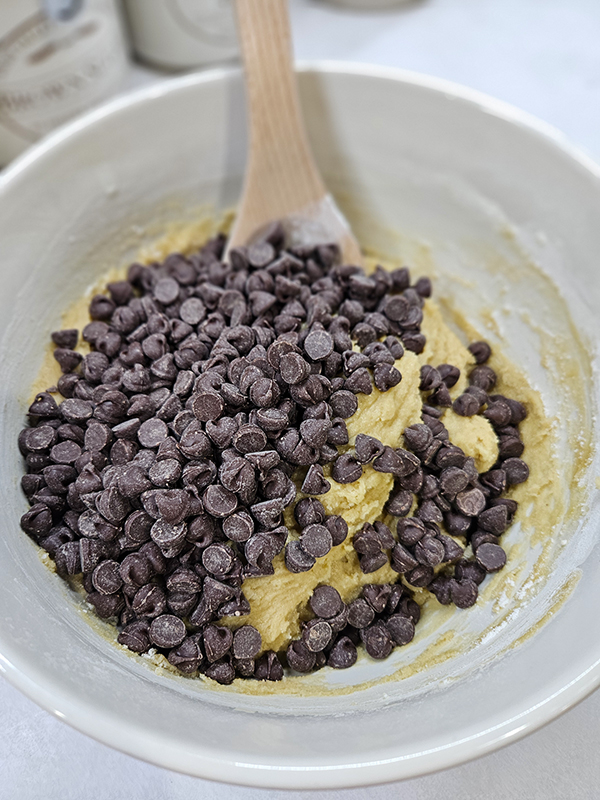
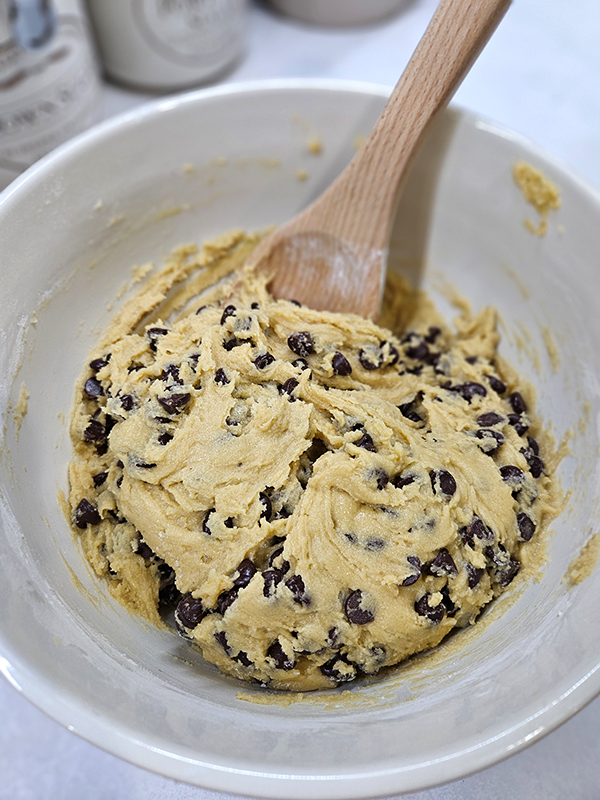
In another bowl, add the flour, baking soda, and salt and whisk together. Add the dry ingredients to the wet, stirring only until they are just combined. Don’t overmix your batter. Fold in the chocolate chips, reserving a small amount if desired to place on top after the cookie bakes.
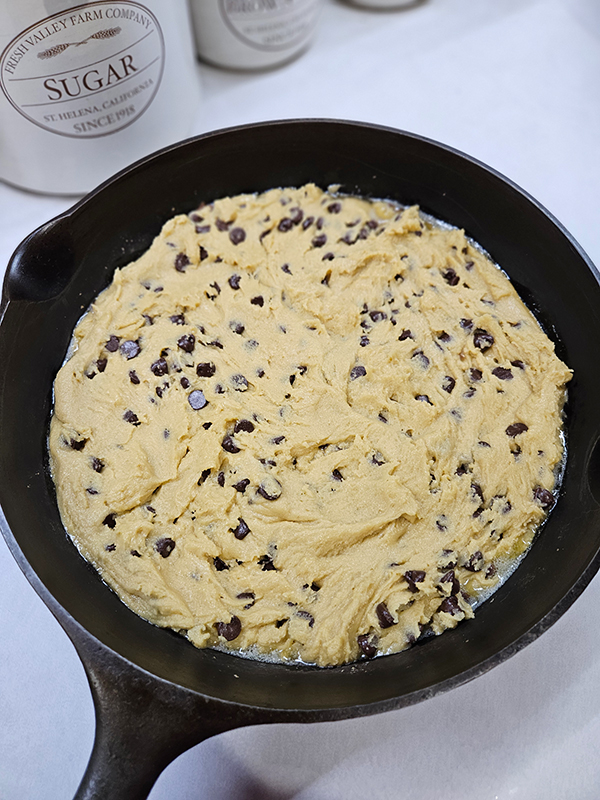
Carefully add the batter to the pre-heated cast iron skillet. Use the back of the spoon or a spatula to gently press the dough evenly around the skillet. Bake for 24 to 28 minutes or until the edges are nice and golden brown. Lightly press the extra chocolate chips on top of the cookie while it is still warm, if desired.

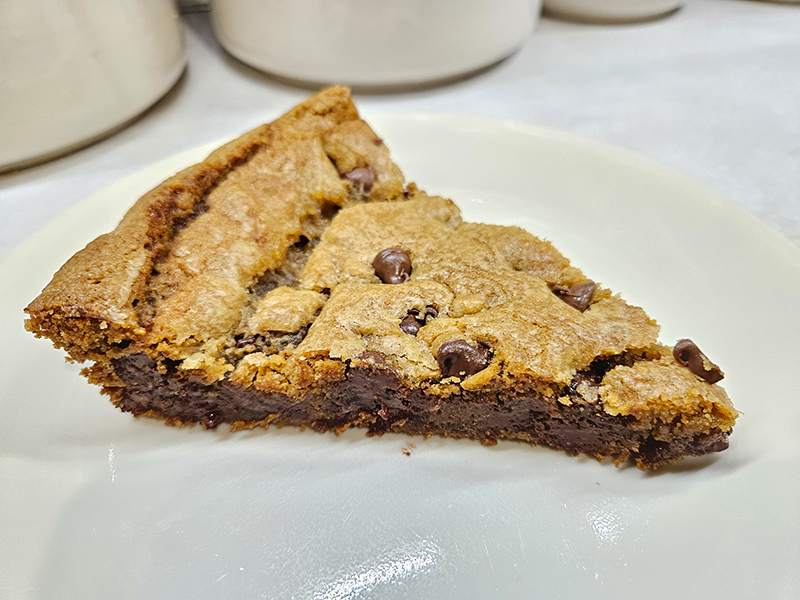
The middle of the cookie will still be quite gooey after baking. Enjoy it as-is if you like gooey cookies. (Just dig that spoon right in there!) Or, allow the cookie to cool to room temperature so it can set up before cutting and serving.
Allow the cookie to come to room temperature, then store it in an enclosed container or ziplock bag. The cookie should stay fresh for 3 to 4 days. You can also freeze the baked cookie if desired, but it may dry out slightly this way.
Commonly Asked Questions
Why isn’t the cookie setting up? That actually isn’t surprising for this recipe. Resist the urge to bake the cookie for longer. Instead, just give it a bit more time to set up in the skillet out of the oven before serving. We actually prefer to serve this skillet cookie at room temperature. It stays soft and has the perfect consistency that way.
Why is the cookie stuck in the skillet? Make sure to oil or butter both the bottom and sides of the skillet before adding the cookie batter. A well-seasoned skillet should act just like non-stick cookware. (If you are struggling with sticking food in cast iron cookware, see my article to fix the issue: “How To Season and Reseason Cast Iron Cookware”.)

How do I store the baked Cast Iron Skillet Cookie? Allow the cookie to come to room temperature, then store it in an enclosed container or ziplock bag. The cookie should stay fresh for 3 to 4 days. You can also freeze the baked cookie if desired.
Can I make the dough ahead of time? Yes, you can make and store the cookie dough in an enclosed container in your refrigerator for a week or so until you are ready for baking. You can also freeze the dough for up to 3 months. Allow it to thaw out overnight in your fridge before baking. You might need to add a few extra minutes to the bake time if baking straight from the fridge.
Will a smaller skillet work? This recipe is specifically made for a 12″ skillet. I do not recommend downsizing to a 10″ because it might not bake properly. However, you can half the recipe and use an 8″ skillet if you have one on hand.
Until next time, thanks for stopping by!
– Chelsea
*This post may contain affiliate links. These are products I have used personally and highly recommend. As an Amazon Associate, I may earn a small commission from qualifying purchases if you purchase items through my links. These links and the ads on this page help to support my family and our semi homestead, so Thank You!

Easy Cast Iron Skillet Cookie
Ingredients
- 1 cup brown sugar
- ½ cup granulated sugar
- ¾ cup butter (plus 1 Tbsp for the skillet)
- 2 large eggs
- 1 Tbsp vanilla extract
- 2 cups flour
- 1 tsp baking soda
- ½ tsp salt
- 12 ounces chocolate chips (or 1 bag)
Instructions
- Preheat oven to 350º Fahrenheit. Place 1 Tbsp of butter into the bottom of a 12" cast iron skillet. Set the skillet in the oven to melt the butter while you make the batter. Remove the skillet using pot holders as soon as the butter is melted.
- In a large bowl or your stand mixer, cream together the sugar and butter until it is light and fluffy. Add your eggs and vanilla and stir until fully incorporated.
- In another bowl, add the flour, baking soda, and salt and whisk together. Add the dry ingredients to the wet, stirring only until they are just combined. Don't overmix your batter.
- Fold in the chocolate chips, reserving a small amount of chips if desired to place on top after the cookie bakes.
- Carefully add the batter to the pre-heated cast iron skillet. Use the back of the spoon or a spatula to gently press the dough evenly around the skillet.
- Bake for 24 to 28 minutes or until the edges are nice and golden brown. The middle of the cookie will still be quite gooey after baking. Lightly press the extra chocolate chips on top of the cookie while it is still warm, if desired.
- Enjoy it as-is or allow to cool to room temperature so it can set up before cutting and serving.
- Store the cooled cookie in an enclosed container or ziplock bag. You can also freeze the baked cookie if desired.