
When it comes to cooking with cast iron skillets and pans, a little bit of basic knowledge can go a long way! Without it, you will often be left extremely frustrated, stressed, and feeling like a failure when you first start using cast iron.
Cast iron can be one of the trickiest types of cookware to work with, especially when starting out. However, these heavy-duty workhorses can be put through the wringer only to get better and better with each use.
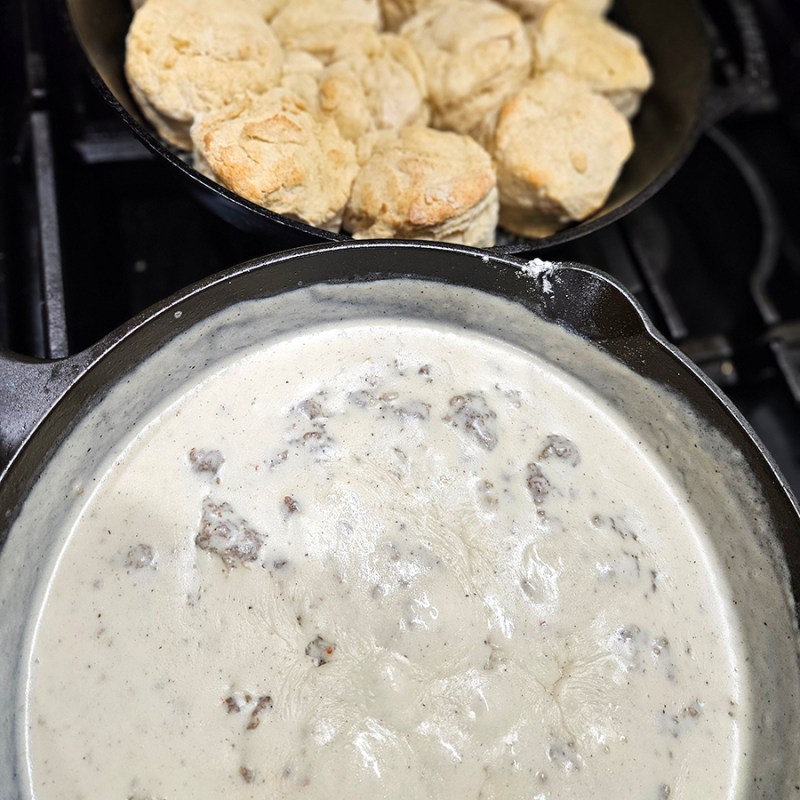
When I first started using cast iron, I had a goal of getting away from non-stick cookware that constantly was getting scratched, warped, and basically needed to be replaced after just a few years. This led to me purchasing my first ever modern cast iron skillet.
I was so excited to get this new pan. But once it arrived, the heavy monstrosity sat in my cupboard unused, basically because I was too intimidated. Once I did work up the courage to finally test drive it, I was left with stuck-on food and burnt bits all over the pan.
Needless to say, the pan quickly went back in the cupboard for a while longer!
No Looking Back!
Fast forward to today, and I feel like I finally have a pretty good handle on cooking with cast iron. It’s been over a year now since I’ve cooked with anything but a cast iron skillet and I’m never looking back!
I want to share my 5 tips and tricks that work for me to hopefully give you the confidence to start the transition to cast iron cookware yourself, without all the frustration and stress that I went through!
Modern Day Cast Iron Versus Vintage Cast Iron
First off, let’s talk a little bit about modern cast iron versus vintage cast iron cookware. There are some big differences that could alter how successful you are with using the cookware.
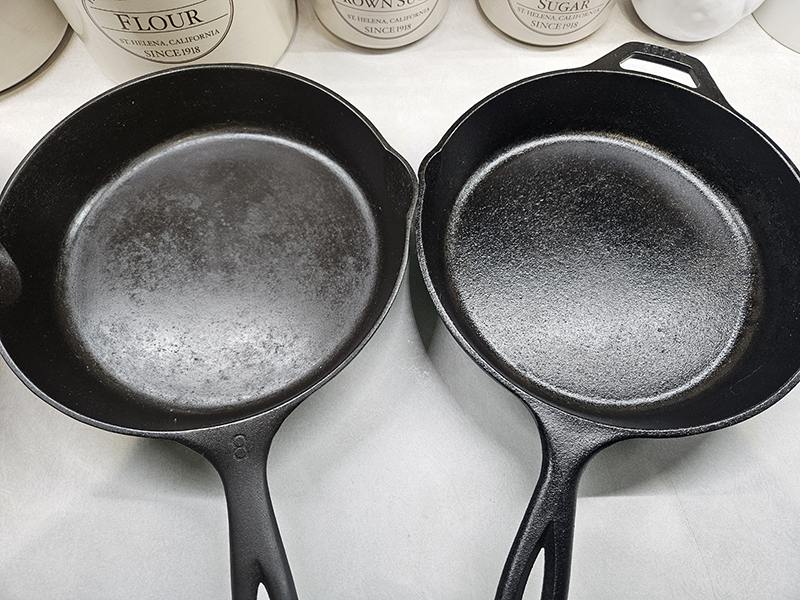
I have several of both types of cookware. The modern-day skillets I have are Lodge brand and can be purchased at most all retailers, including Amazon for relatively inexpensive. I have both a 12-inch skillet as well as a 10.25-inch skillet. (Product Links: Lodge 10.25 Inch Cast Iron Pre-Seasoned Skillet and Lodge 12 Inch Cast Iron Pre-Seasoned Skillet)
While $30 might sound like a lot for one pan, you have to remember that cast iron is made to last. This single pan will be the last one in that size that you will ever need to purchase again. That is as long as you take care of it properly. So over the course of your lifetime, a $30 investment doesn’t sound that bad!
Most modern-day cast iron skillets tend to be a bit heavier than vintage ones. This can pose a problem because the larger the skillet is in diameter, the heavier and more awkward it can be to lug around.
In addition, most modern cast iron skillets come “pre-seasoned”. They have a rougher, almost sand-like texture to the cooking surface due to skipping the step in removing their sand cast finish to save on costs. (If you want to learn how to remove this texture by yourself, check out my article, “Refinish A Modern Cast Iron Skillet So It Works Like A Vintage One“
Vintage Cast Iron Skillets
Vintage cast iron skillets, on the other hand, are often lighter and easier to use. In addition, the cooking surface is smooth like glass. It’s a difference that you can not only see but also feel if you were to compare the two. This is important when it comes to cooking with them, as you will see in a bit.

I was handed down my late grandma’s cast iron skillets and pan. They were in pretty rough shape when I got them due to recent unuse and years of oil and grease buildup before that. So I had to restore the pans back to their original condition – a process that I wrote about here: “How To Easily Restore Cast Iron Cookware Using Your Oven“
If I could pick between vintage or modern cast iron, I would hands down choose vintage every time. There’s just something about the workmanship and the quality of the older pans that can’t be replicated anymore with today’s technology. My vintage pans seem to conduct heat more evenly and just do a better job of cooking foods.
Either way, these tips will work for both types of cookware. Just maybe make sure to keep your eye out at any local estate or yard sales for those vintage cookware treasures! They just don’t make them like they used to! (Does that statement make me sound old!?)
5 Ways To Cook With Cast Iron Cookware Like A Pro
#1 – Seasoning Is Key
When we usually talk about “seasoning”, we are referring to salt, pepper, and other spices. However, with regard to cast iron cookware, “seasoning” refers to the oil or fat that is used to give the pan a non-stick surface.
There are tons of different products that you can use for seasoning cast iron. The most common are tallow, bacon grease, shortenings, vegetable oil, avocado oil, grapeseed oil, and so many other options. (I will write a whole separate article on all the different types in the future.)

Some cast iron aficionados get into heated debates on which seasoning is superior. However, you just need to choose the one that you are comfortable using and that you find works well for you and your family.
The key though is to choose an oil or fat with a high heat point. I personally have used multiple different types of seasoning with good results. Most often, I vary between animal fat, Crisco, and simple vegetable oil. But as always, you do you!
Add your seasoning prior to cooking and heating up your skillet. Some people will tell you to get the cast iron cookware hot before you add your seasoning, but I tend to have better luck with adding the fat and then getting the heat going.
#2 – Preheat Before Cooking
In order to help prevent foods from sticking, you want to preheat your skillet before cooking. Adding your food to a cold skillet will inevitably end up with stuck-on bits and pieces.
After you add plenty of seasoning to the pan, allow it to come to its smoke point. If you were to look closely (and carefully) at the oil, you could actually see it smoking slightly. Proper seasoning plus smoking hot cast iron cookware equals good cooking!
Once the seasoning is nice and hot, you can start cooking with it. Don’t forget to season the sides of the pan as well, especially if you are cooking something that will be coming into contact with the sides.
3. Add Food & Cook
Now it’s time to start cooking. Usually, once I add the food, I allow it to sit in the skillet untouched. Let the food start to cook and heat up before you mess with it much.

For example, when I cook a steak, I allow the steak to heat up on one side before I ever mess with it. If I try to nudge the steak and it doesn’t budge, I know that the sear hasn’t happened and I need to give it a little longer. But once the steak can be moved around a little in the pan, there will be a perfect non-stick sear and I can flip the steak to the other side.
The same goes when cooking other foods like ground beef or eggs. I allow them to sit in the oil or fat for just a little bit before messing with it.
With foods that have sauces or liquids, I do stir those soon after adding to the pan though to prevent the bottom from scourching.
4. Clean The Cast Iron Pan After Cooking
Once the food is done cooking, it’s best to clean your cast iron pans as soon as you can while the pan is still hot.
If there are no food pieces stuck to the cast iron, you can simply wipe the pan clean with a paper towel or clean cloth. For example, when I am frying eggs, I usually have nothing left in the pan other than some salt or pepper. Those are quickly wiped out along with excess oil or fat and the pan is good to go.

However, sometimes you will need to do a bit more cleaning or even scrubbing. If you have any larger pieces left in the pan, scrape those out and toss. Wipe any excess oil with a paper towel to prevent it all from going down your drain.
Then, wash your hot pan in hot water. The hotter, the better because the fats or oils you use as seasoning will become gummy or start to solidify if you use cold water.
Some people like to use coarse salt and a paper towel. I however just use a scraper or even a Scrub Daddy to clean the pan out and hot water along. (The Scrub Daddy is a modern product that works great for cast iron cookware! I think my late grandma would approve!) One or two swipes are usually all it takes to remove any excess gunk or food particles. (Product Link: Scrub Daddy Color Sponges)
5. Dry & Reseason – Cooking With Cast Iron
Lastly, you want to make sure to dry your cast iron cookware fully. Any moisture will quickly start to cause the pan to rust. I usually take a towel and dry the outside of the pan right after washing. Since the pan is still hot at this point, the residual moisture dries quickly.
You can help speed up the drying process by placing the pan back on your stove and turning it on low to help evaporate the moisture. Flip the skillet and do the same to the other side until the pan is dry.
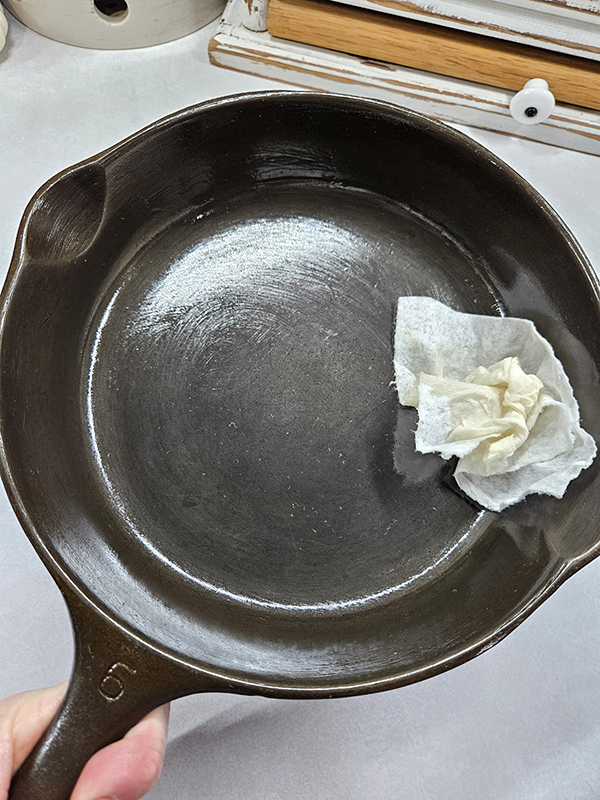
Once the pan is fully dry, it’s time to reseason the skillet. Again, use any type of fat or oil with a high smoke point. Wipe a thin layer all over the entire surface of the cast iron – top, bottom, sides, and any handles. Your cast iron cookware is now ready for storing!
Cast Iron Is The Best!
With regular cooking and proper maintenance, your cast iron cookware will only become better with age. This is one kitchen product that you will be able to use for years to come and possibly even pass down to your own kids someday!
Until next time, thanks for stopping by!
– Chelsea
*This post may contain affiliate links. These are products I have used personally and highly recommend. As an Amazon Associate, I may earn a small commission from qualifying purchases if you purchase items through my links. These links and the ads on this page help to support my family and our semi homestead, so Thank You!
Discover more from Semi Homestead Life
Subscribe to get the latest posts sent to your email.