Green bean plants are one of the easiest and most rewarding plants to grow in the garden. Not only are they simple to grow from seed, but the plants are extremely productive.
Whether you grow pole beans or bush beans, the plants can provide you with multiple harvests throughout the growing season. In fact, you can often get around 4 to 5 pounds of green beans from one bush bean plant and up to 10 pounds per pole bean plant! This allows for plenty of fresh beans for eating right away as well as some for freezing or canning.
Unlike most vegetable plants in your garden, green bean plants are planted by seed directly in the garden. No messing with starting seeds indoors or trying to successfully transfer seedlings from small containers into your garden soil.
The seeds germinate in less than two weeks in most cases and you are able to harvest your first green beans in just a few weeks. With proper planing, you can stagger planting dates to allow for consistant harvesting all summer long. Or, pull your first plants and do a second planting if your growing season allows enough time.
Green bean plants can grow in traditional in-ground gardens, in raised beds, or even in containers. This makes them the perfect plant for about any growing situation!
How To Plant, Grow, And Care For Green Bean Plants
Pole Beans Vs Bush Beans
There are two main types of green bean plants: Pole beans and Bush beans. There are some advantages and disadvantages to both types. Which type you grow will depend on your end goals as well as your gardening space.
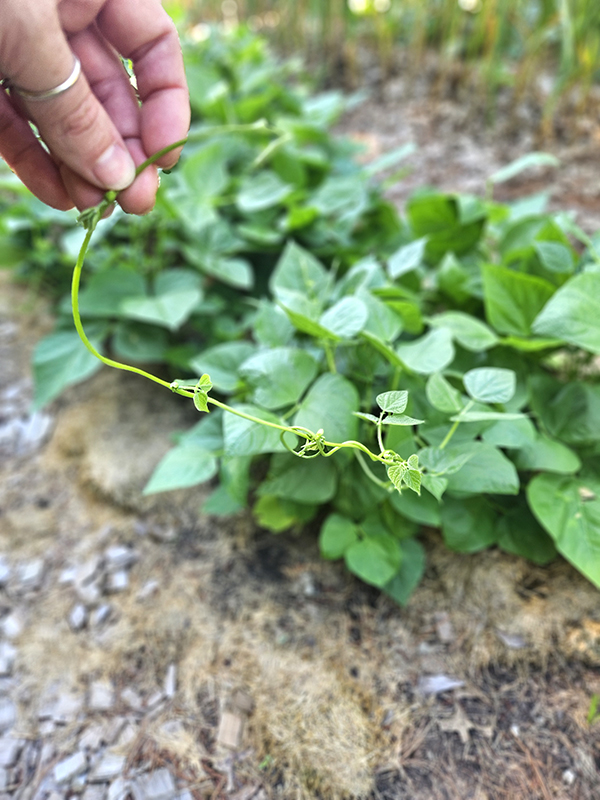
Like their name hints, pole beans have climbing habits that allow them to grow up trellises and other structures (like poles!). The vines can end up growing to around 10 to 15 feet long by the end of the growing season if you let them.
As the plants grow, they continue to push out beans, often resulting in a larger yield by the end of the season. Pole beans do require trellising. Otherwise, you will end up with a tangled mess of vines spreading out all over your soil. Not only will this be a pain for harvesting, but it also is an open invitation for pests to easily chow down on the plants.
Bush Beans (My Favorite!)
Bush beans, on the other hand, have a more mounding growth habit. They typically only grow to heights of around 2 feet and do not require trellising. This makes them a lot easier to maintain and grow. However, they do result in less yields.
Bush beans often have one large harvest and then a few additional harvests for a few weeks after. This makes them great if your goal is to can and put away a lot of beans at one time.
I normally grow bush beans because they work well with our growing rows garden setup. We can plant two rows of bean seeds per growing row, providing us with plenty of beans for harvesting.
My absolute favorite variety and one I plant each year is Blue Lake 274. They are full, hardy plants that produce loads of beans that each measure around 5 to 6 inches long with a delicious flavor and texture. (Product Link: Burpee Blue Lake 274 Bush Bean Seeds)
Planting Seeds – Green Bean Plants
As mentioned above, green bean seeds need to be planted directly in the soil. Do not start the seeds indoors or attempt to plant them via transplants.
Choose a location that receives full sun (at least 6 hours of direct sunlight each day). The more sunlight the better with these warm-weather-loving plants. Keep in mind surrounding taller plants that might shade out bush beans when planning your garden space.
As for the timing of planting, don’t go off of the weather and air temperature in the spring. Instead, wait until the soil is at least 55º Fahrenheit (12º Celsius) before planting.
The warm soil will allow the seeds to quickly germinate and start to grow. Planting too early when the soil is still damp and cold can result in delayed germination as well as seeds rotting. Patience is the key here!
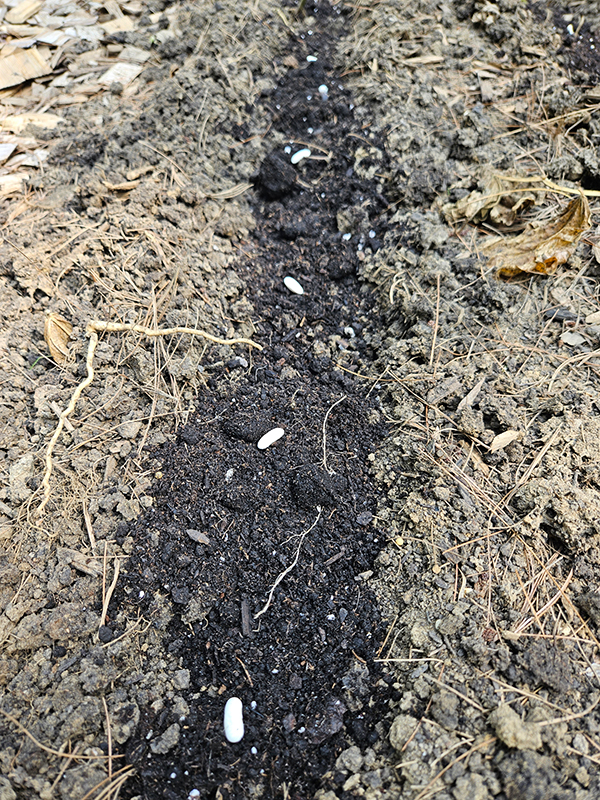
When it’s time for planting, loosen up the soil to allow for easy root growth. Once the soil is nice and loose, take the edge of a hoe and make a long trench that is about 1-2 inches deep.
Fill the trench with about an inch of finished compost. The compost will help to provide the seeds with easily absorbed nutrients right from the start.
Adding The Seeds & Mulching
Push the seeds into the compost so they are about an inch below the soil line. Space additional seeds about 4 to 6 inches apart. Some websites might suggest a larger spacing, but I find this amount to be about perfect without the need to pull extra seedings after germination.
Top the seeds with an inch of loose soil and gently tap down. Don’t compact the soil too much or the seeds will struggle to sprout. Water the rows well. For continual harvests, sow green bean seeds every two weeks.

As soon as we are done planting, we add mulch to our growing rows. We typically use grass clippings on the rows, leaving the space where the seeds are open. The clippings are usually readily available during the spring and an easy free resources for us.
You can also use straw or shredded leaves as mulch as well. The mulch will help to protect the soil from weeds, regulate the soil temperature, and a whole host of other benefits you can read about here, “Why To Use Mulch In Your Garden – Weed Less & Improve The Soil“.
If using pole beans, set up your trellises now. If you wait until the green bean plants have already started growing, there is a good chance of damaging their establishing roots.
Caring For The Green Bean Plants
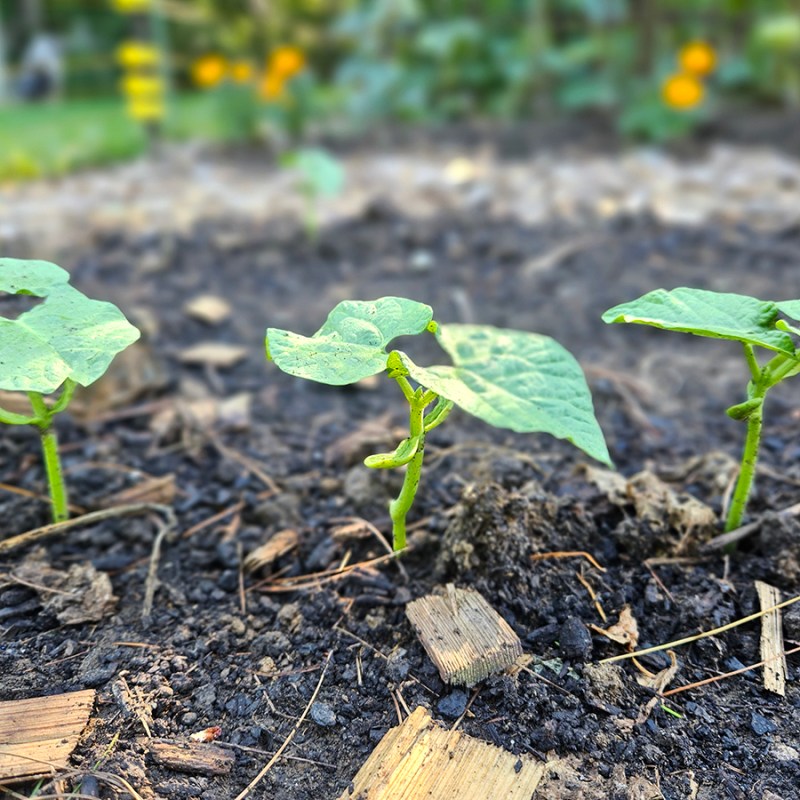
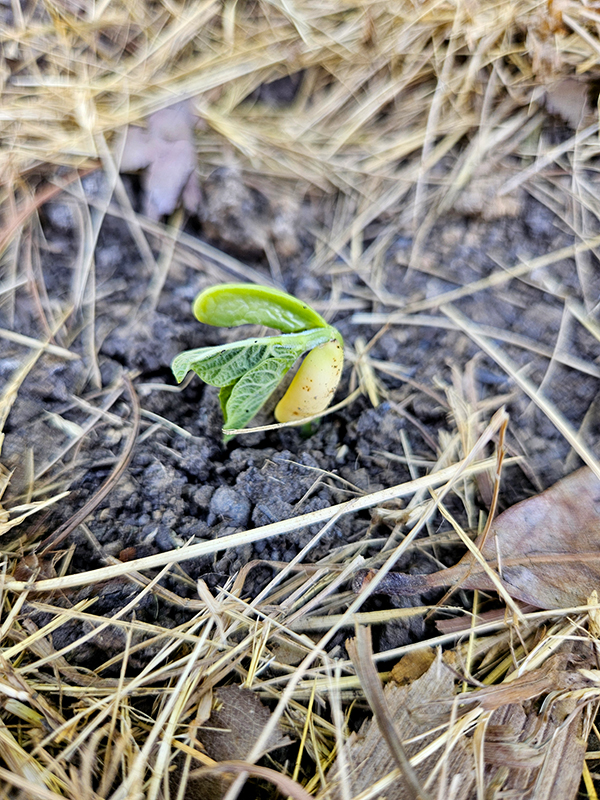
Green bean seedlings will start to germinate in around 8 to 10 days. Warm soil and air temperatures will allow for quicker germination. Keep the soil watered every couple of days until you start to see the seedlings pop up through the soil.
It’s at this time that the plants are most susceptible to pests and bugs. We have had lots of issues with rabbits chowing down on our green bean plants. Read more about that here, “How To Deter Rabbits – Keeping Bunnies Out Of Your Garden“.
When it comes to green bean plants, they are fairly easy to maintain throughout the growing season. The main goal is to keep them sufficiently watered.
When it comes to watering, water them at the soil line if at all possible. This helps prevent the moisture from hitting the leaves.
Also, water early in the morning before a sunny day. The sun will help to dry out the leaves, helping to prevent diseases that can flourish with excess moisture.
The green bean plants need about an inch of rain water or had watering every week. During the heat of summer, I usually water my plants every other day if it hasn’t rained.
Fertilizing & Weeding
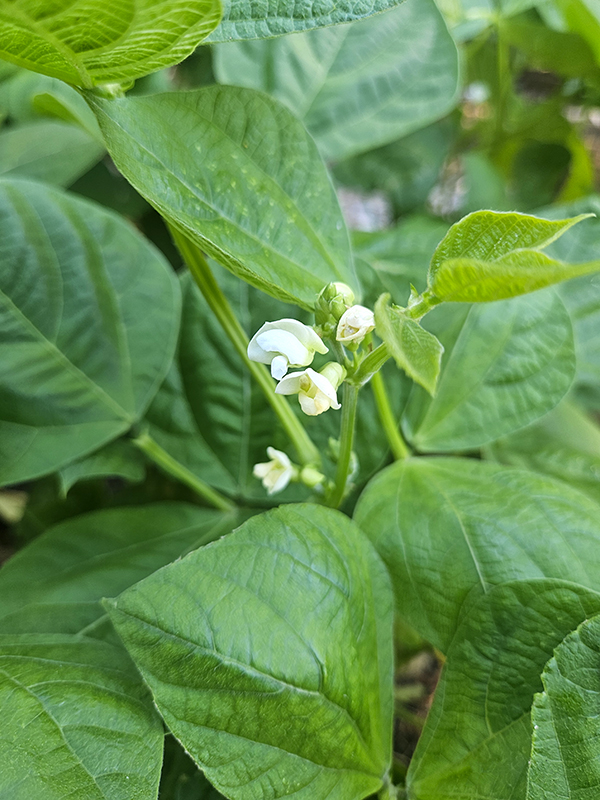
Because you add compost when planting, you don’t really need to fertilize until the plants start to set blooms. Adding more compost is always a good alternative to synthetic fertilizers. Avoid using a fertilizer with a high nitrogen number. Otherwise, you will end up with tons of beautiful foliage but not many blooms or beans.
Check your growing space regularly for weeds. Due to the plant’s shallow root systems, competing weeds can quickly become an issue and fight the plants for resources. The sooner you remove the weeds, the better.
Hopefully, you used a thick layer of mulch when planting. This will greatly reduce the amount of weeding needed. Keep the mulch layer around 3-4 inches thick all season long, adding more if needed.
Harvesting Green Beans
Green beans are typically ready for harvesting around 50 to 60 days after planting. This timeframe will be slightly different depending on the variety you are growing.
Again, with bush beans, you will have one main harvest and then several smaller ones. Pole beans will continue to push out pods all growing season long.
When it comes to green beans, the more often you harvest them the better. Frequent harvesting will encourage the plants to set new blooms. In addition, it allows the plant to focus its energy and resources on those new blooms and bean growth.

You might be surprised at how quickly the plants will start to set and mature beans! Don’t be surprised if you have to pick every couple of days in order to keep up.
How To Pick & Store The Beans
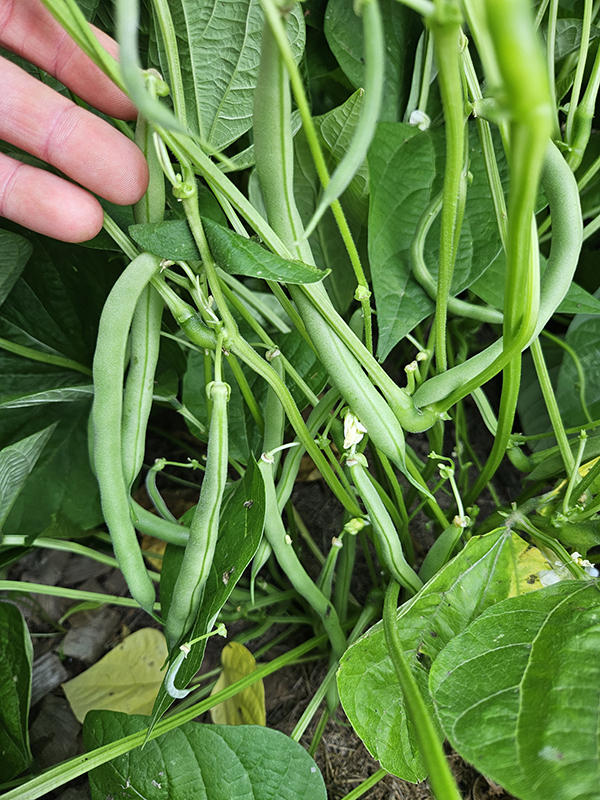
Pick the beans when they are still young and tender. You shouldn’t be able to see the seeds bulging from the pod. Waiting too long will result in beans that are tough, stringy, and have a woodier texture. About the size of a pen or pencil is ideal for most green bean varieties.
To harvest, simply grasp the stem with one hand and pull the bean pod off with the other. Using two hands will ensure that you don’t accidentally pull up the entire plant or break off too much of the stem (spoken from personal experience!). Green bean plants can easily be broken if you aren’t careful.
When you are harvesting from bush plants, make sure to look the plant over from all sides. It’s easy to miss a growing bean that might be hiding behind a few leaves.

Store unwashed harvested beans in a ziplock bag or airtight container in your refrigerator. Wash and trim them right before using. Consume, freeze, or process the beans within four days for the best flavor and results.
If you notice that your plants have stopped producing blooms, you can cut the beans from the ground and do a second planting if your growing location allows enough time. This will allow you to have multiple big harvests from the one growing season.
I hope this article helped and you decide to try planting, growing, and harvesting green bean plants this year!
Until next time, thanks for stopping by!
– Chelsea