While it might seem intimidating, starting your own garden seeds indoors is actually a lot easier than you might think! To help walk you through the process, I’ve put together a three-part series to show you everything there is to know. Welcome to Part 1 of Starting Garden Seeds Indoors: Sowing!

There are so many different ways to start seeds indoors, but it doesn’t need to be as complicated as some bloggers make it out to be. And, you don’t need to spend a ton of money on special equipment in order to still have success.
It really only takes a few simple items to grow seeds indoors. No expensive lights marketed as “Grow Lights”, no overpriced seed starting trays, no heating pads – nothing like that is required.
Sure you can definitely go to your local grocery store or nursery this time of year and purchase vegetable seedlings. Unfortunately, you are left choosing only the few options those stores carry. I don’t know about you, but there are so many different varieties of seeds and plants out there that I’d prefer to have more options than just what my local nursery offers!
I’ve put together my basic tips and steps I use to get your own seeds started indoors. Hopefully it can guide you through the process and allow you to avoid some of the same errors I made while learning (although I’m still learning). In this three-part series, you’ll learn the reasons why to start seeds indoors, how to go about sowing them, and how to transition them for outside planting.
Advantages Of Starting Seeds Indoors – Part 1
I’ve already mentioned the fact that you have almost an endless choice of different varieties you can pick from when you choose to grow from seeds. But what are some of the other advantages of going this route?

One of the best advantages is that seed packets are typically less expensive than purchasing seedlings. Yes, you can get some seedlings in a four-pack for just a few bucks, but you can get entire seed packets with 30-plus seeds for the same price.
Do you need 30 of the same plant this year? Probably not. However, the seeds can usually be saved and used for several years before you need to purchase new ones.
Other Advantages
In addition to cost savings and the option for more varieties, you can also grow seeds that you save from previous years. If you grow heirloom plants, you can dry and save those seeds from the previous garden and start them this year.
For example, last year, I saved some seeds from one of my favorite tomato varieties, Brandywine Tomatoes. Since they are an heirloom plant, I can dry out the seeds and store them safely. I know that when I sow them this year, I will get a copy of the same exact plant I saved the seeds from. (I plan on writing an article on how exactly I save those seeds later and I’ll be sure to link it here when I do.)
So with all of those advantages, let’s dive into how to start the seeds. I’ll go over everything from the materials you do need to get started and some tips that I’ve learned along the way (usually the hard way!).
Gathering Your Supplies – Starting Seeds Indoors Part 1
The first step in starting your garden seeds indoors is pretty obvious: You need to gather up all of your supplies. Ensuring that you have everything before you start can make the process a lot less frustrating (not that I speak from personal experience or anything)!
Containers
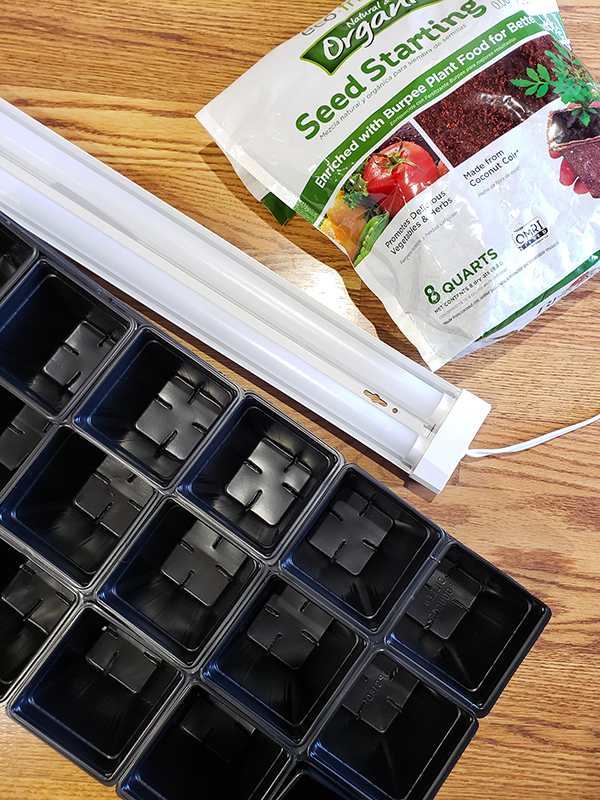
The first supply is some type of container to grow the seeds in. These containers can vary from actual seed starting trays like you see at your local stores to saved (and cleaned) yogurt containers.
I’ve even seen people start seeds in empty toilet paper rolls. Although I’ll be honest, I’ve tried using them once and I didn’t have any luck. I only ended up with moldy containers and stunted seeds. But you might have more luck than I did so don’t totally discard the idea!
The most important aspect of your containers is that they have drainage holes. Your plants need to be able to drain off excess water as well as absorb water for bottom watering (more on this later).
I typically use seed starting trays with cells that can be separated. They are inexpensive and have lasted for three years so far. I personally do not like using smaller cell trays. The ones I use have 18 cells for each 11×22″ tray. (The bottom tray is used to catch and collect water and soil that might have escaped through the drainage holes.)
Seed Starting Soil
Next, you will need some start of seed starting soil medium. You can make your own mixture or you can purchase pre-made bags. I just like to purchase the pre-made kind because I usually don’t have the time or energy to buy the items to make my own. The brand doesn’t really matter in my opinion.
Whichever route you go, both work just fine as long as the soil is lightweight and drains well. Just don’t use normal potting soil for starting seeds or your seeds might struggle. I also like to add some worm castings and/or compost to the mix as well to give the soil a bit of added nutrients.
Lights – Starting Seeds Indoors Part 1
This is the part of the supplies where people might differ in opinion. You can purchase lights that are labeled as “grow lights,” but you will have just as good of luck using basic LED shop lights. I purchased my 2-foot shop lights from Menards for less than $8.00 each on sale.
With my setup, I use two lights spaced a few inches apart per rack. The key is to keep the lights as low to the seedlings as possible. This allows the seedlings to grow slowly and stronger as opposed to growing tall and spindly as they would if they were reaching for the light.
The most important thing when it comes to lights is to avoid placing seeds on your windowsill. The seedlings will end up growing tall and thin since there usually just isn’t enough light to get to the seeds via windows.
Other Supplies
The other supplies you need will be, of course, your seeds, a way to water the containers, and some kind of clear plastic cover for the containers. (More on this later.)
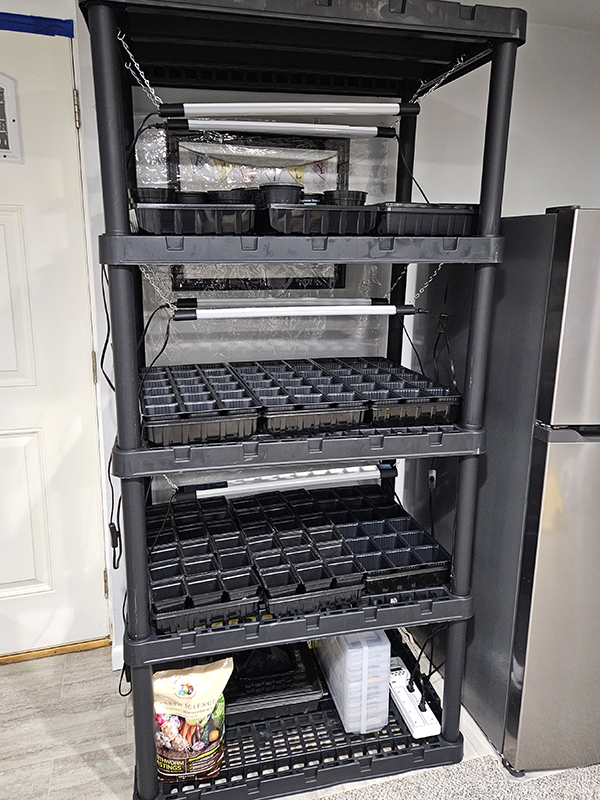
You also need a place to put your trays and to hang or support your lights. I used a multi-shelf plastic rack to hold my seed trays and lights this year, but you can use any spot that is flat and you can hang or support lights on.
We put together an inexpensive wooden frame two years ago using extra lumber we had lying around and some i-hooks. (I’ll try to put together a post on that before next year to show you a bit more about how we made it.)
There really is no right or wrong system to use. Your kitchen table even works great, but you might have to enjoy your meals somewhere else for a few weeks!
Sowing Seeds – Starting Seeds Indoors Part 1
Now that you know what supplies to use, let’s get growing!
Filling the Containers
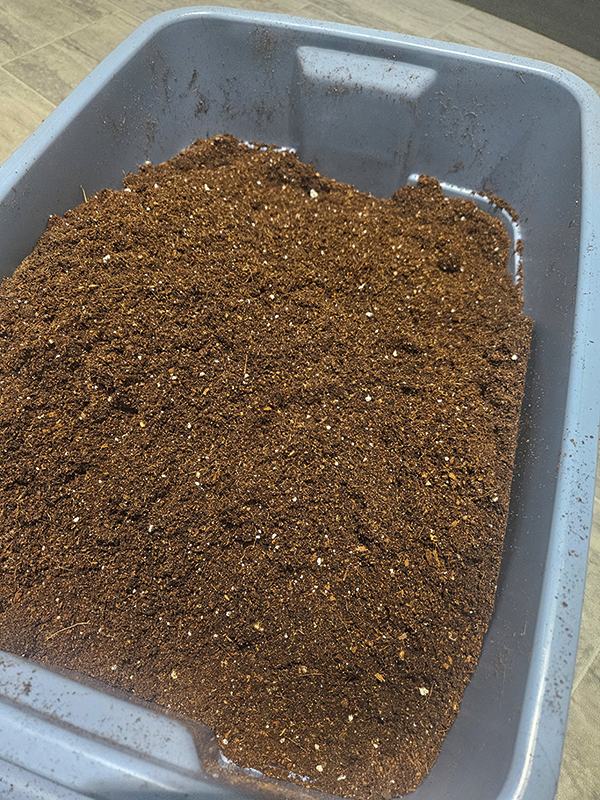
First off, you need to fill your containers with pre-moistened seed starting soil a few days before you want to plant the seeds. The reasoning for this is that the soil will have a chance to settle into the containers, allowing you to add more soil on top if needed.
You want to use pre-moistened soil because really dry soil will have a hard time absorbing moisture when you water. Chances are, the water will just run through the soil and into your trays, not really being absorbed into the soil at all. I had to learn this the hard way the first time I tried starting seeds indoors!
Instead, I now add warm water to the soil and mix until it is moistened but not dripping wet. I do this before I even start to fill my containers.
Sowing the Seeds
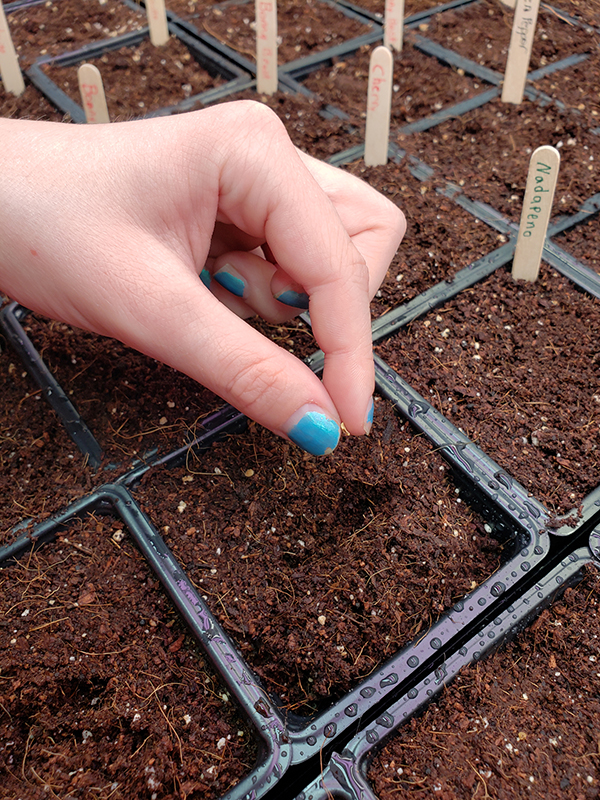
After your containers are full, you can start sowing seeds! I usually sow about two to four seeds per container. This will vary greatly depending on the type of seeds you are growing and the size of your containers. But this amount seems to work well for me.
Follow the directions on the seed packet for how deep to plant the seeds. This will also vary by the type of plant you are growing. After you sow the seeds, cover seeds with a thin layer of soil.
Now, here’s a very important step not to skip: LABEL your containers! You’ll be amazed at how easy it is to forget what seeds you put into which containers. I use cheap plastic labels and a waterproof pen from Amazon. I used to use popsicle sticks, but they would always end up absorbing too much moisture and turning black (eww!).
Waiting For Germination – Starting Seeds Indoors Part 1
The next step is to cover your containers with clear plastic of some sort. Some purchased trays will come with clear covers or you can always buy them separately from most stores. You can also just use a piece of plastic wrap placed loosely over the soil as well.

At this point, you do not need to turn on your grow lights. You can wait until the seeds have germinated. The amount of time germination takes will vary depending on the seed variety.
While you wait, be sure to check the soil’s moisture daily and keep the cells covered. The seeds need moisture in order to germinate.
If the soil is dry, carefully spray it down with water to keep the soil moist but without disturbing the seeds. Once you see that even one seed has germinated, it is time to turn on your lights and remove the cover (or at least remove it from that cell anyway).
That’s it for the first part of starting seeds indoors! If you want to see everything you need to know about starting seeds in one article, check out “Indoor Seed Starting 101 – A Complete Beginner’s Guide”. For the next part of my series, visit Part 2 of my Starting Garden Seeds Indoors Series: Growing! Part 3 will be all about Hardening Off Plants to get them ready for transplanting!
Until next time, thanks for stopping by!
– Chelsea
*This post may contain affiliate links. These are products I have used personally and highly recommend. As an Amazon Associate, I may earn a small commission from qualifying purchases if you purchase items through my links. These links and the ads on this page help to support my family and our semi homestead, so Thank You!
Discover more from Semi Homestead Life
Subscribe to get the latest posts sent to your email.