
Dandelions are typically looked at as a nuisance for most homeowners. But what if I told you that you can turn those “weeds” into a delicious dandelion jelly?
Now hear me out, I know it sounds a little odd and maybe not very appetizing, but dandelion jelly actually tastes (and smells!) a lot like honey. This makes sense because bees make honey from the pollen of plants and flowers like dandelions.
You can use it just like you would traditional jelly. It is delicious when slathered on a piece of toast, topped on fresh homemade biscuits, or (my personal favorite) added to your hot tea.
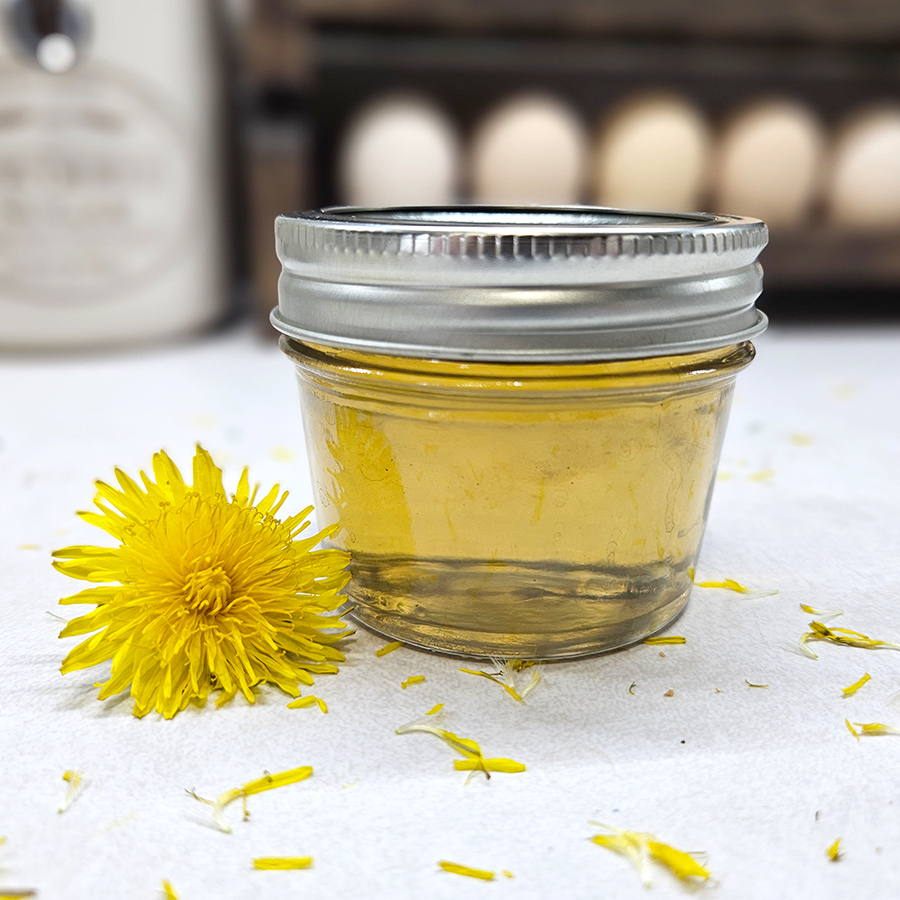
This specific recipe includes a little bit of lemon juice to help the jelly solidify and helps to raise the acid levels for canning purposes. The lemon just helps to enhance the flavors.
Now, I will be upfront about something: This is not a healthy recipe due to being a bit heavy on sugar. But like most homemade jellies, it is meant to be a treat – And that it is!
Homemade Dandelion Jelly Recipe
*Scroll down to the bottom of this post to see the full recipe, including exact measurements and amounts. You can also print out the instructions. I go into a bit more detail about the recipe here first, just in case you need it.
If you want to try another recipe using dandelions, check out my Dandelion Shortbread Cookies! They are super easy to make and another tasty treat using these beautiful “weeds”!
Pick your Dandelions
The first step is to gather up your dandelion heads. You can simply pop the tops off from the stems. (Remember that old saying from when we were kids, “Mommy had a baby and her head popped off!” Yes, it’s rather morbid thinking about it now, lol).

Make sure you are picking the dandelions from a location that you are sure hasn’t been sprayed with any insecticides, pesticides, or any other type of chemicals. You also don’t want to use a location where one of your pets (or the neighbor’s pets) frequent! Hopefully, I don’t need to explain why!
You will need about 4 cups of dandelion heads in order to make the jelly. The best time to pick them is in the middle of the day when they are dried from the dew and opened wide.
Choose any that has a wide open yellow head. Try to leave a few behind for the birds and bugs. If your yard is anything like ours, that shouldn’t be an issue!
Separate The Yellows
Now comes the rather tedious part. You need to attempt to separate the yellow petals from the green base. This will help to eliminate the bitter flavors that you might associate with dandelions.
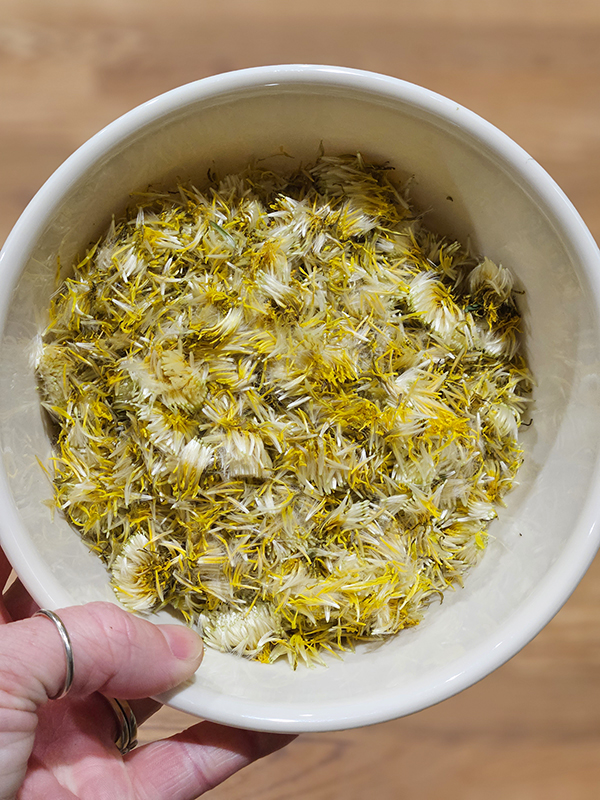
The easiest way I found to do this is to use a pair of sharp scissors and clip off the base of the flower. Once you do that, you can pretty easily separate the yellows from the rest of the green leaves. Remove as much of the green as you can.
While this process might take a little while, it really shouldn’t take you more than half an hour at the most. Do it while watching TV or listening to your favorite podcast.
You will need to end up with about 2 cups of the petals in the end. Don’t pack them down, just measure them light and fluffy. Add them to a heat-safe bowl that can hold about 6 cups.
Make Dandelion Tea
Next, you want to boil 4 cups of water. Carefully pour the boiling water over the dandelion petals. Stir to make sure all of the petals are in the water.
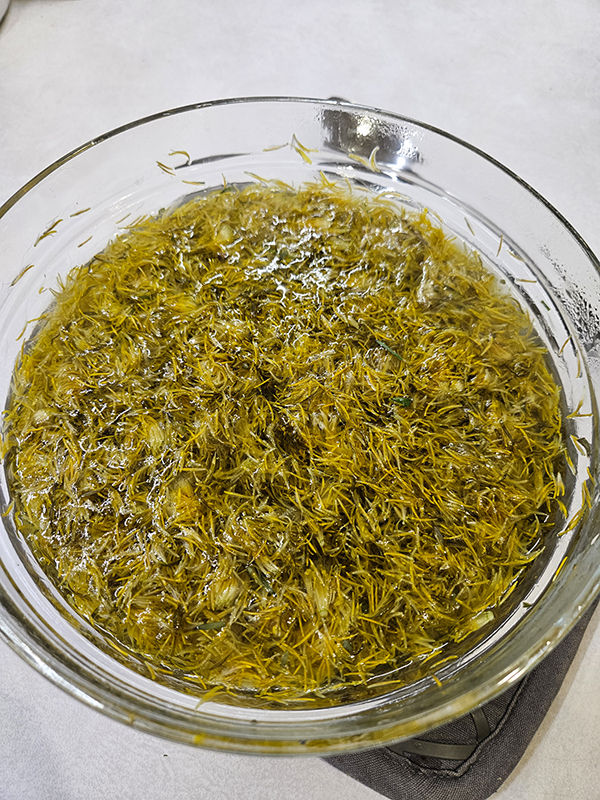
Allow this dandelion tea to seep overnight or for 24 hours. I made my tea around 10:00 pm and let it seep and cool overnight. By morning, it was nice and cool and ready for cooking.
Don’t be alarmed if your tea is kind of a dark green color and not very appetizing looking. That is totally normal!
Cook The Dandelion Jelly
Now that your dandelion tea is nice and cool, the next step is to strain off all of the solids. I used a jelly strainer cloth but you can also use a coffee filter or any super fine mesh material. Squeeze as much of the liquid out of the cloth as possible.
You should be left with about 3 1/2 to 4 cups of liquid. If not, you can add a bit more water to get to the minimum amount. You can add the solids to your compost bin or just toss them in the trash.
Add the strained dandelion tea to a large pot and place on the stove. Add 2 Tablespoons of lemon juice. You can use freshly squeezed like I did or the bottled kind is just fine. Also, add one box of original powdered pectin. Mix well and bring the mixture to a boil.

Right: Boiling the tea, pectin, and lemon juice.
Once it is at a rolling boil, add your 4 cups of sugar. (I didn’t say it was healthy remember!) Mix the sugar well until it is dissolved. Return the mixture to a boil and cook for about 2 minutes.
The mixture will be runny at this point, but just trust the process! As the dandelion jelly cools down, it will solidify and become jelly-like.
Canning Dandelion Jelly
Now you need to bring out your water bath canner or just use a large pot with a rack at the bottom. I love using my Ball Electric Canner. No, it isn’t the cheapest, but I have more than made up the cost with as much as I use it and the convenience of it!
Fill sterilized and hot jelly jars with the hot dandelion jelly. Leave a 1/4 of an inch of headspace. I was able to get twelve 4-ounce jars. (Product Link: Ball 4 oz Quilted Jelly Jars)
If you notice that the jelly has formed a ton of bubbles on the top, you can skim that off with a spoon if it bothers you. This step is totally optional and will not change the outcome of the jelly.

Clean the tops of the jars and add your lids and rings. Place the jars into a water bath canner. Allow the water to return to a boil and process for 10 minutes.
Carefully remove the jars and set them on a towel to cool for 24 hours. Do not touch or disturb them until after the 24 hours are done. After that time is up, check to make sure they are sealed properly. Label the jars and store them on your pantry shelf. Be sure to share them with friends and family!
Until next time, thanks for stopping by!
– Chelsea
*This post may contain affiliate links. These are products I have used personally and highly recommend. As an Amazon Associate, I may earn a small commission from qualifying purchases if you purchase items through my links. These links and the ads on this page help to support my family and our semi homestead, so Thank You!
Homemade Dandelion Jelly
Ingredients
- 4 cups dandelion blooms (2 cups yellow petals)
- 4 cups water
- 2 T lemon juice (Fresh or bottled)
- 1 box powered pectin
- 4 cups sugar
Instructions
- Pick 4 cups of open dandelion blooms. Cut the bottom of the blooms and separate the yellow petals from the greens. You should end up with about 2 cups of yellow petals.
- Boil 4 cups of water. Carefully pour water over dandelion petals in a heat-safe bowl. Mix and allow the petals to seep overnight or until completely cool.
- In the morning, strain the solids from the dandelion tea. Squeeze out as much liquid as possible. You should end up with about 3 1/2 to 4 cups of tea. Compost or toss the solids.
- Pour the tea into a large pot. Add lemon juice and pectin and stir well. Bring mixture to a rolling boil.
- In the meantime, sterilize your canning jars and prepare your water bath canner.
- Once the tea mixture is boiling, add the sugar to your pot and mix until dissolved. Allow the mixture to come to a rolling boil again. Boil for about 2 minutes, stirring constantly.
- Remove from heat and pour mixture into hot canning jars, leaving 1/4 inch headspace. Skim off any extra bubbles or film (optional). Wipe the jar rims and add the lids and bands. Place in water bath canner and process for 10 minutes.
- Remove jars from the canner and allow them to sit undisturbed on a towel for 24 hours. Check for a tight seal, label, and store. Enjoy!
Discover more from Semi Homestead Life
Subscribe to get the latest posts sent to your email.