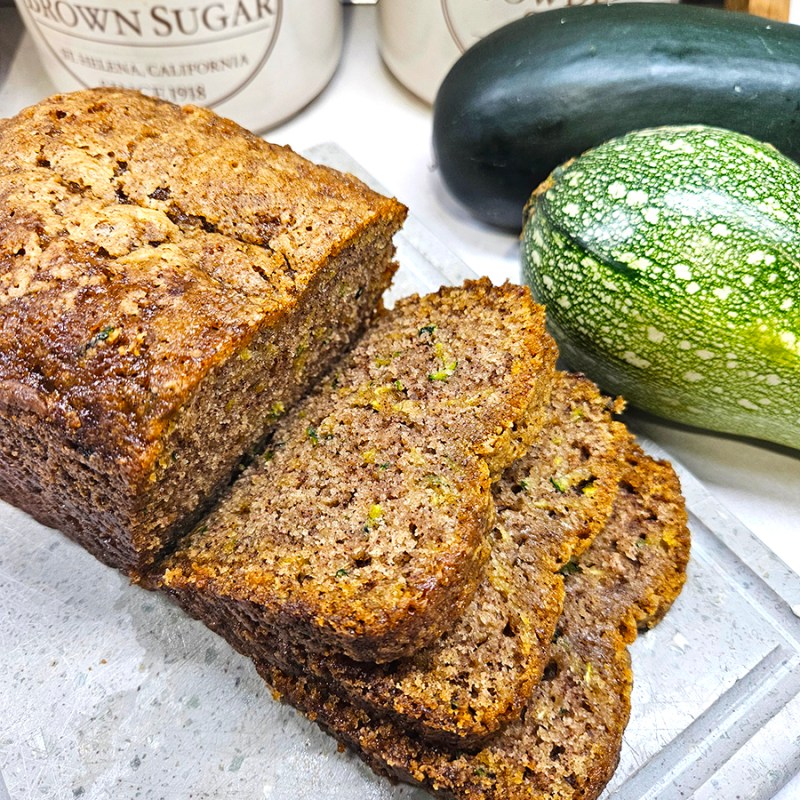
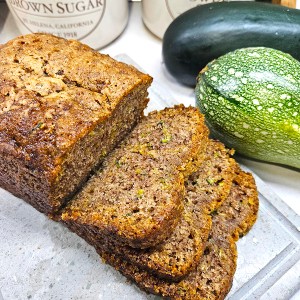
A sweet, moist, and flavorful zucchini bread that is made using my late grandma’s recipe, so you know it’s going to be a family favorite!
Zucchini is one of the best-producing crops you can grow in your garden. One single plant can be enough to provide you with weeks’ worth of fresh, harvested zucchini.
But then you run into the problem of what to do when all those zucchinis start to stack up on your kitchen counter. Well, you can make zucchini bread, of course!
Zucchini bread is probably the most popular way to use zucchini. It’s like the cousin of banana bread, only you don’t have to wait for the bananas to over-ripen before you can use them. (Does anyone else have issues with timing those darn things? One minute, they are perfect for eating. The next, they resemble something you forgot at the bottom of your lunch pail over summer break!)
There are loads of different zucchini bread recipes out there, and I’ve tried my hand at many of them. This particular recipe is from my late Grandma. With just a few minor tweaks, the result is a quick bread that is moist, sweet, flavorful, and perfect on its own or with a little smear of butter. No peeling or draining of the zucchini required!

How To Make Grandma’s Zucchini Bread
*Scroll down to the bottom of this post to see the full recipe, including exact measurements and amounts. You can also print out the instructions. I go into a bit more detail about the recipe here first, just in case you need it.

Ingredients
- Eggs – Use room temperature eggs if possible. This helps the batter to come together a bit easier.
- Sugar – The sugar is what adds the sweetness to the recipe and makes it so irresistible, especially for my kids!
- Oil – There is quite a bit of oil in the recipe, but that is what helps to make such a moist bread. You can try swapping out some of the oil for applesauce, but we figure if we are going to indulge in zucchini bread, then indulge in the full-recipe version!
- Vanilla – Use real vanilla or try your hand at making it homemade. The flavor and scent are so much better with a homemade version!
- Zucchini – The amount of zucchini you need will depend on the size of the fruit you harvest. (Yes, zucchini is technically a fruit.) You can also use frozen shredded zucchini that you might have prepared at an earlier date. We like to do this and freeze it in the same quantity needed for this recipe, so I can easily pull out a bag and use it.
- Flour – We use Unbleached King Arthur’s All-Purpose Flour, but you can use any AP flour you have on hand.
- Salt – The salt helps to balance out the sweet sugar in the recipe and makes for a richer bread.
- Baking Soda – The baking soda is the leavening agent for the bread, which allows it to rise.
- Baking Powder – In addition to the soda, baking powder also helps to allow baked goods to rise.
- Cinnamon – The cinnamon adds a nice touch of warmth to the bread.
- Chopped Nuts or Chocolate Chips – These are both optional ingredients. While we don’t typically add nuts, my kids love adding in chocolate chips to make a chocolate chip zucchini bread!
Equipment Needed – Grandma’s Zucchini Bread
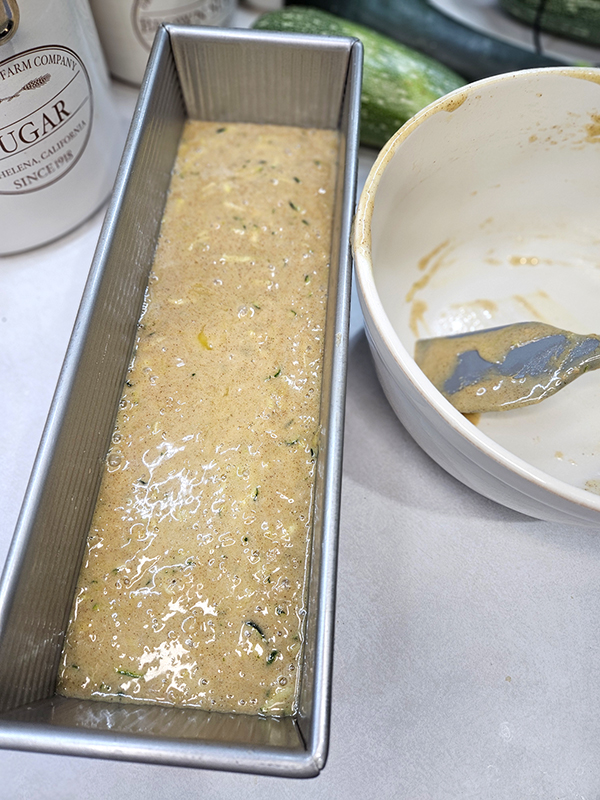
You are going to need two medium to large-sized bowls for this recipe. In addition to the bowls, you will need either one 13×4″ pullman loaf pan, two 1-pound loaf pans, or two regular sized loaf pans. (This is the 13×4″ pullman pan I use for most of my larger bread recipes like this and my pullman sandwich bread recipe – Product Link: USA Pan Bakeware Pullman Loaf Pan.)
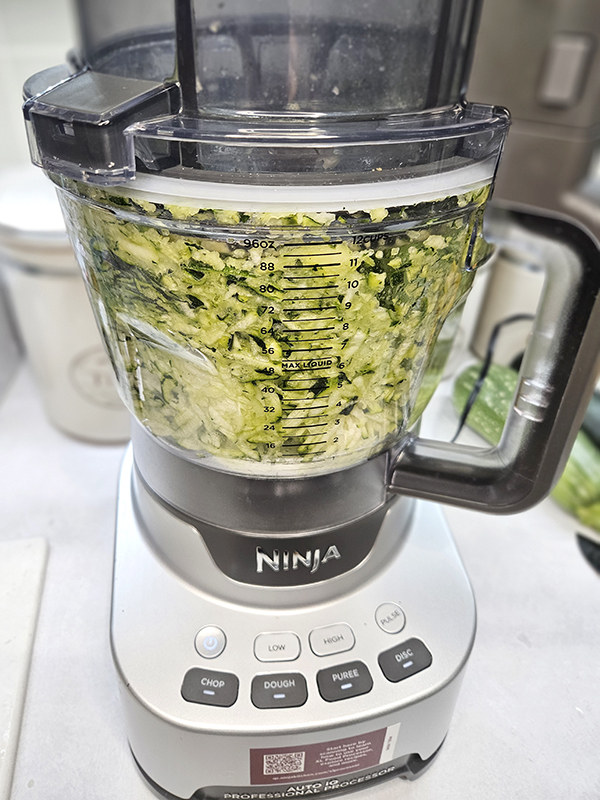
You are also going to need either a hand shredder or a food processor with a shredding disc. The food processor is the route I like to go because it is so much faster than hand-shredding. (This is the large capacity food processor my husband spoiled me with one Christmas that makes super quick work of shredding a ton of zucchini at once – Product Link: Ninja Food Processor, Professional XL.)
If you are going to be using a hand shredder, I highly suggest using cut-resistant gloves. While they might not be the most fashion-forward, these gloves have saved my fingers more times than I can count! (Product Link: NoCry Premium Cut Resistant Gloves Food Grade – I have the medium-sized ones for those who are interested.)
Instructions For Grandma’s Zucchini Bread
Start by preheating your oven to 350º Fahrenheit. Prepare your loaf pan or pans by either spraying with non-stick spray or buttering the sides and edges well to prevent sticking. Unlike with my sandwich loaf bread, this zucchini bread does have a tendency to stick to the sides and bottom of the pan if you skip this step. Set the pan or pans aside once done.


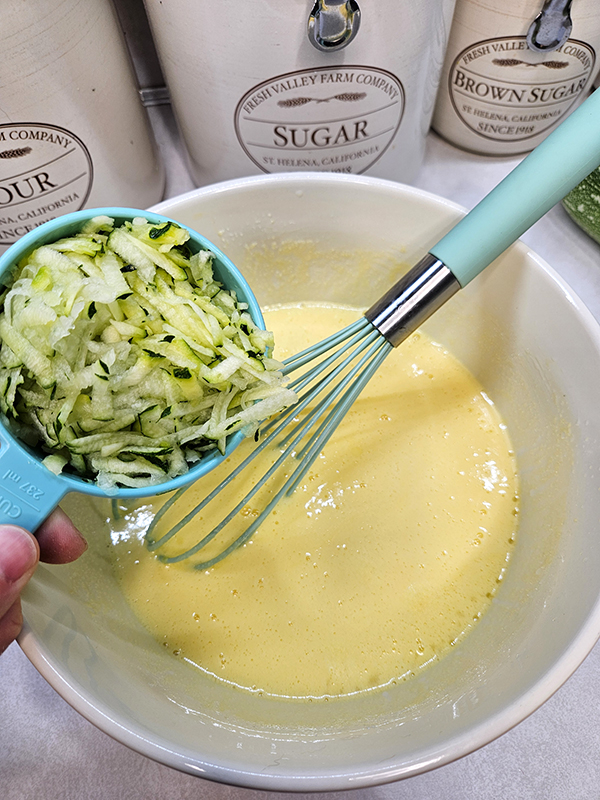
In a large bowl, add the eggs and whisk them until they are light and foamy. Next, add in the sugar and mix until well combined with the eggs. Once they are combined, add in the oil and the vanilla and mix thoroughly.
Now it’s time to grate the zucchini. Again, you can do this using a hand grater or a food processor. You are going to need two to three cups of zucchini. I usually pack it in my measuring cup pretty decently.
There is no need to peel the zucchini; just give it a good wash and dry before grating. The peel is not noticeable and actually adds a nice pop of color here and there throughout the bread. However, if you are being a sneaky parent and are trying to hide the zucchini from picky kids, then you might want to consider peeling it first.
Coring & Grating The Zucchini
If the zucchini you are using is larger than about 2 inches, you will want to remove the spongy middle. This also includes the seeds. You can do this easily in two different ways.
One way is to cut the zucchini lengthwise into fourths. Then, take a knife and run it down the middle (kind of like how you would remove the core from a pineapple). If needed, use a large spoon to scrape out any remaining seeds and the center part.
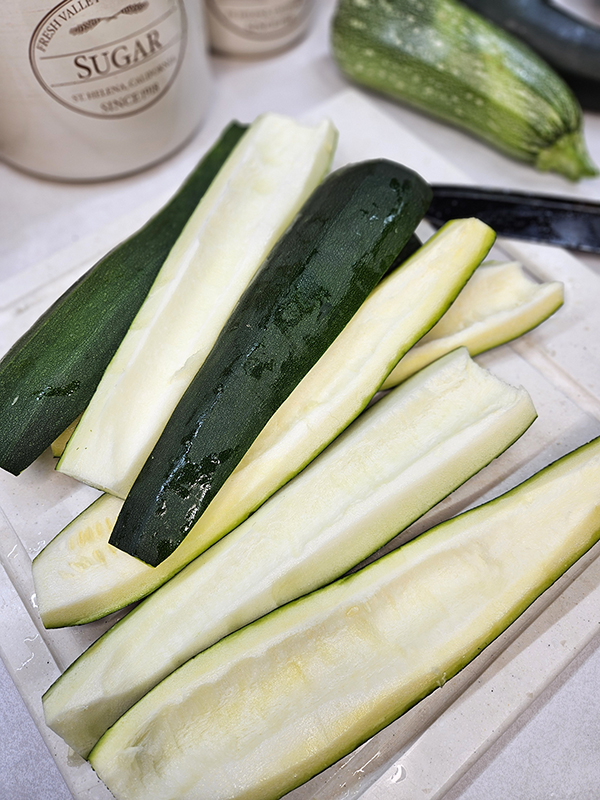
Alternatively, you can just cut the zucchini into two halves lengthwise. Use a large soup spoon to scrape out the spongy middle and the seeds. I usually do the other method simply because this can sometimes be messier and a bit harder to do, in my opinion. Both work fine, though.
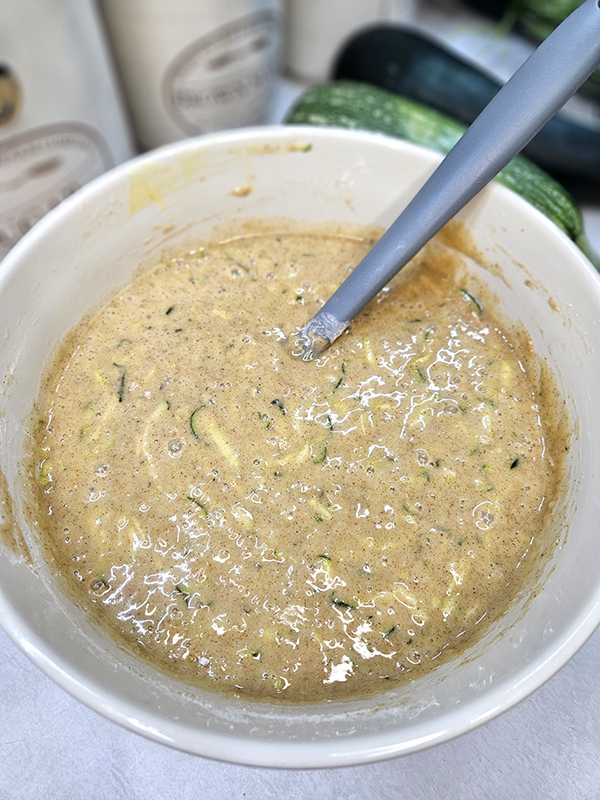
You can then shred your zucchini. Once the zucchini is shredded and measured, fold it into the wet ingredients. You do not need to drain off the extra moisture from the zucchini like you do with some baking recipes. It goes in right from the grater.
Combine Dry Ingredients & Bake – Grandma’s Zucchini Bread
In another bowl, add together all of the dry ingredients (flour, salt, baking soda, baking powder, and cinnamon). Whisk until all the ingredients are well distributed.
Slowly pour the dry ingredients into the wet ingredients and stir just until combined. Avoid overmixing the batter. If you are adding chopped nuts or chocolate chips, add those at this time as well.
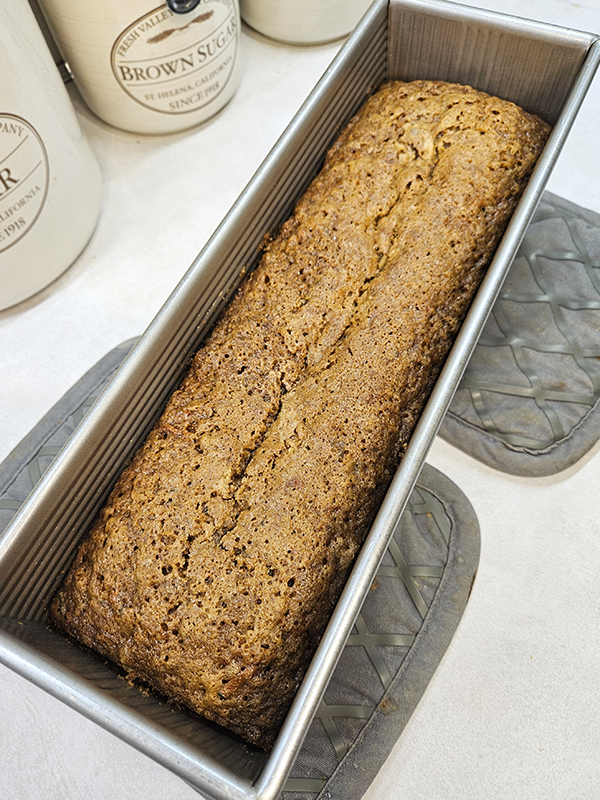
Pour the batter into your prepared loaf pan or pans. Bake for 45 minutes to an hour or until you can stick a toothpick into the middle of the loaf and it comes out clean. (If you use a 13×4″ pan, the baking time will be on the longer side.)
Remove the pan or pans from the oven and allow to cool slightly before taking the loaves out of the pans. Enjoy warm or allow the loaves to come to room temperature before storing in an air-tight container. (I actually prefer my zucchini bread chilled in the refrigerator. I feel like you can taste all of the flavors better than when it is warm.)
Other Zucchini Recipes
If you are looking for other zucchini recipes, give one of these a try:
Until next time, thanks for stopping by!
– Chelsea
*This post may contain affiliate links. These are products I have used personally and highly recommend. As an Amazon Associate, I may earn a small commission from qualifying purchases if you purchase items through my links. These links and the ads on this page help to support my family and our semi homestead, so Thank You!

Grandma’s Zucchini Bread
Ingredients
- 3 whole eggs (at room temperature)
- 2 cups granulated sugar
- 1 cup oil
- 3 tsp vanilla
- 2 to 3 cups grated zucchini
- 3 cups flour
- 1 Tbsp salt
- 3 tsp baking soda
- ¼ tsp baking powder
- 3 tsp cinnamon
- ½ cup chopped nuts (optional)
- 1 cup chocolate chips (optional)
Instructions
- Preheat oven to 350º Fahrenheit. Prepare two 1-pound loaf pans, a 13×4" pullman pan, or two regular loaf pans by spraying with non-stick spray or wiping the sides and bottom with butter. Set aside.
- In a large bowl, beat the eggs until they are light and foamy. Then add in the sugar and whisk until smooth. Add in the oil and vanilla and stir until well combined.
- Grate the zucchini using a hand grater or a food processor. There is no need to peel before grating. Do not squeeze the liquid from the grated zucchini. Add it to the wet ingredients. Set aside.
- In another bowl, add the dry ingredients (flour, salt, baking soda, baking powder, and cinnamon and whisk until well combined.
- Slowly mix the dry ingredients in with the wet. Do not overmix. If you are adding the optional nuts or chocolate chips, do so now.
- Pour the batter into the prepared loaf pan or pans. Bake for 45 minutes to an hour or until a toothpick inserted into the middle of the loaf comes out clean. Allow the loaves to cool slightly before removing from the pans.
- Enjoy immediately or allow to come to room temperature and store in an air-tight container.