
I want to show you just how easy it is to harvest and cure your own garlic crop so you can enjoy it long into the winter months!
Garlic – It’s one of my absolute favorite crops to grow in the garden! I love how easy it is to take care of. I love how you can buy it once and you are pretty much set for life.
And, of course, I love eating garlic whenever possible! (No vampires near me!) I like to use recipe instructions for adding garlic as suggestions. They might say to use one tsp of garlic, but what they really mean is one TABLEspoon. I’m that kind of chef when it comes to garlic!

When it comes to harvesting and curing garlic, it’s a relatively simple procedure. However, there are a few tips for knowing just when the right time is as well as how to care for it afterward.
You don’t want to waste all those months of growing and caring for your garlic only to end up with it in your compost pile because it wasn’t cured properly. Learning how to properly finish off your garlic will set you up for months of delicious, garden-fresh flavors and recipes.
How To Harvest And Cure Garlic
There are two different types of garlic: hardneck and softneck garlic. We typically grow hardneck garlic here in Illinois. It requires a period of about 8 weeks under cold conditions for it to be able to produce large bulbs in the spring and summer.
For that reason, hardneck garlic must be planted in the fall in order to be ready for harvesting in the summer. Softneck garlic, on the other hand, can be planted in fall or spring. (To learn more about the different types of garlic as well as how to plant it, check out “Planting Garlic In The Fall“)
I have grown softneck garlic before but the results weren’t as great as the hardneck garlic was. The bulbs were pretty tiny and the cloves were tough to peel the papery skin off. So for the last few years, I typically only grow hardneck garlic.
Garlic Scapes
A bonus with growing hardneck garlic is that it produces edible garlic scapes prior to harvesting. The scapes are long flower stems that appear about a month before the garlic is ready for harvesting. And they are absolutely delicious!
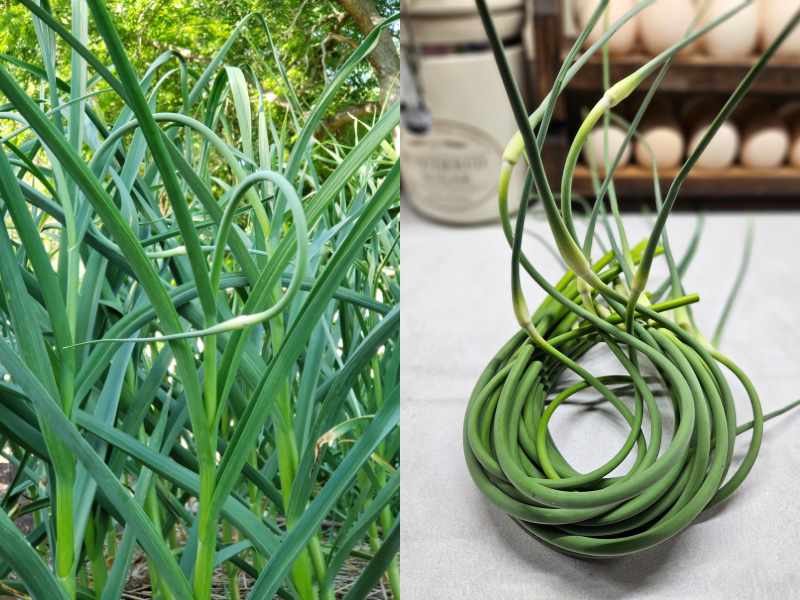
You can use garlic scapes in any recipe that can benefit from a light garlic flavor. We like to use them in our homemade fried rice. I also like to cut them into 2-inch pieces and saute them up in a little butter and salt for a tasty little side dish.
The garlic scapes can also be cut up and frozen for future use. No matter how you decide to use them, they are an edible bonus that you shouldn’t waste! Even if you don’t plan on consuming them though, you still should remove them so the plant can focus its energy on making a larger bulb as opposed to making the flower.
Wait until the scapes curl back around to the main stem before cutting them off. This typically happens around mid-June for our location. If you wait too long, they start to become tough and woody. You can use a pair of pruners or just snap them off at the base of the scape with your fingers. (I love these tiny pruners for small jobs like this – Product Link: Fiskars Micro-Tip Pruners.)
Watch For Other Signs – Harvest And Cure Garlic
Once you start to see that 3/4 of the leaf tips are starting to turn brown, it’s time to back off on watering. It’s a lot easier to harvest the garlic bulbs when the soil isn’t soggy and overly saturated.
Eventually, you will see that the bottom couple of leaves will start to turn brown and die back. This is the point where you can actually harvest a bulb or two to check its progress. They are likely ready for harvesting!
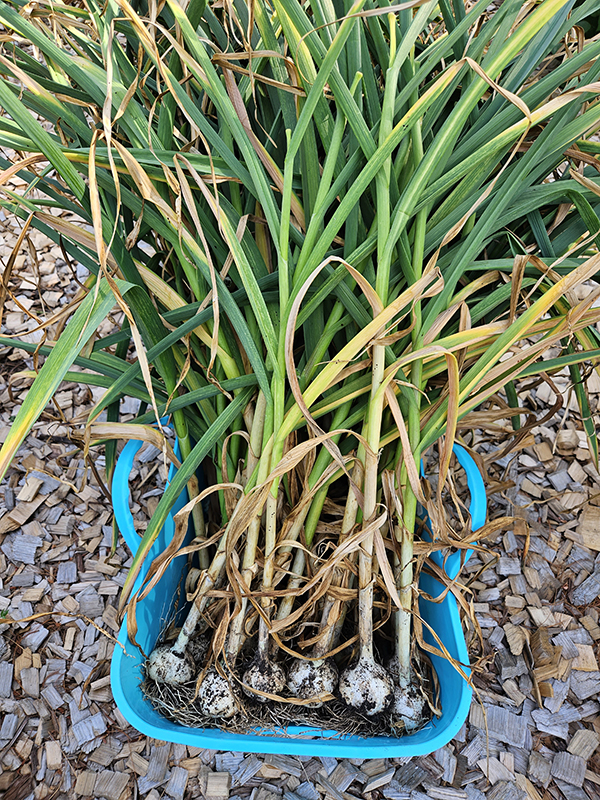
If you happen to leave one or two garlic scapes behind, they can also help indicate when it’s time to harvest. As soon as you see the scapes straighten and stand up, it’s time to harvest. However, I like to eat the garlic scapes so much that I typically don’t leave any behind!
Harvesting The Garlic
If it happens to rain right before harvesting, you are better off waiting a day or two. This will give you the best chance of having clean, easier-to-harvest bulbs.
When you go to harvest, do not just pull up on the stems of the garlic plant. This will likely break the stem off or damage the bulbs. Instead, take a small hand shovel and loosen the soil around the garlic bulb. You can then use it to pop the garlic out of the ground. The roots will still be attached, and that’s what you want.
Check to make sure the cloves have filled out the papery skins and are a nice size. If so, you can go ahead and harvest the entire crop. Keep in mind that if you have several different varieties of garlic, they might not be ready at the same time.
Curing The Garlic – Harvest And Cure Garlic
Before you can store your garlic, it must first be properly cured.
After harvesting your garlic, do not wash off any of the soil or trim the stems. Leave the stems intact as well as the roots. Just brush off some of the extra soil but try not to damage the papery skins.
Your garlic needs to sit and cure for a couple of weeks in a location that allows the garlic to stay dry and protected. It also needs to have proper airflow so all sides dry evenly.
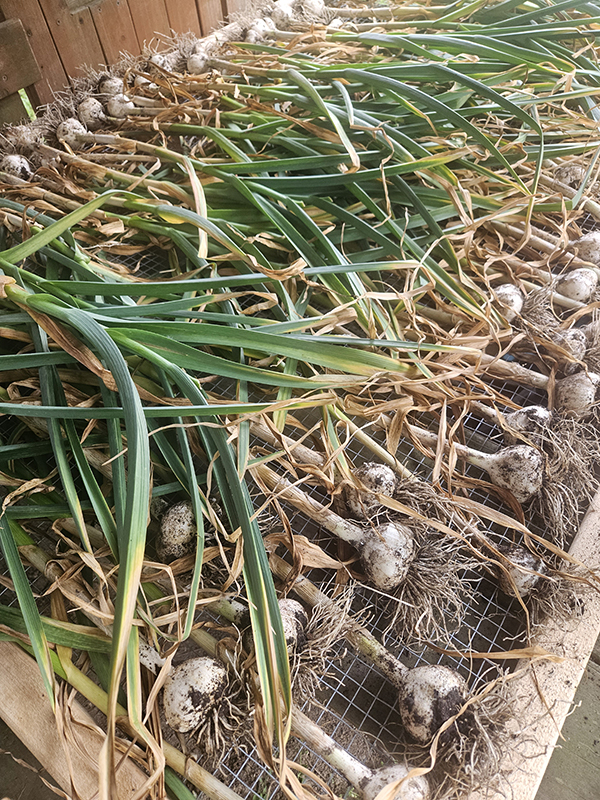
You can braid the stems of softneck garlic in bundles and hang them to dry. You can also do as I do and set the garlic on a handmade wire shelf. I took a large piece of hardware cloth and framed it out and used that to set my garlic on. (It was actually used as a breathable lid when we first got our chicks!)
Allow the garlic to cure until all of the stems are brown and dry. You can now trim off the roots and most of the stem as well. If your garlic is still pretty dirty, remove the one outer layer of paper to reveal clean and beautiful garlic underneath.
Storing Garlic Long Term
Store your garlic in mesh or paper bags in a cool, dry location to use throughout the winter. Softneck garlic will keep for up to 8 months whereas hard-neck garlic lasts about 4 months. Just don’t forget to save your largest bulbs for planting again this fall! It’s the crop that keeps on giving year after year!
And there you have it, how to properly and easily harvest and cure your own batch of homegrown garlic! If you are a visual person, be sure to check out my YouTube Shorts to see exactly how I tell how the garlic is ready for harvesting and how easy it is to dig it up.
Until next time, thanks for stopping by!
– Chelsea
*This post may contain affiliate links. These are products I have used personally and highly recommend. As an Amazon Associate, I may earn a small commission from qualifying purchases if you purchase items through my links. These links and the ads on this page help to support my family and our semi homestead, so Thank You!
Discover more from Semi Homestead Life
Subscribe to get the latest posts sent to your email.