
There is nothing like the flavor and taste of homemade dill pickles! It took me several years to perfect this recipe and I now have it to where everyone in my family is a fan – Even my teenage son!
I will admit that I am a dill pickle fanatic. When I was younger, I actually used to get dill pickles as birthday and Christmas gifts. I even have the pickle fork my parents got me one year to go with that big jar of green beauties!
So once I got into gardening and growing my own vegetables, I knew I had to try my hand at canning pickles. In fact, dill pickles were the first product I ever attempted canning!

I’d like to say that they turned out crisp and perfect the first time, but we all know that is rarely the case. My first few batches were soggy and floppy and the flavor had a lot to be desired.
But as the years went by, I have been able to adjust the recipe so that the pickles turn out crisp and delicious every time. And now, I want to share that recipe with you!
A Note About Cucumbers – Homemade Dill Pickles
To begin with, you have to understand the difference between slicing cucumbers and pickling cucumbers. When you purchase your seeds in the spring, you have likely come across a multitude of different varieties and names of pickles.
There’s Burpless and Boston and English and many other types out there. However, not all of the varieties are best suited for creating crispy pickles.
There are cucumbers that are specifically marketed as pickling cucumbers. They typically grow shorter and have thinner skins. In addition, their seeds are often a lot smaller than slicing cucumber varieties.
While pickling cucumbers can be eaten fresh, they are perfect for being turned into your favorite dill or sweet pickles. The key is to pick them at just the right time.
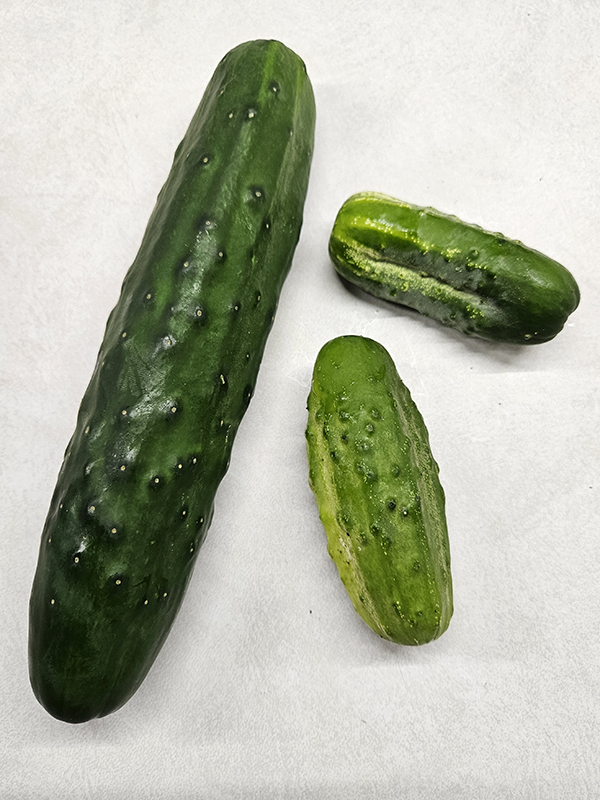
If you are after gherkin pickles, then you want to harvest them when they are only a couple of inches long. For sphere cucumbers, they need to be around four to five inches long before harvesting.
And sliced pickles will depend on the girth of the cucumber as opposed to the length. I like to pick my pickling cucumbers when they are between 1 to 2 inches wide for slices.
Storing Cucumbers
In the ideal situation, you should harvest your cucumbers the same day you plan to can them. However, I know that can’t always be the case. Be it low production or just lack of time the day of, it’s ok to store your cucumbers until you have enough or more time.
Unlike sweet corn where you want to consume it the day it is picked, you can be a bit more lenient on the timeline with cucumbers. (To see how I preserve sweet corn, check out “Harvesting & Preserving Sweet Corn“.)
If you need to, place the cucumbers unwashed into plastic storage bags and stick them in your refrigerator. They will stay fresh for a couple of days, giving you more time if needed.
I typically need to end up doing this since it seems like my cucumbers are never ready at the same time. (Or they are ready at an inconvenient time but I need to pick them so they don’t end up too big!)
How To Make Homemade Dill Pickles
*Scroll down to the bottom of this post to see the full recipe, including exact measurements and amounts. You can also print out the instructions. I go into a bit more detail about the recipe here first, just in case you need it.
Ingredients
- Pickling Cucumbers
- Water
- Vinegar
- Pickling salt
- Garlic cloves
- Peppercorns
- Fresh or dried dill
- Mustard Seeds
- Ball Pickle Crisp
Instructions – Homemade Dill Pickles
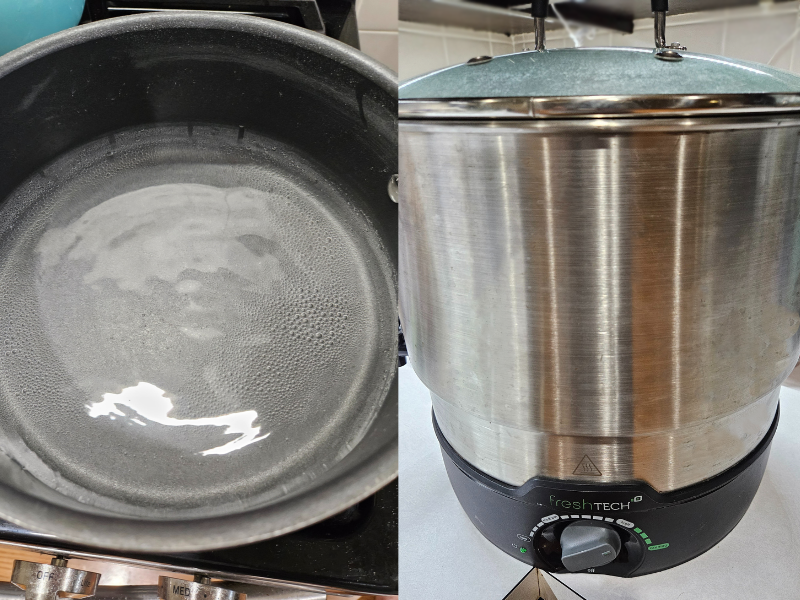
First, you want to prepare your canning supplies. You will need a water bath canner, sterilized canning jars, lids, and rims. Other items like a jar lifter and a funnel also come in handy.
The ingredient quantities are specifically for pint jars. If you are using quarts, you will want to increase the dry ingredients accordingly.
Making The Brine
Start by bringing the water to a boil in a stockpot. Once the water is boiling, add the vinegar and canning salt. Stir until it the salt fully dissolves. Bring the mixture back to a boil and cook for 5 minutes. Keep the brine hot while you prepare the jars.
If you plan on canning several batches of pickles, consider doubling the brine recipe and storing any extras in the refrigerator. The brine will last for up to two weeks. Just reheat it when the time comes to use it.
Prepare The Ingredients
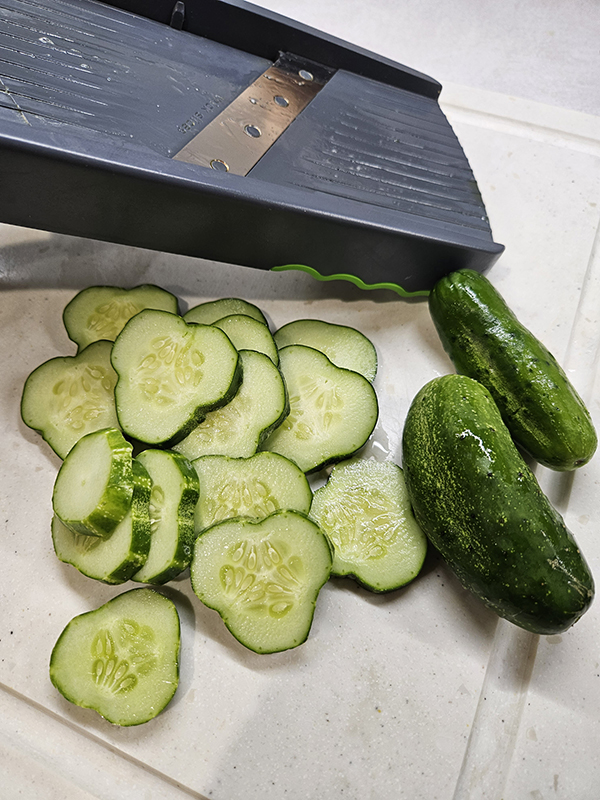
Next, you need to slice your cucumbers. Begin by removing about 1/4″ off of the blossom end of the cucumber. Leaving this end can cause your pickles to become limp and soggy so it’s better. to remove it.
I prefer to slice my cucumbers pretty thick for my homemade dill pickles. This gives them the best chance of staying nice and crisp. I have a mandoline food slicer and I simply use the thickest setting it has. They are probably around a quarter of an inch thick. You can adjust this to your own family’s preference.
I highly recommend using a pair of cut-resistant gloves when slicing your cucumbers. They can be slippery and you don’t want to end up with more than just sliced cucumbers on your cutting board! (Here are the specific ones I got – Product Link: NoCry Cut Resistant Gloves)
In addition to slicing cucumbers, you also need to get your cloves of garlic ready. Separate the cloves from the bulb and remove the papery skins. Leave them whole.
Stuff The Jars
Now it’s time to pack the hot canning jars. Add the garlic, peppercorns, dill, mustard seeds, and pickle crisp to the warm jars. Next, pack your cucumber slices in. Try to pack as many as possible in the jar without damaging the slices.
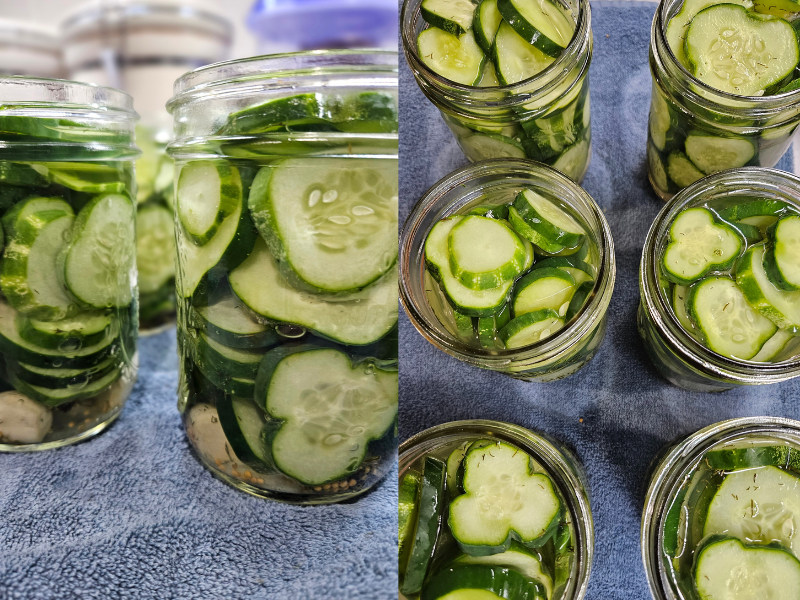
Once the jars are filled, add the hot brine, leaving 1/4 inch headspace. Remove any air bubbles, wipe the rims with a damp paper towel or cloth, and add the lids and rings.
Place the jars into your prepared water bath canner. Be sure that once all of the jars are added, there is at least one inch of water above the top of the jars. (Bonus Tip: Add about 1-2 tablespoons of white vinegar to help prevent water spots on your jars.)
Bring the canner to a rolling boil and process pints for 10 minutes and quarts for 15. Turn the canner off and remove the lid. Allow the jars to sit for 5 minutes before removing.
Place the jars on a thick towel on your countertop. Allow them to sit, undisturbed for 24 hours. After that time, check to make sure the lids have a good seal. If they aren’t, pop them in your refrigerator to eat first. The sealed jars of homemade dill pickles can be kept in storage for up to 18 months.
Until next time, thanks for stopping by!
– Chelsea
*This post may contain affiliate links. These are products I have used personally and highly recommend. As an Amazon Associate, I may earn a small commission from qualifying purchases if you purchase items through my links. These links and the ads on this page help to support my family and our semi homestead, so Thank You!
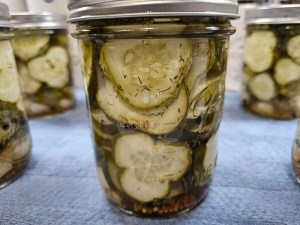
Homemade Dill Pickles
Ingredients
- 30-60 small picking cucumbers (The amount varies on size of cucumbers)
- 6 cups Water
- 2 cups vinegar (5% acidity)
- ½ cup pickling salt
- 3-4 cloves garlic (per jar)
- 6-10 peppercorns (per jar)
- 3-4 fresh sprigs dill (or 1/2 tsp dried dill per jar)
- ½ tsp mustard seeds (per jar)
- ⅛ tsp Ball pickle crisp (per jar)
Instructions
- Prepare your water bath canning equipment and gather sterilized jars, lids, and rims.
- Boil water over medium heat on the stove. Once it is boiling, add vinegar and salt and mix until the salt has dissolved. Bring back to a boil and cook for 5 minutes. Keep the brine hot until ready to use.
- Slice cucumbers thickly, removing 1/4 inch of the blossom end and discard or compost. Remove the papery skins of garlic cloves and keep the whole.
- Dry pack the garlic, peppercorns, dill, mustard seeds, and pickle crisp into hot, sterilized pint jars. Add cucumber slices and pack tightly without damaging the slices.
- Pour hot brine into the jars, leaving ¼" headspace. Remove any bubbles and wipe the rim with a damp cloth. Add the canning lids and hand-tighten the rings.
- Add jars to the prepared water bath canner. Ensure that there is at least 1" of water above the top of the jars. Bring the water to a rolling boil and process pints for 10 minutes (15 minutes for quarts). After the time is up, turn off the heat and remove the lid. Allow the jars to sit for 5 minutes.
- Carefully remove the jars and set them on a thick towel. Leave undisturbed for 24 hours. After that time, check each jar for a proper seal. If they didn't seal, keep them in your refrigerator and eat first. Use sealed jars within 18 months.
Notes
Discover more from Semi Homestead Life
Subscribe to get the latest posts sent to your email.