If you are lucky enough to have pecan trees growing on your property, it’s time to learn all about harvesting, shelling, and storing the nuts so you can have homegrown pecans on hand all year long!
Pecan trees are native to the United States. They are very slow-growing trees that thrive in southern locations. Besides producing edible nuts, they make for excellent shade trees since they eventually reach heights of over 100 feet tall.
Like most nut trees, pecan trees produce nuts in alternate years. Every other year, they will have what’s referred to as a “bumper crop”, which is where a tree produces a ton of nuts one year and then a smaller amount the next year.
We recently discovered that my parents had a few pecan trees growing on the edge of their property. This was a bit of a surprise to me because we live in Illinois, specifically Growing Zone 5.
Normally, when I think of pecans, I think of them as being only a southern crop. It never occurred to me that pecan trees could grow in our location! Lo and behold, some varieties of pecans can grow up through zone 5. What a nice surprise for our family; It’s just too bad that it took us so long to figure it out!
Tips On Harvesting & Shelling Pecans
Identifying A Pecan Tree
The first step in harvesting and shelling pecans is to identify what a pecan tree looks like. The first clue is their size. Pecan trees average around 70 feet tall but can grow far above 100 feet under the right conditions.


Next, look for more than one of the same tree. Most often, pecan trees grow in groups of three or more. This helps to improve pollination (therefore increasing nut production).
Then it’s on to the leaves. Pecan trees produce compound leaves. That means that every leaf stem has multiple leaflets growing out in alternating directions. Each leaf stem has nine to 17 serrated-edged leaflets, with one being right at the tip. The leaflets measure at least three inches, are flat, and slightly curved.
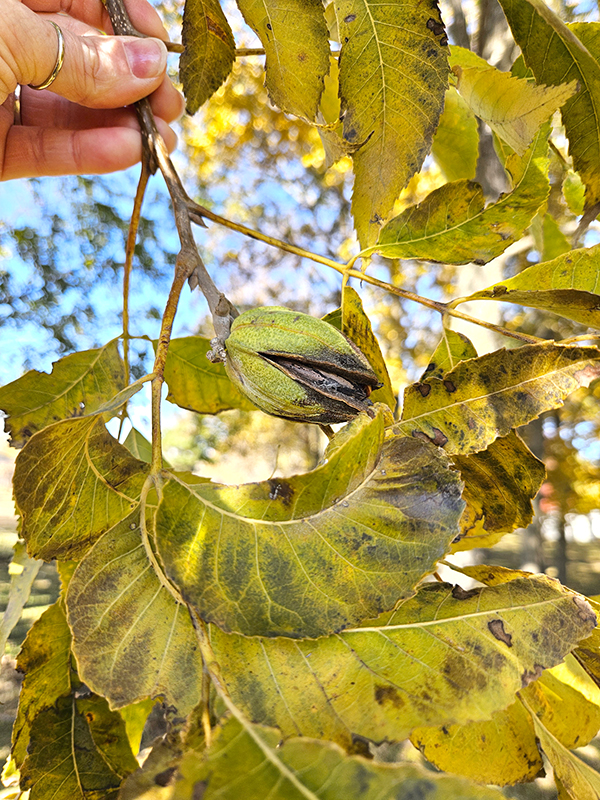
During the spring, pecan trees produce yellow-green flowers. If pollinated, the flowers turn into oblong nuts that are enclosed within a green husk. As the nut matures, the husk will start to break apart on the flower end, exposing the hard nut inside.
The meat of the nut is inside these hard shells. The husks and shells need to be removed in order to harvest the actual nut meat. That’s the part we are ultimately after!
Harvesting The Nuts – Harvesting And Shelling Pecans
Harvesting takes place usually between late September through November. As long as the green husks have started to split open, the pecans are ready for harvesting. They often grow in clusters within the branches and can sometimes be tricky to spot.

While you can pick the pecans from the tree, this can be a bit difficult thanks to the tree’s large size. We did have success using a tractor and a loader to reach some of the branches, but there was no way we could’ve reached any from the top!
Thankfully, we don’t really have to! As the nuts ripen, they will simply fall to the ground. The key is to harvest them frequently during this timeframe, though. Otherwise, your crop will likely get stolen by hungry squirrels, insects, and other such foragers!
During harvest season, go out at least once a day and pick any freshly fallen nuts off the ground. The nuts will most likely still be encased in the green husks. Sometimes, you will find the nuts separate from the husks, so don’t forget to grab those as well.
Storing Pecans Whole
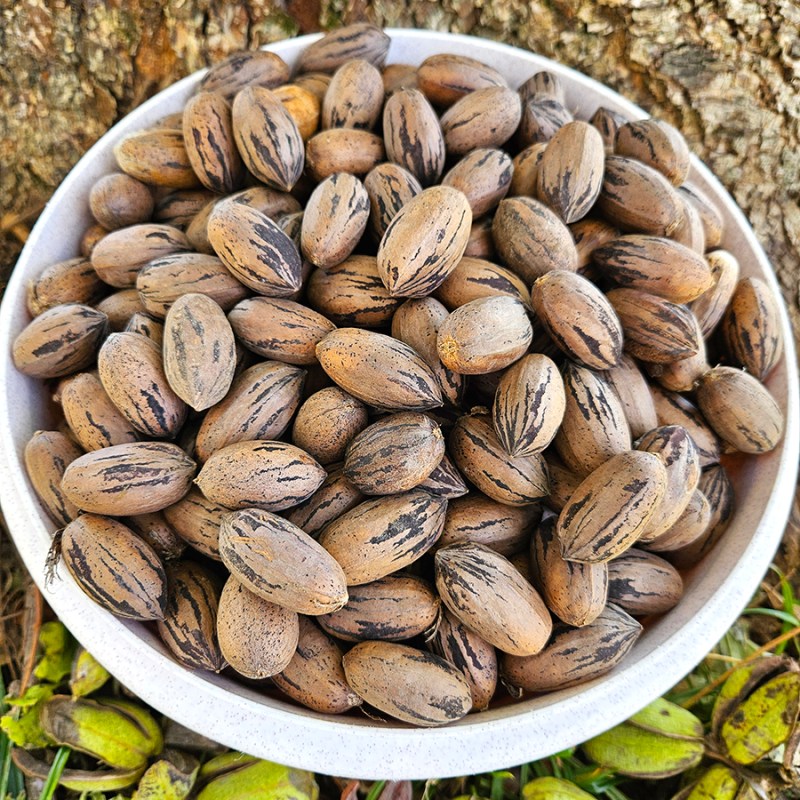
Once you have gathered the pecans, go ahead and husk them right then and there. The goal is to have a big bucket of just the pecans in their shells.

If you want, the husks are great for adding a bit of smoky flavor and aroma to your BBQ or campfire. You can also use them as a mulch around plants, add them to your compost, or use them as a slug deterrent.
If you are going to be storing the pecans in their shell, you first want to dry them out. Lay the pecans out in a single layer on a wire mesh to dry. This process is important before storage and takes about one to two weeks.
Leaving the pecans whole will extend their shelf life. However, I prefer to shell mine first. If left whole, you can easily store pecans in the refrigerator for about a year or the freezer for two or more years.
Shelling Pecans – Harvesting And Shelling Pecans
I prefer to shell my pecans because I don’t want to go through the hassle of shelling when I need a few for a recipe! Doing the process in the fall, right after harvesting, is the easiest for me personally. I then store the shelled nuts in my freezer in a freezer-safe ziplock bag.

The easiest way I have found to shell pecans is to boil them first. Place the pecan shells in a large pot. Add enough water to cover the pecans. They will float, so you just need enough water to cover the pecans when stirring.
Allow the water to come to a rolling boil, then “cook” for 10 minutes, stirring occasionally. After the time is up, strain the pecans and allow them to cool long enough to handle or to room temperature.
Hammer Time!
I then take a hammer and a cutting board and start to get to work shelling. I won’t lie, this process is a bit tedious, but it gets easier the more you do it. (It’s also way easier than shelling hickory nuts!)
If you look at a pecan shell, you will see a “seam” that runs from the tip and down each side. You want to use the hammer to hit the pecan on a non-seam side. Place the pecan on the cutting board and give the non-seam side a good couple of hits toward one end.

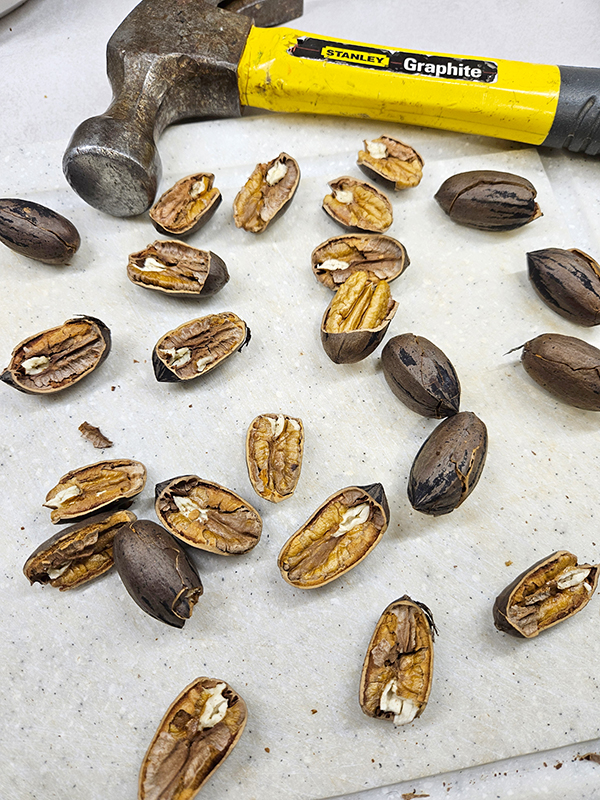
Once you hear a crack, flip the pecan over and do the same process with the other non-seam end. Your goal is only to split the pecan in half, not to obliterate it! I like to repeat this process for a good amount of the pecans, then get to work on removing the actual nut meat.
Removing The Nut Meat
First, remove the papery brown middle part. Then take a small pick and gently coax the nut from the shell. If the sides of the shell go up over the nut, try to break those back gently. The more of the shell you remove to expose the nut, the easier it will slide out.
Again, it takes some practice, but you will start to get the hang of it. Even if you wind up with pieces of pecans as opposed to full halves, you can still save those to use in recipes. Patience is key!
There are some products designed specifically for shelling nuts. For example, my parents like to use a nut sheller instead of a hammer. Either way, it is a slow process, but the reward is worth it! (Product Link: The Texan York Nut Sheller)

Once shelled, your pecans are ready for snacking or to be used in all sorts of delicious recipes! Store any shelled pecans in an enclosed container in your refrigerator for about 9 months or in your freezer for a year or more. Enjoy!
Until next time, thanks for stopping by!
– Chelsea
*This post may contain affiliate links. These are products I have used personally and highly recommend. As an Amazon Associate, I may earn a small commission from qualifying purchases if you purchase items through my links. These links and the ads on this page help to support my family and our semi homestead, so Thank You!