
One of the most popular and easiest landscaping plants to grow around your property is hostas – and for good reason! These shade-living perennials are grown not only for their laid-back growth requirements but also for their stunning foliage.
Hostas come in a wide range of colors, textures, and sizes. From smooth and pointy to textured and wide, hosta foliage has you covered! (And with over 2,000 different varieties, there’s definitely one for your property!)
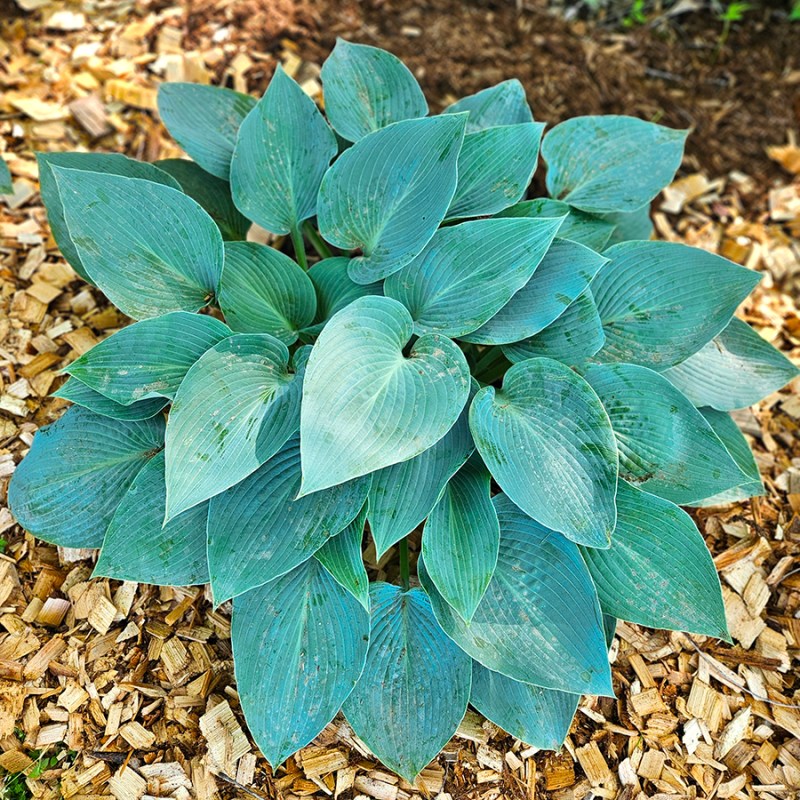
While plants typically grow to be around one to three feet wide and tall, you also can find varieties that grow much larger and smaller to really fit your growing space perfectly. You can find their foliage in all shades of green as well as green-blue, cream, variegated, and more.
Unlike most plants that require full sun, hostas thrive in shady locations. This makes them great for adding interest and color around and under treelines, porches, awnings, and anywhere else where other plants might struggle to grow.
Even though hostas are pretty easy plants to plant, grow, and maintain, there are still a few tips that you should keep in mind so you can enjoy this healthy, thriving plant for years to come!
How To Grow & Maintain Hostas
Growing Requirements
Hostas are typically planted as divisions or from small potted plants. You can find all sorts of different varieties in most garden centers and even some big box stores. However, you also might be able to find a neighbor or family member who would gladly give you a division from one of their established plants!

It’s best to plant hosta divisions or bare roots in the spring or fall. This allows them to become established and start growing before the heat of summer arrives (for spring planting) or the chill of winter starts (for fall plantings). While you can plant hostas during the summer months, it might be more of a challenge to get them to establish.
Due to their large leaves, hostas don’t really handle full sun well. The ideal growing location has partial or dappled sun. They can also handle full shade as well, but a bit of morning sun is well tolerated.
Choose a spot that has well-draining, fertile soil. Amend the soil with plenty of compost if needed to help improve drainage as well as up the nutrient levels. Make sure the growing location does not have standing water since hostas do not like to be in constantly saturated soil.
Side Note: Hostas are also great for growing near Black Walnut trees – something most plants can’t tolerate! We have several hostas planted near one of our big walnut trees, and they thrive there!

Planting Hostas – How To Grow Hostas
Once you’ve decided on the growing location and the ground is workable, create a hole that is two times as wide and deep as the root ball of the division. This will allow the hosta’s roots to grow and expand easily. If needed, add a good amount of compost to the bottom of the hole.
Place the hosta division into the hole so that the base of the plant (the crown) is even with the soil line. If planting a hosta from a nursery pot, plant it at the same level as the container. Add additional soil under the plant so that it reaches the proper height if needed.
Backfill with additional soil, lightly tamping it down around the roots. Water the plant well to help the soil fill in and settle.
If you are planting more than one hosta, be sure to space them out according to the variety. It won’t take long for hostas to fill up the space and reach their mature size. You want to make sure to provide them with plenty of growing space.

Long-Term Care – How To Grow Hostas
After planting, apply a few inches of mulch around the base of the hosta. This helps to retain moisture in the soil, regulate the temperature, and keep out competing weeds.
One of my favorite choices to use as mulch around hostas is untreated cedar chips. I like to use finer chips as the base layer and then larger chips on top. Not only do the cedar chips do a great job of keeping out weeds, but they look amazing around the bright greens of hosta plants!
Throughout the first year, water new hostas at least once a week if you don’t receive any rain. Hostas like moist soil, but make sure it isn’t saturated or to the point of having standing water. After the plants become established, they can tolerate some drought conditions so you can cut back or stop watering.
When you start to see new growth appear, you can apply a light dose of balanced all-purpose fertilizer. This is especially beneficial if your soil is infertile.
A slow-release granular fertilizer is the best option to provide continual nutrients. However, we have pretty fertile soil where we live so I normally do not fertilize hostas other than the initial compost added when planting.
Hosta Blooms
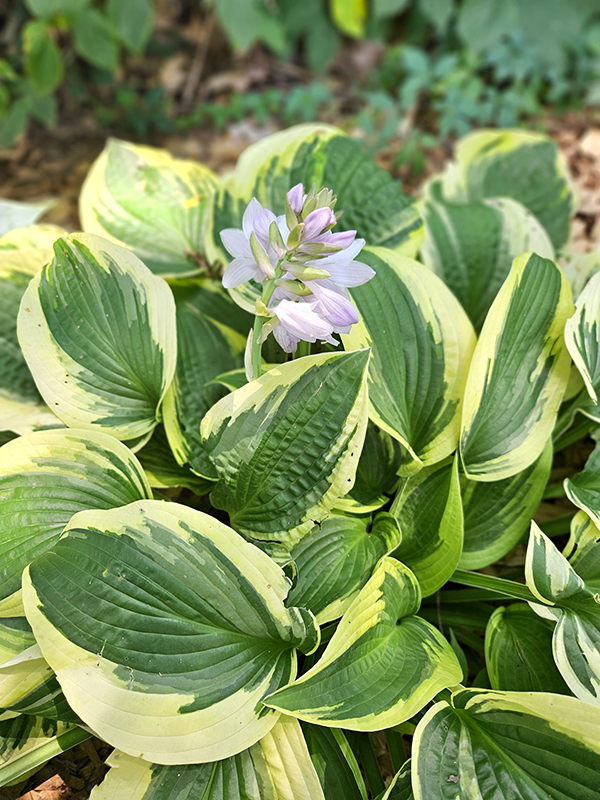
While hostas are cherished for their foliage, they do produce blooms. These blooms shoop up from the center of the plant on long flower stalks. The blooms range in color from purple, blue, pink, or white. Most of the plants we have produce light purple blooms.
To some people, the blooms are pretty so they let them grow. But most gardeners prefer to cut the blooms off as they appear. Pruning the blooms will allow the plants to focus their energy and resources on beautiful foliage instead of the flowers.
Personally, I like to cut off my hosta blooms. I want the foliage of the plants to be the main focus as opposed to the flower stalks. To prune the blooms, take a pair of sharp, clean pruners and cut the flower stalk off at the base of the plant. (These are my favorite pruners to use all throughout my garden – Product Link: Fiskars Bypass Pruning Shears.)
Pruning In The Fall – How To Grow Hostas
During the growing season, there is no need to prune hosta plants. You can remove a leaf here and there if it gets damaged due to winds or pests.
When the cooler weather of fall arrives, hosta plants will start to go dormant. As this happens, the foliage will start to turn yellow and eventually die back completely.
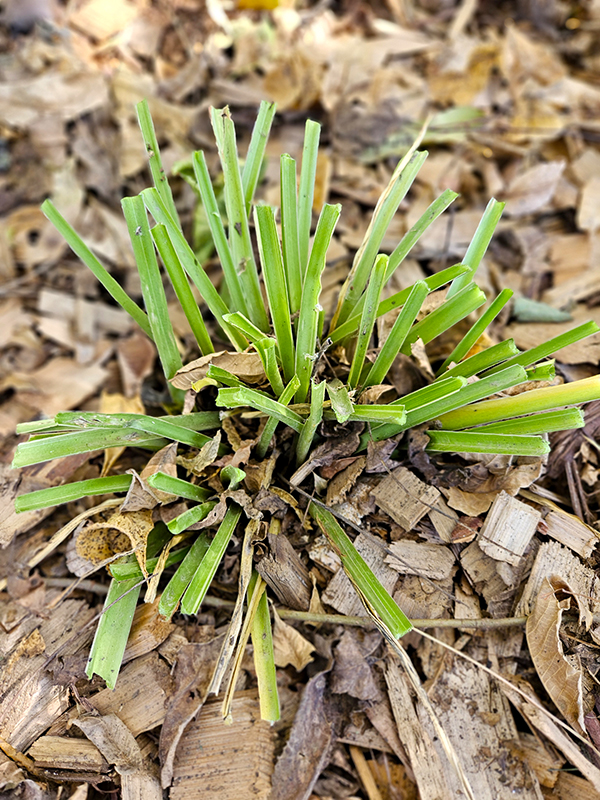
Remove this fading foliage from the plants as soon as you see it starting to turn. There are many different pests that are attracted to the dead foliage and will more than happily take up residence over winter if the foliage is left as is. Not only that, but it can also be a breeding ground for diseases.
Once I start to see the foliage dying back and looking less than stellar, I take my pruners or my loppers and chop plants back to about 2 to 3 inches above the soil line. Remove the foliage and add it to your compost pile or toss. After pruning, I add a few inches of dead leaves where plants are for a bit of winter protection.
Hostas can also be divided and propagated, but I’ll leave that for another article. When spring arrives, your hostas will start to push up through the mulch and provide you with another great year of beautiful foliage!
Until next time, thanks for stopping by!
– Chelsea
*This post may contain affiliate links. These are products I have used personally and highly recommend. As an Amazon Associate, I may earn a small commission from qualifying purchases if you purchase items through my links. These links and the ads on this page help to support my family and our semi homestead, so Thank You!
Discover more from Semi Homestead Life
Subscribe to get the latest posts sent to your email.