If you want to break ground on a small garden but don’t know where to begin, don’t worry – I’ll walk you through the simple steps to convert a small space in your backyard into in-ground raised garden beds.
There are all sorts of different ways to grow your own food at home. You can create a traditional in-ground garden. You can set up raised beds using all sorts of different materials and structures. There are even ways to garden in grow bags and small pots on your front porch.

However you decide to garden, the goal is to grow fresh fruit, vegetables, and flowers for you and your family. So really, there isn’t a right or wrong answer in what method you use.
But if you are starting from scratch and are looking have maybe a small garden plot without needing to purchase lumber or materials for traditional raised beds, then this article is for you. I’ll show you how to go from a simple backyard full of grass to a raised in-ground garden bed in six basic steps.
How To Create In-Ground Raised Garden Beds In 6 Steps
Step 1: Choose Your Location
The first step to creating your new in-ground garden beds is to choose your location wisely. You need a location that receives full sun for at least 6 to 8 hours each day. The more sunlight, the better.
The soil in the area should be well-draining and not prone to flooding or standing water. Also, make sure to keep the in-ground garden away from any black walnut trees. (See why I know that tidbit here: “Black Walnut Trees & Vegetable Gardens”.)
Next, it’s time to think about the size of your in-ground raised garden bed (or beds). Think about what types of crops you want to grow to help you decide this.
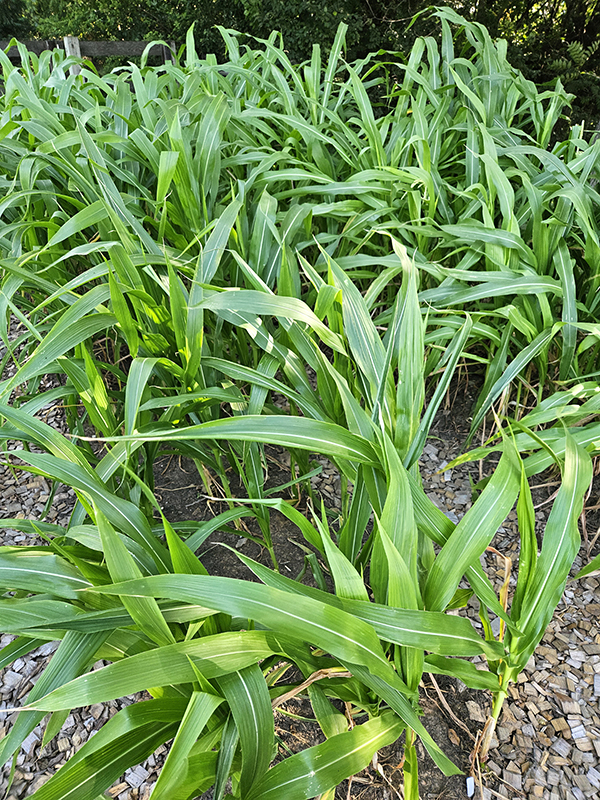
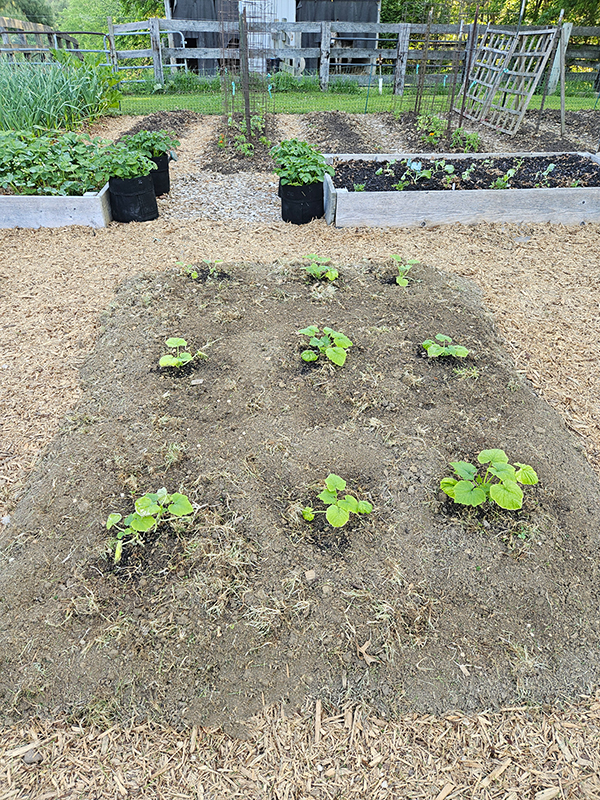
Do you want to just grow a few tomato plants and a couple of peppers? Then your space doesn’t need to be too big. Do you want to have a full salsa garden as well as a few zucchini plants, fresh herbs, green beans, and more? Then you will likely need a few in-ground beds like I added.
If this is your first garden, it’s always best to start small and work your way up. Choose a few of your family’s favorite crops and focus on those for the first year. Like I have done several times, you can always expand in the future.
Keep in mind that a typical raised bed measures up to around 4 feet by 8 feet. This provides you with easy access to all sides without needing to walk on the actual soil.
Step 2: Measure And Mow – In-Ground Raised Garden Beds
Once you have the perfect spot picked out, it’s time to get it laid out. This includes the walking areas that you want to go around and between the in-ground beds. With this type of garden setup, the walking areas are just as important as the growing spaces (and where you will get the soil from to create the “raised” beds).
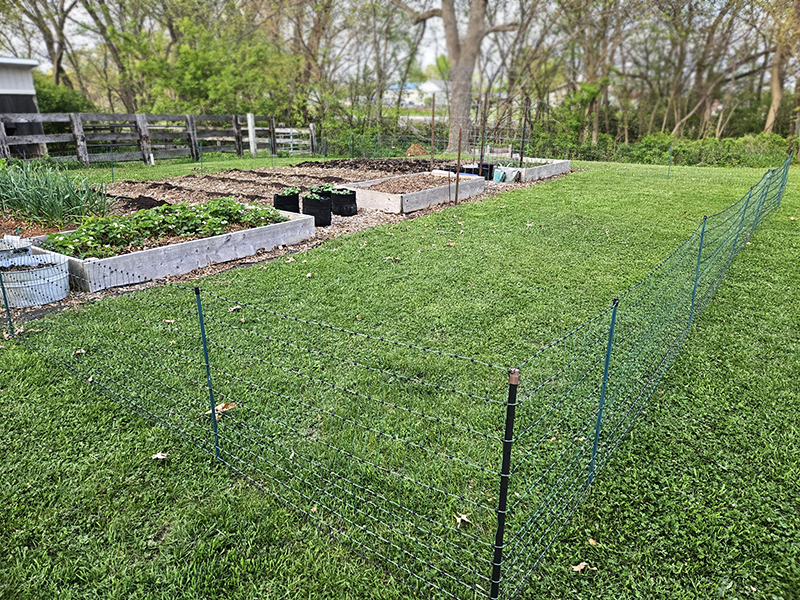
In my case, I already had a fence around my garden that was larger than my current setup at the time. I expanded the fence to show me what space I had to work with to help me decide the size of these new in-ground beds.
For my setup, I ended up leaving about two feet of walking space around the perimeter with three feet of space between each bed. Then, the beds themselves each measure around 9 feet by 6 feet.
Whatever space you end up using, the first thing to do after measuring in order to prepare the ground is to mow the grass super short. This isn’t required, but it does make the tilling process a little easier. It also helps you visualize the space without taking the drastic step of digging up the soil just yet.
Step 3: Breaking The Ground
As much as you might be a fan of no-till gardening, there really is no way around it. You have to break up your soil at least once so you can plant in it.
Rototillers aren’t really a piece of equipment that most people have lying around in their garages. Thankfully, you can rent tillers at most home improvement stores.

You might even be able to find a neighbor or someone in your local community who has a rototiller that you can borrow. Check local Facebook groups or ask around for help. Some people might even tackle the job for you for a fee.
I won’t lie to you, tilling the ground for the first time is hard work. You will definitely be able to skip your workout for that day!
If you really want a workout, you can break up the ground by hand using a shovel. However, you need to go down about 12 to 14 inches deep into the soil, so hand tilling is almost impossible to accomplish. (Or at least it would be for me!)
Tips On Tilling
How dense and compacted your soil is will dictate whether this job will be easier or harder. One simple tip to help: wait a few days before tilling if it has recently rained, so the soil is as light as possible. (Damp soil is a beast to till and break up!)
Use the tiller to walk back and forth to break up the soil where your in-ground raised beds will be, as well as your walking areas. When you are done tilling the garden in one direction, do it again in the other direction. But this time, go a little deeper if possible. (For example, if you were walking North and South for the first round, now till the garden East and West. This helps to avoid ruts and ridges in the soil.)

You may need to make several paths over the space before the soil is broken up enough and you are able to till down deep into the soil. Break this process up in the span of a few days if you need to.
Step 4: Create The In-Ground Raised Beds
Now for the other labor-intensive part of this process. You have to actually make the beds “raised” compared to the walking areas in your garden.
To accomplish this, you are going to shovel the soil from the walking path up onto the growing areas. You don’t need to go down super deep; just a few inches is plenty. Use a square mouth shovel to help scrape the soil to create your walking paths. (Use a shovel like this as opposed to one meant for digging – Product Link: Ashman Heavy-Duty Transfer Shovel.)
Not only will this help to give your plants more loose soil to grow in, but it also helps elevate the surface off the ground and prevents standing water.
Step 5: Amend The Soil – In-Ground Raised Garden Beds
Next, you want to amend the soil by adding compost and some other organic matter. Chances are, the soil you just broke up is lacking in nutrients and minerals – items your plants need to grow and produce.
To help provide that, work a nice thick layer of finished compost into the soil in your raised beds. By adding compost to your soil each year, the soil will only improve as the years go by.
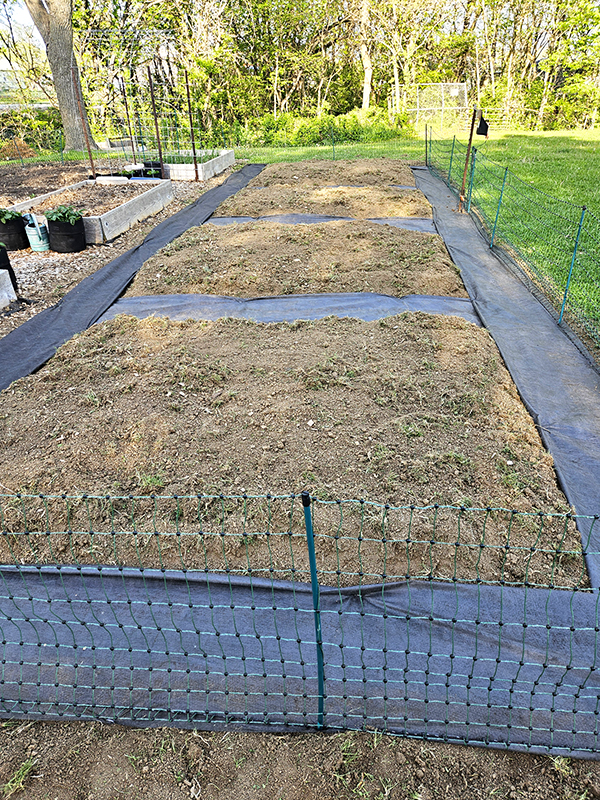
You can see the difference in my photo comparing the light-colored newly turned in-ground raised bed soil versus the rich brown of my growing rows that have been packed with compost for several years now.
At the very least, add a few inches of compost into the planting holes before adding your seedlings or vegetable seeds into your new in-ground raised garden beds. You can add even more nutrients by also including worm castings.
Step 6: Add Mulch
For the last part of this transformation, it’s time to add the mulch. There are two types of mulch you should be adding: first, a mulch for the walking areas, and second, a mulch for the in-ground raised garden beds.
In your walking areas, you can use any type of organic or natural mulch that you want. My preference is natural hardwood or softwood woodchips. Avoid using any that contain dies or chemicals like weed suppressors.
Some people like to use small stones or rocks to create their walking paths. That choice is completely up to you. We like the idea of a mulch that breaks down over time as opposed to rocks that don’t.
Before laying the mulch down, we also lay down weed fabric. Again, this is a personal preference, and you can skip this if you like. We have some pretty persistent weeds, and the fabric helps to slow their growth down.
In-Ground Raised Garden Bed Mulch
As for the growing areas, you want to add a mulch that will break down quickly and add organic matter to the soil when the growing season is over. Our favorite choice during the spring and summer months is hands down grass clippings. You can also use straw, shredded leaves, and even pine needles.
Create a thick 4 to 6-inch layer of mulch around your plants. Just keep the mulch a couple of inches away from the stems of each plant.

The mulch will help the soil retain moisture, prevent weeds from growing, and help regulate the soil’s temperature. And, as mentioned earlier, it will add organic matter to the soil each year as it breaks down and decomposes. (You can read more about the advantages of using mulch in my article, “Why To Use Mulch In Your Garden – Weed Less & Improve The Soil”.)
Now the only thing left to do is plant your newly made in-ground raised garden beds! Best of luck on a wonderful growing season!
Until next time, thanks for stopping by!
– Chelsea
*This post may contain affiliate links. These are products I have used personally and highly recommend. As an Amazon Associate, I may earn a small commission from qualifying purchases if you purchase items through my links. These links and the ads on this page help to support my family and our semi homestead, so Thank You!
Discover more from Semi Homestead Life
Subscribe to get the latest posts sent to your email.