
Are you curious and want to learn how to make your own sourdough starter from scratch, but are overwhelmed with all of the information on the internet these days? If so, you aren’t alone!
There are so many different methods and tricks for getting a sourdough starter going that it can be hard to know which method to use. While most of them will successfully create a mature starter, some methods are easier to tackle than others.
After my own personal trial and error, I have put together a simple method for easily creating a sourdough starter. It’s a tried and true method that will result in a bubbly, happy sourdough starter in no time at all – and all by using two simple ingredients and less than 10 minutes each day!
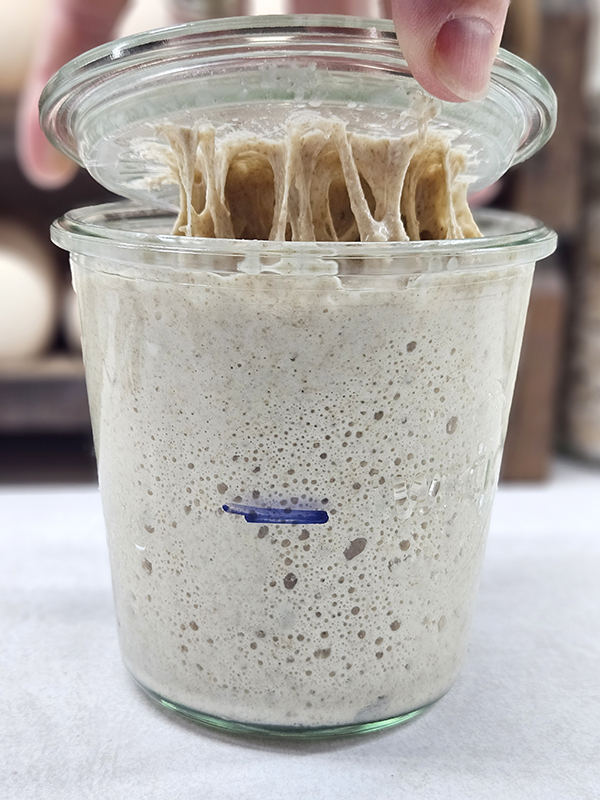
I’ve now had my mature starter for over a year. Her name is Doughlene, and yes I sing Dolly’s famous song every time I feed her! (Thankfully, it’s usually just in my head.) But with us being as busy as we are with the kids and work, I have put her through the wringer and she is still as dependable as ever!
If you want to learn how to create your own dependable (insert your chosen name here) sourdough starter but don’t want a ton of fuss, then keep reading. In just a couple of weeks, you will have a mature starter that you can make all sorts of delicious baked goodies with!
Some Basics About Sourdough – Making A Sourdough Starter From Scratch
*Scroll down to the bottom of this post to see the full recipe, including exact measurements and amounts. You can also print out the instructions. I go into a bit more detail about the recipe here first, just in case you need it.
Before we just jump into the recipe and the steps, I want to take a quick minute or two to talk about what a sourdough starter really is. A sourdough starter is essentially fermented flour and water. The flour and water combine with natural “wild” yeasts that are found all throughout your environment.
These yeasts live naturally in the air you breathe, on your clothing, in the flour you use, and even on your skin. They are unique to you and your home. While that might not sound very appetizing, these yeasts are natural and don’t cause any concern.

Anyway, as the flour and water ferment, they combine with the wild yeast and create a live culture of beneficial bacteria. These bacteria and yeast are what allow bread dough to naturally rise and turn into flavorful sourdough bread (similar to what occurs when you use commercial yeasts).
A mature sourdough starter can be used to make so many yummy homemade baked goods like crusty boules, sandwich bread, cinnamon rolls, focaccia, bagels, pizza crust, and so much more! Not only do homemade baked goods taste so much better than store-bought, but they allow you to have a little bit less reliance on the grocery store – and that’s never a bad thing!
Ingredients & Terms You Need To Make A Sourdough Starter From Scratch
Different bakers are going to give you their own list of must-have items and ingredients. These are the items that I use for my sourdough starter and what I’ve had success with.
Unbleached Flour
There are many different types of flour available. I have had the best luck using a mixture of unbleached bread flour and 100% whole wheat flour to create a strong new starter. The most important aspect when choosing your flour is that it is unbleached and has a high protein content. While you can use only all-purpose flour, it might take a little bit longer to get it mature.
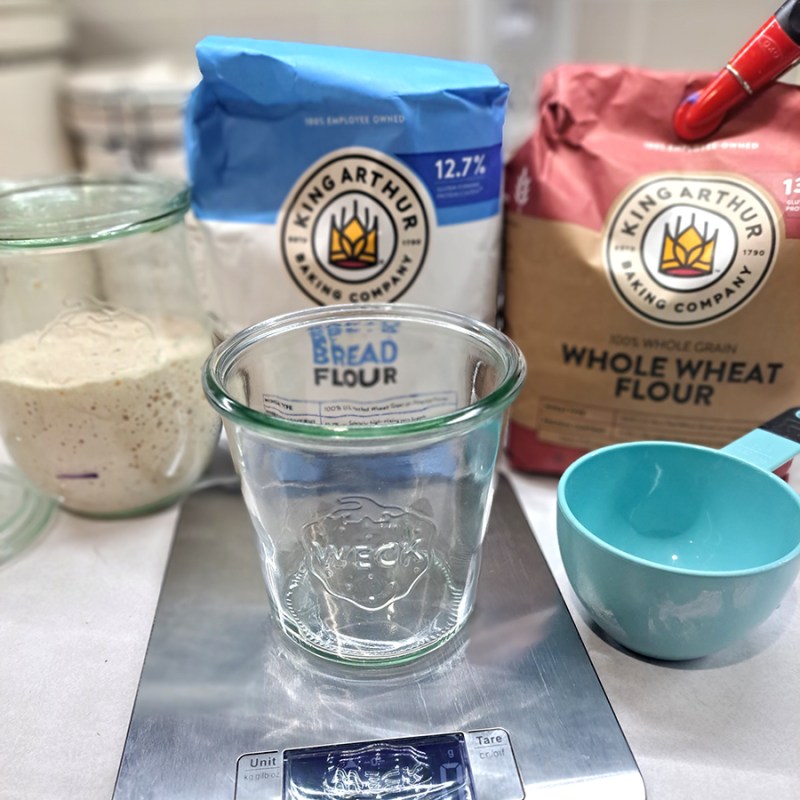
Warm Water
Here’s another item that is a hot topic amongst sourdough bakers. Some insist that you must use filtered water due to the chemicals in tap water. However, in my personal experience, I have had great success with my good old tap water. I suggest you try using your tap water first. If after a few weeks you still aren’t seeing desired results, then move to filtered water and see if that helps.
Glass Jars
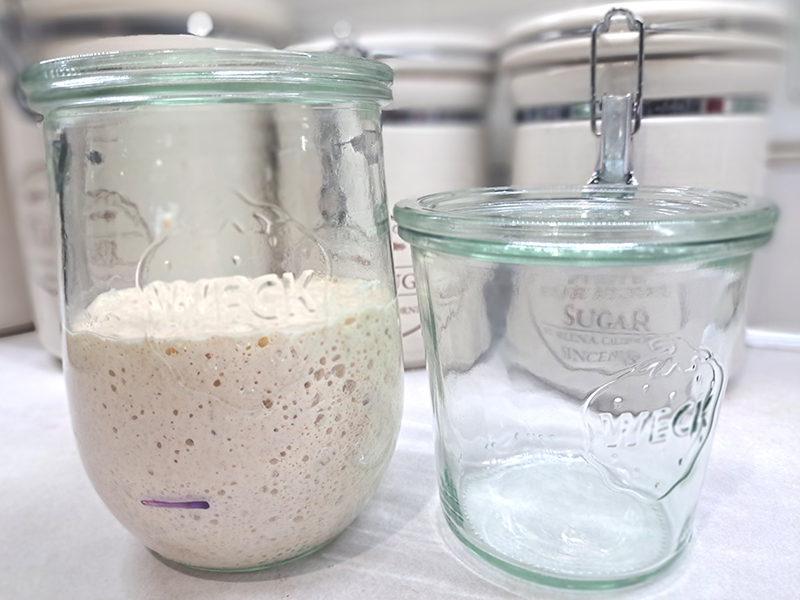
The next item you need is a couple of glass jars or containers to feed and keep your starter in. The container needs to be large enough to hold your starter and make it easy to add your ingredients.
The containers or jars also need to have a loose-fitting lid or a way of covering them. You can use a piece of plastic wrap or even a piece of cloth with a rubber band securing it. Whatever you use, the lid shouldn’t be airtight.
I like to use glass jars that have a bit wider opening as well as straight sides to make pouring and mixing the ingredients easier. My go-to favorites are Weck canning jars and their glass lids (just don’t use the rubber seal or the clips). They are a bit more expensive than simple Ball jars, but it’s well worth it for me. I use either 1-liter or half-liter jars depending on how much starter I need to work with. (Product Links: Weck 1-liter tulip jars and Weck half-liter jars)
Miscellaneous Supplies
The other supplies you need for this method are a kitchen scale, a measuring cup, and a spatula or spoon for stirring your starter ingredients.
You can definitely measure your flour and water ingredients using measuring cups, but I highly encourage using a kitchen scale. If ten people measure out a cup of flour, you would end up with ten different weights of flour. So an inexpensive kitchen scale is really a must-have tool for making a sourdough starter from scratch. (I couldn’t find a link to my exact scale, but this is basically the same as the one I have used for years – Product Link: Nicewell Food Scale)
Terms & Wording – Making A Sourdough Starter From Scratch
There are a few odd words that you will hear in regard to sourdough starters. The first is a “feeding.” When I talk about feeding a starter, that is the process of adding flour and water to the starter.
The next term is “discard.” Once your starter is mature and bubbling consistently, then you will have what’s called discard. Every time you feed, you remove part of the starter and that’s the discard. Eventually, you will be able to make all sorts of yummy things with your sourdough discard like crackers and cookies. But until your starter is nice and mature, you need to throw the discard into the trash or compost bin.
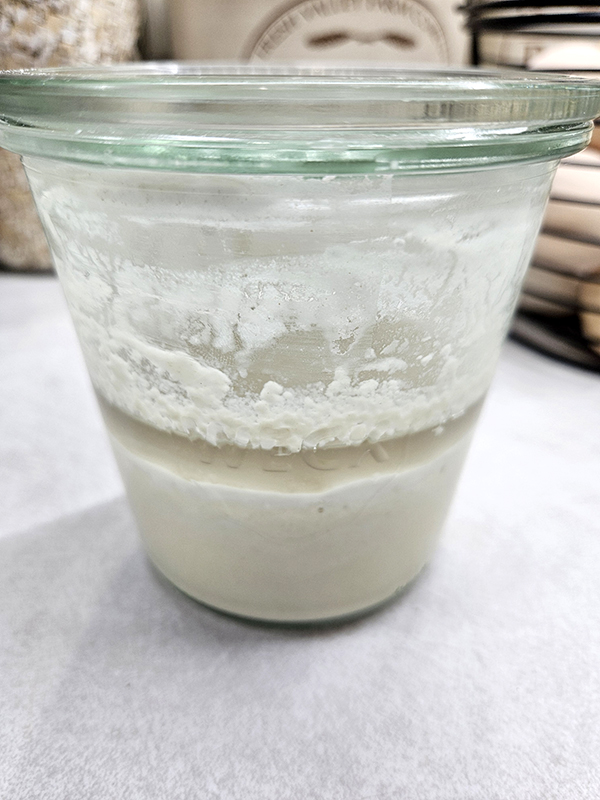
While you’re making a new starter, you might see a little bit of dark liquid at the top of the starter. This can happen at any time throughout this process. That liquid is called “hooch” and is totally normal and fine. You can either pour it off or just mix it back into the starter. I usually opt to pour it off because it can give the starter a stronger “sour” flavor. You might also see hooch if you store your starter in the fridge for an extended period of time (ahem . . . sorry Doughlene).
Ok, now you’re finally ready to get your sourdough starter started!
How To Make A Sourdough Starter From Scratch
If you do a Google search for making a sourdough starter, you will likely find hundreds of different recipes and instructional tips. There is no right or wrong way of creating a sourdough starter. Below are the steps I take if I need to create a new starter.
Your sourdough starter will take at least a week before you start to see consistent active bubbling and a large increase in size. The goal is to have your starter consistently doubling in size within 4 to 12 hours after feeding.
Just be sure to give the process patience since not everyone’s starter will behave the same way. (My first-ever starter took almost an entire month to become fully active!) But don’t worry and don’t give up on it; It will happen!
Day 1: Starting Your Starter – Making A Sourdough Starter From Scratch
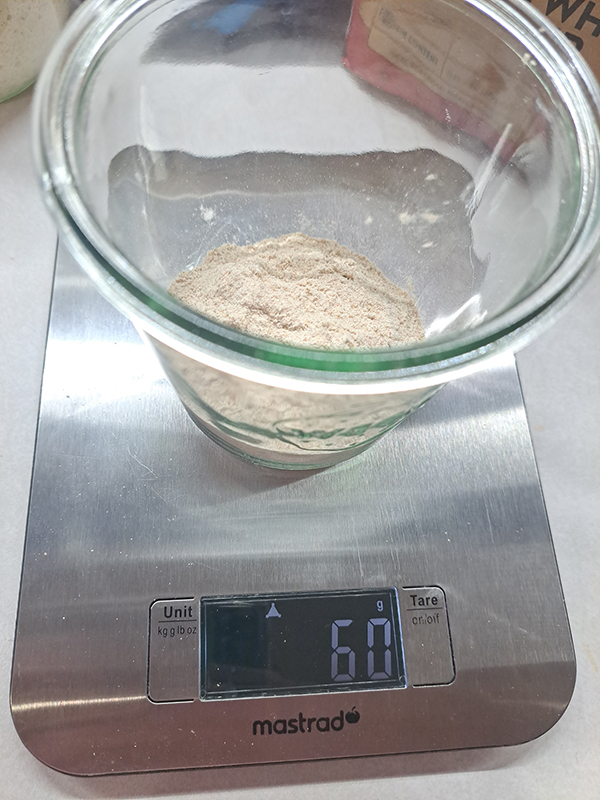
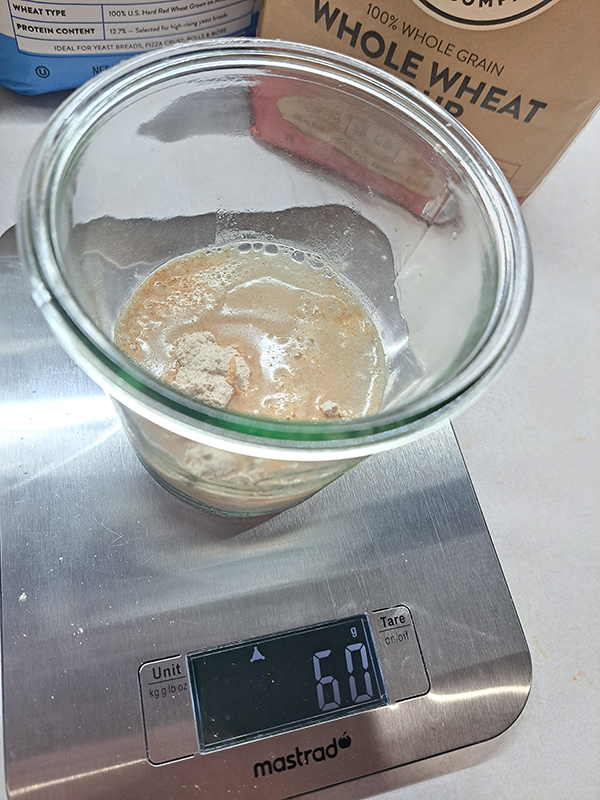
Place 30 grams (g) of whole wheat flour + 30 g of bread flour into your glass jar. Add 60 g of warm water and mix until all of the flour has been fully incorporated. The mixture will be rather thick and sticky. Cover the jar with a loose-fitting lid.
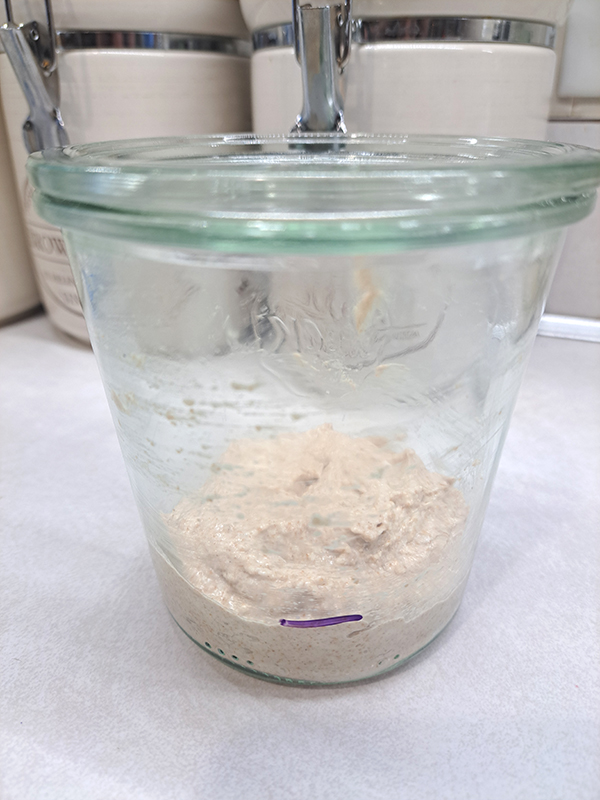
At this point, you want to mark the height of the starter on the outside of the container. Some people like to place rubber bands around their jars at the level of their mixture. However, I just like to use a dry-erase marker to note the height.
Set the jar on your counter or in a warm location for 24 hours (room temperature is fine). That’s it for day one!
Day 2: Discard & Feed
Chances are that you won’t notice much of a difference over the course of 24 hours. You might see some bubbles or you might not. Don’t be surprised if you start to see a little bit of hooch on top or in the middle of the starter. Just pour this off or mix it in. Again, you might see this at any point during this process in the beginning.
After the 24 hours are up, you are going to discard about half of the starter. It doesn’t have to be exact. You are now going to “feed” the leftover starter still in the jar with water and flour.
Add 30 grams of whole wheat flour + 30 g of bread flour. Mix in 60 g of warm water until all of the flour has incorporated. Cover, mark the height of the starter, and set it in a warm location once again for 24 hours.
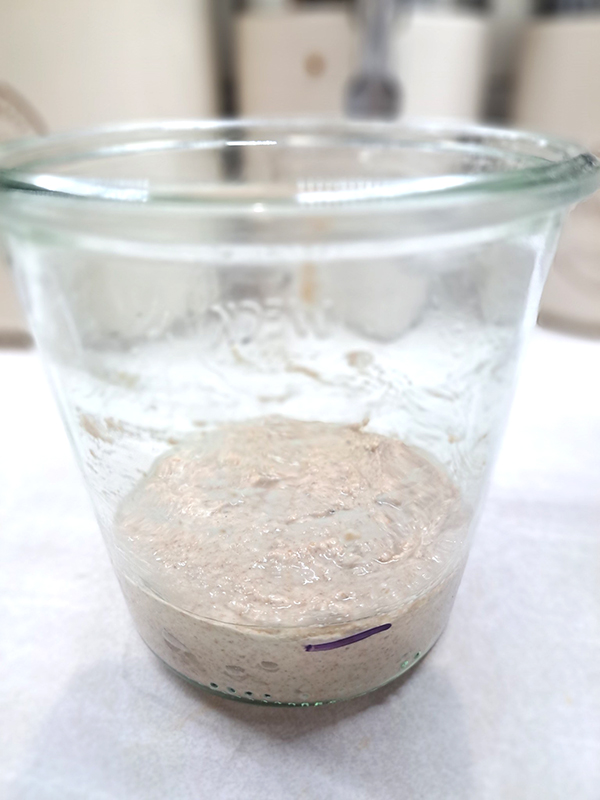
Day 2: Very little activity after the first 24 hours. Discard half and feed. 
The consistency is a bit better after feeding on day 2. 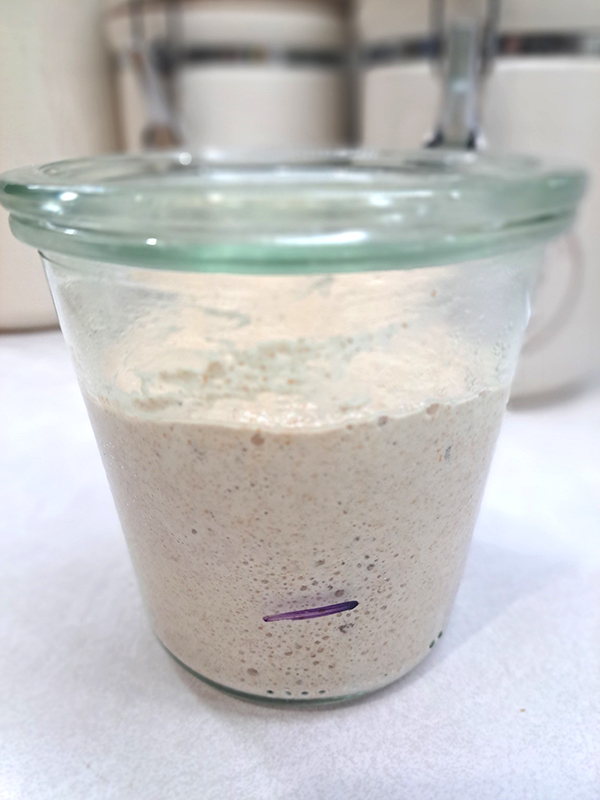
Day 3: Tons of activity and smells bad. Keep discarding and feeding. 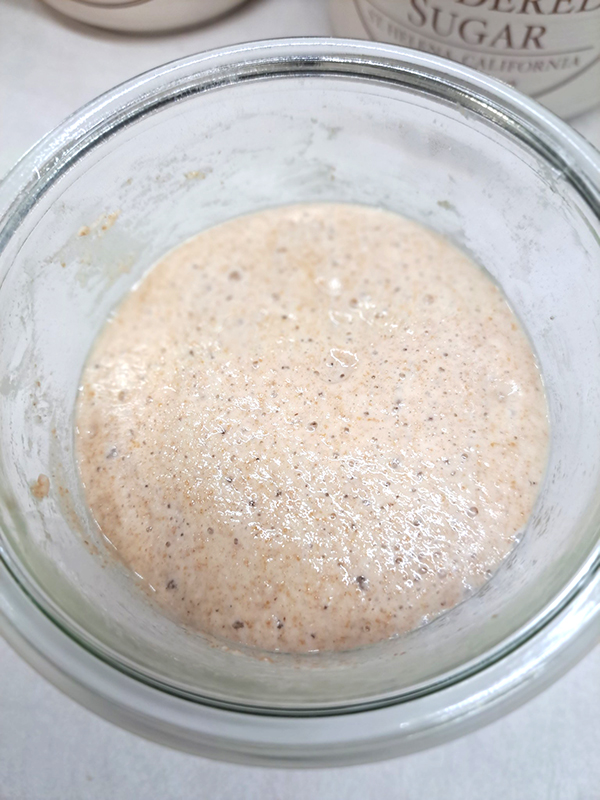
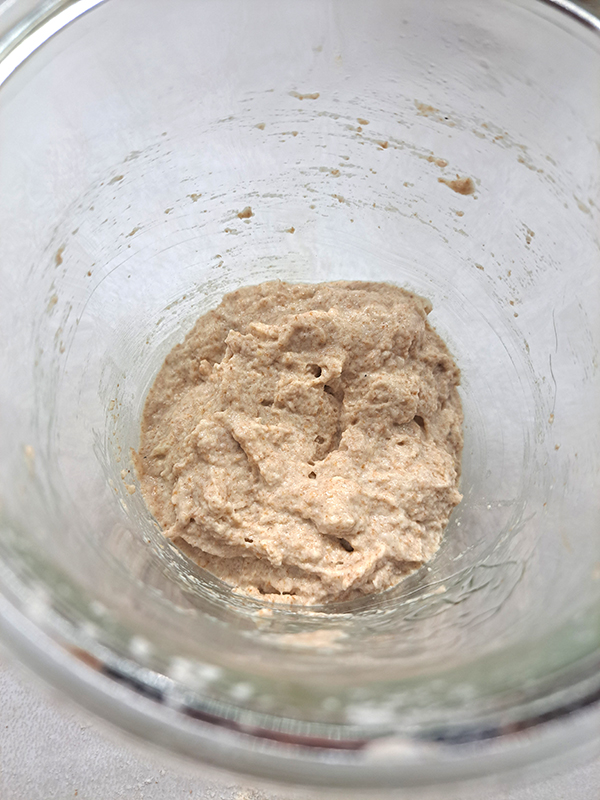
Top view of the early activity. Note how small the bubbles are. 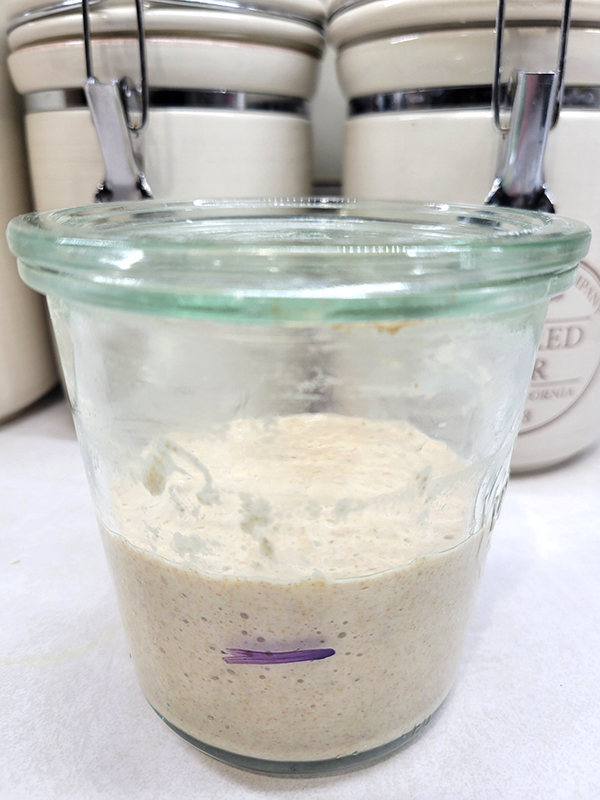
Day 4: Less activity. Still smells bad. 
Day 5: Activity about the same. Smell is better. 
Day 6: So close! Starting to have more bubbles and better rise. 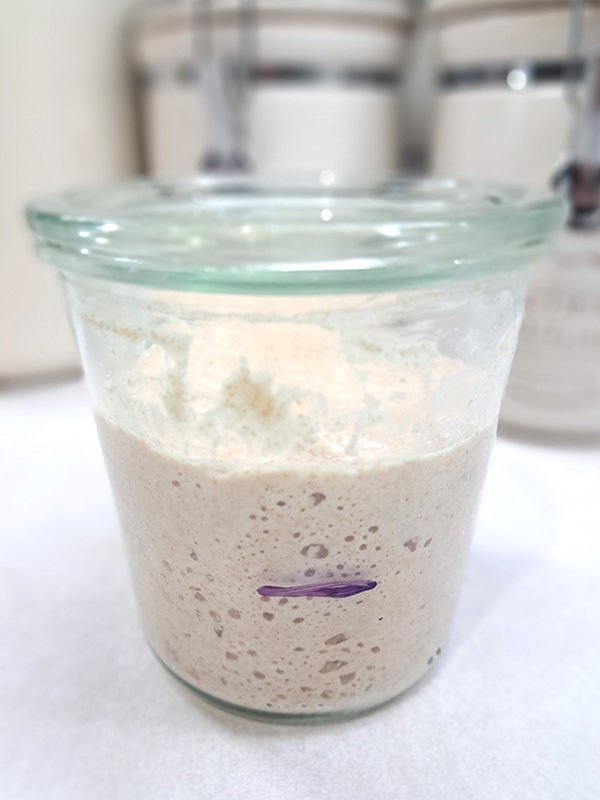
Day 7: Tons of different sized bubbles, starter has doubled, and it looks great!
Days 3-7: Continue Discarding & Feeding – Making A Sourdough Starter From Scratch
Note the change after each 24 hours. Did your starter start to bubble? Did it sit there looking pretty all day long doing absolutely nothing? Both scenarios are fine and completely normal! You might even have a ton of bubbling and activity in the first few days and then absolutely nothing the next; Also completely fine. Trust the process!
Just keep in mind that active bubbling and doubling in the first couple of days does not mean that your starter is ready for use. It’s just all those good and bad bacteria and yeast working things out. It’s exciting to see either way though!
Also, note the smell of your new starter each day. Don’t be surprised if it has a rather off-putting smell to begin with. (I liken it to the smell of dirty socks!) Once the starter matures, it should have a slightly sweet, tangy aroma but it won’t be off-putting like it was while getting established.
Continue to discard half of the starter and feed the remainder 30 grams of whole wheat flour + 30 g of bread flour. Add in your 60 g of warm water. Mix, cover, mark, and set aside.
Day 8 Onward: Time To Double The Feedings
After about a week, if your starter hasn’t started to double in size after 4 to 12 hours with lots of different-sized bubbles, you need to amp up the fermentation process by starting to feed your starter twice a day.
Once in the morning and once before bed, discard half of the starter and feed the remainder 30 grams of whole wheat flour + 30 g of bread flour just like before. Mix in 60 g of warm water. Cover, mark the height, and set aside.
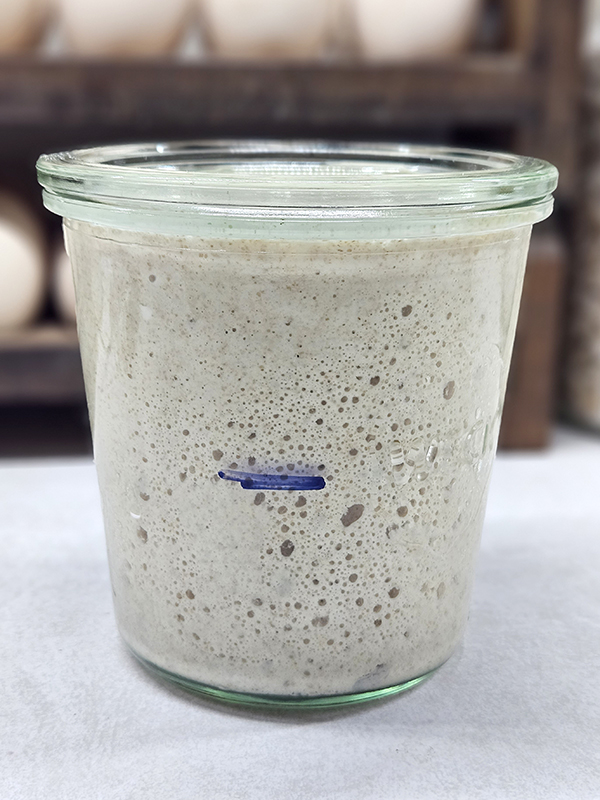
The goal is to get your starter to where it has lots of little bubbles, doubles in size in the 4 to 12-hour timeframe after feeding, and has an almost fluffy, melted marshmallowy texture (see first image above). Transfer the starter to a new jar and give it a name.
Your starter is now ready for baking and creating amazing sourdough baked goods like the bagels I use in my Bagel Breakfast Sliders recipe. It’s truly amazing how many different products can be made using sourdough starter and discard!

Keeping A Sourdough Starter Alive – Making A Sourdough Starter From Scratch
I will go into more detail about this in a later article, but here’s the jist: You can keep your starter on the kitchen counter and feed it every one to two days. However, if you don’t plan on using it daily, you can just place it covered in your refrigerator to be fed weekly or a few days before you need to use it.
I prefer to keep Doughlene in the fridge and feed it weekly or sometimes every two weeks when I’m not using it frequently. In fact, I’ve even gone up to a month before feeding and it was just fine after a couple of feedings!
That’s what is often misunderstood about keeping a sourdough starter alive; You don’t have to be tied down to constantly feeding and maintaining a starter if you are busy like me. Once they are mature, they are super forgiving.
Just check out my YouTube short for proof of reviving poor neglected Doughlene! I’ve also put together an article about waking up a neglected sourdough starter: “How To Revive Sourdough Starter – Is My Neglected Starter Dead?”
Congratulations! You have successfully made your very own sourdough starter! Shoot me a message if you need any help or have any questions.
Until next time, thanks for stopping by!
– Chelsea
*This post may contain affiliate links. These are products I have used personally and highly recommend. As an Amazon Associate, I may earn a small commission from qualifying purchases if you purchase items through my links. These links and the ads on this page help to support my family and our semi homestead, so Thank You!
Making A Sourdough Starter From Scratch
Ingredients
- Whole wheat flour unbleached
- Bread flour unbleached
- Warm water tap or filtered
Instructions
- DAY 1: Add 30 grams (g) of whole wheat flour and 30 g of bread flour into a clean glass jar. Add 60 g of warm water and mix well until all of the flour is incorporated. Cover the jar with a loose-fitting lid. Add a rubber band or mark the height of the mixture on the outside of the jar. Set aside in a warm location for 24 hours.
- DAY 2: You may or may not see bubbles after 24 hours. There may even be a black liquid in the starter that is called hooch. Simply pour the hooch off and begin feeding. Discard (or remove) about half of the starter. At this point, the discard needs to be thrown away or composted (you can use it to make tons of goodies once the starter is mature but this needs to be tossed). To the remaining starter in the jar, add 30 g of whole wheat flour and 30 g of bread flour. Mix in 60 g of warm water and stir well. This is called a "feeding". Cover with a loose-fitting lid. Measure the height of the starter and set aside for 24 hours.
- DAYS 3-7: Note any changes to the starter. It may start doubling in size, bubbling, or doing absolutely nothing during these days. Don't be surprised if you notice a strong offputting odor during this time as well. All is completely normal. A mature starter will have a slightly sweet, tangy aroma. Continue to discard half of the starter and feed the leftover starter in the jar 30 g of whole wheat flour plus 30 g of bread flour. Add 60 g warm water. Mix, cover, mark, and set aside for 24 hours.
- DAY 8+ (If Needed): If your starter hasn't doubled in size after 7 days, start feeding the starter twice a day. Once in the morning and once at night (about every 12 hours), discard half the starter and feed the remaining starter 30 g of whole wheat flour and 30 g of bread flour. Add 60 g warm water and stir well. Cover, mark, and set aside. If your starter starts to have tons of little bubbles, doubles in size within 4 to 12 hours after feeding, and has an almost fluffy texture, the starter is ready for use in recipes. Now transfer the starter to a clean new jar and give it a name!
- Maintenance: Keep your starter on the counter and feed every one to two days. Alternatively, you can keep your starter in the refrigerator and feed it weekly or bring it out to awaken it a few days before you want to bake with it.
Notes
Discover more from Semi Homestead Life
Subscribe to get the latest posts sent to your email.