We dreamed for years about building a new screened-in porch on our home. The only problem is that the renovation would take a lot of time and money – both of which we lacked!
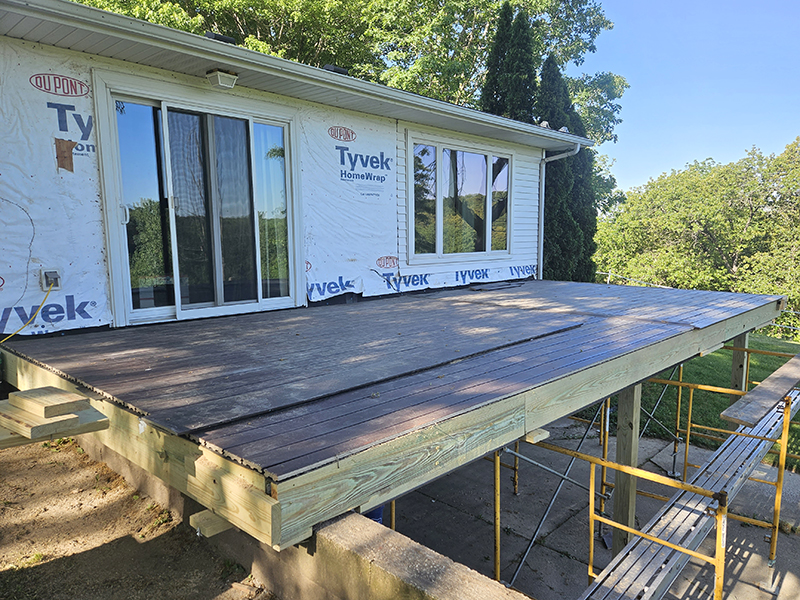
We had a huge wooden deck that ran the length of our living room and kitchen. It was about 24 feet wide by 16 feet deep. It had plenty of space for a large 8-person patio furniture set with room to spare.
But there were a lot of issues with the deck. The boards on top were starting to warp and we had a few spots underneath where the supports were rotting and needed supporting themselves. That doesn’t even count the structural issues from whoever built it in the first place!

Our family tried to spend a lot of time on the deck. We ate family dinners out there when we could, but the bugs and mosquitoes always ruined it. The patio set we used had a large umbrella on it to help block the sun, but the wind made keeping it open basically impossible.
So while we loved the deck, it wasn’t as practical as we’d like it to be. Well, after several years, we finally bit the bullet and decided to replace the old worn deck with a new screened-in porch and open deck combo!
A Little About Our Home
We moved into our house about two weeks before my firstborn arrived. (You want to talk about a stressful time!) One of the biggest features that drew us to this home was the view and the privacy, especially when standing on the back deck.
The deck looks out over a horse pasture and the dam of our little local lake is on the right side. There are mature trees bordering the entire back pasture and along the dam, making it feel almost like a private oasis.
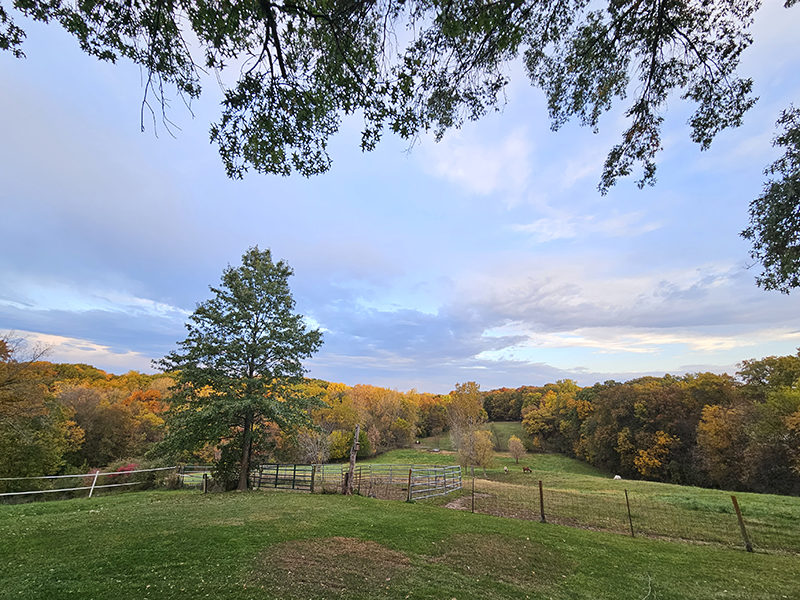
While we unfortunately don’t own the back pasture, we are still able to enjoy the view. Well, at least from inside the house! After several years of putting it off, the deck was no longer safe to be on due to its bad shape.
So after 15-some years, we finally made the new screened-in porch a reality!
The Making Of Our New Screened-In Porch
While we “maybe” could’ve done the work ourselves, we decided it would be much easier (and safer!) in the long run to hire it out.
We did successfully gut and finish our basement a few years back (we’re talking re-frame and everything). We also have created smaller projects like our chicken coop. So we aren’t strangers to construction by any means. (See, “Chicken Coop Features“)
However, for the sake of time (and our marriage!), a professional was the way to go. Once we found someone who was highly recommended, we set up a game plan for the porch and deck combo.

We wanted one side of the new screened-in porch to be open like a traditional deck with railings. That way, we could still get the amazing view while sitting in our living room.
The other side would all be screened in. This is the side that is attached to our kitchen by patio doors. We had a few design ideas we liked saved (thank you, Pinterest!) and the contractor put his own spin on things for the final design.
The screened-in portion would be around 14 feet wide by 12 feet deep with a cathedral ceiling. There would be semi-private, heavy-duty screens installed to help keep out bugs. The open deck portion would be 10 feet wide by 12 feet deep with a railing along two sides.
While the new deck and screened-in porch weren’t going to be as deep as the old deck, it would still give us plenty of space to be comfortable without going overboard.
Design Struggles
The worst part for me was the design process. While I might have graphic design experience and knowledge, I stink when it comes to putting home decorations up or making big decisions! I almost need to see it in place before I can make a decision one way or another.
After going to multiple stores and comparing prices and features, we ended up going with a mid-grade compost decking in a dark mahogany color. The railings on the deck portion would be black and the rest of the porch would be white. The outside would feature white siding to match what was already on our house.
The part we went back and forth on the most was the ceiling. At first, we weren’t going to finish it and thought we’d just take care of it ourselves at a later date.
However, as the porch progression went on, we agreed that we likely wouldn’t take the time to finish it so we might as well have the contractor do it. Besides, he had the scaffolding and the skills to make the job much easier!
Time For Demo
To help save some money, my husband, kids and I all started working on tearing down the old deck first. This was around the first of May.
Now, I tend to be a bit of a sentimental person. (Okay, a very sentimental person.) So I was a little sad to see the old deck go. However, I knew what was coming would be even better and used more, so that helped of course! What’s that saying, out with the old and in with the new?
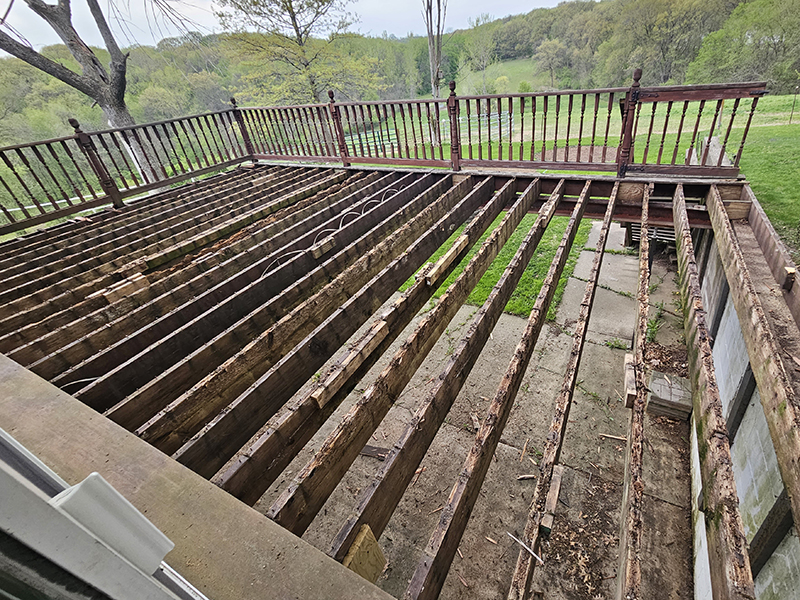
Anyway, the boards were a pain to take down. Some of them were rotten and easily pulled away while others acted like they were glued down. Add to that the fact that the deck is raised off the ground a whole story, and it becomes a bit of a precarious task. But we got it done!
Once we were down to the tresses that attached to the house, the contractor and his assistant came and took down the remaining boards. They had much better ladders and equipment than we did!
Framing For The New Screened-In Porch Begins
By May 15th, the old deck was completely gone. The first boards of framing went up on the 18th and it was off to the races! Each day we were able to look out and see great progress being made.

The contractor was a local older gentleman and his assistant. Just two guys who liked doing construction work and appreciated the craft. Since they weren’t a big company, we knew the work would take a bit longer to get done. However, we also knew they wouldn’t take shortcuts, so we appreciated that.
The composite decking came in and went up pretty quickly. By the end of May, we could see the uprights as well as the peak of the cathedral ceiling being framed. Slowly but surely, the new screened-in porch and deck started to take shape.
My husband helped speed things along some by wiring the electrical outlets and I helped by staining the ceiling once it was up. I chose a semi-transparent stain in Pecan color – and it was perfect!
Saying Goodbye!
Finally, on July 12th, we paid our last check and said goodbye to the two gentlemen. While the process took a little longer than we expected, we are super happy with the result. The guys did a great job and we were almost sad to see them go after being here for so long. Almost!
The composite deck boards have been installed 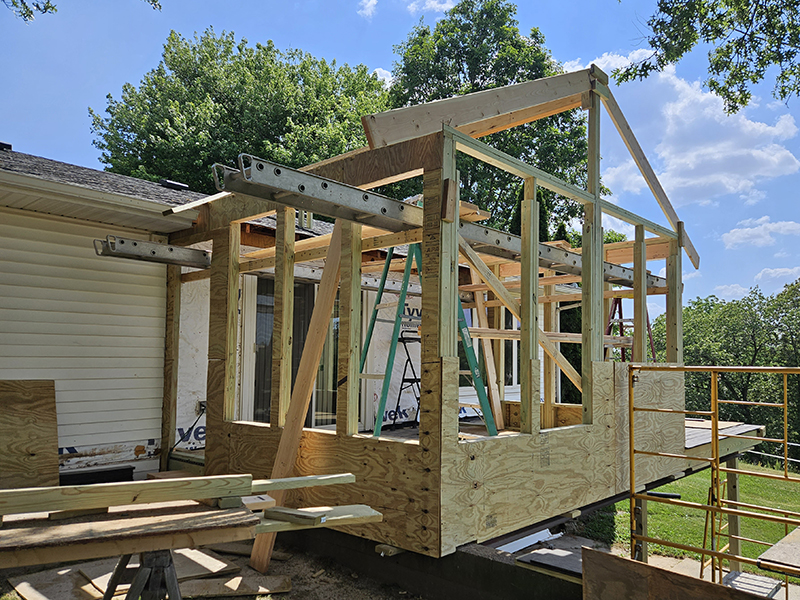
Framing has finally begun! 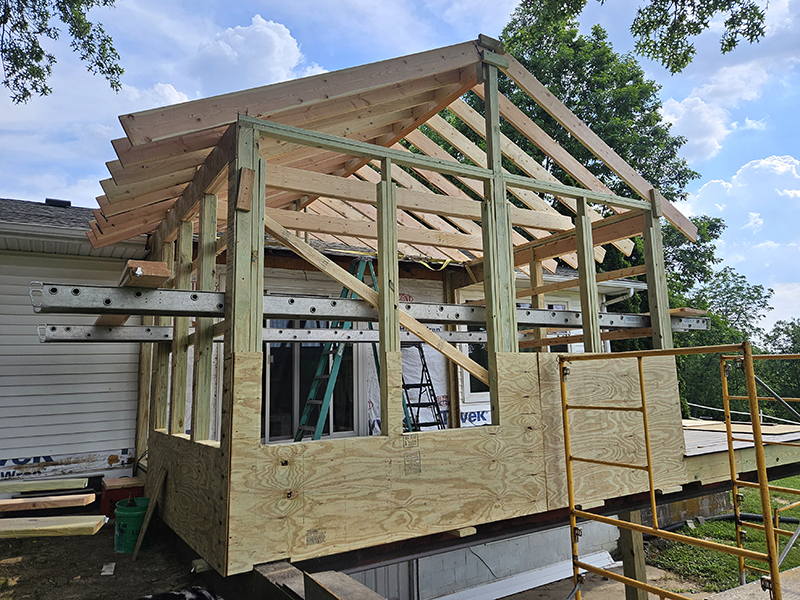
More of the roof framing being put up. 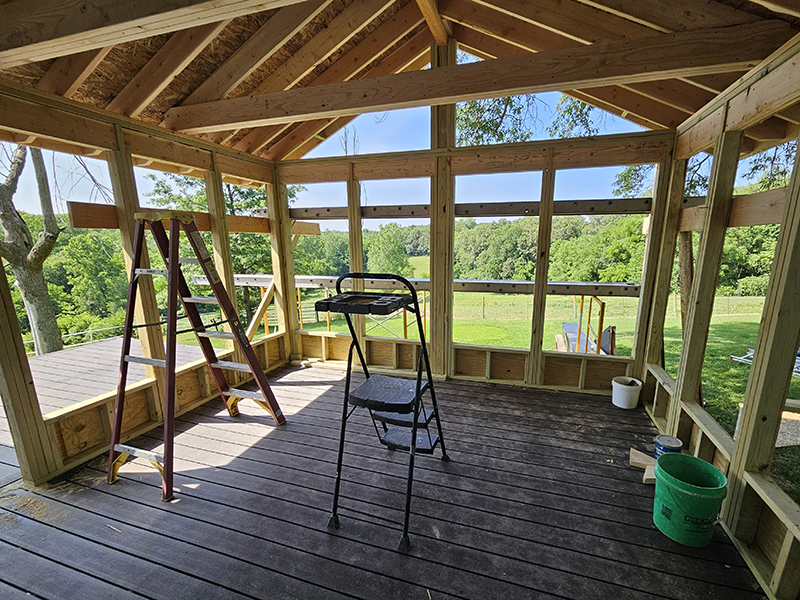
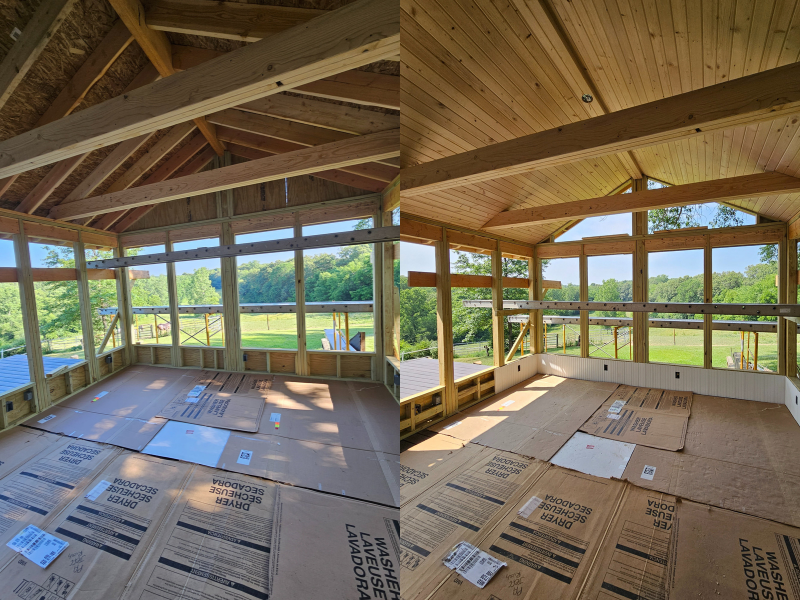
The inside of the porch with plywood covering the roof. 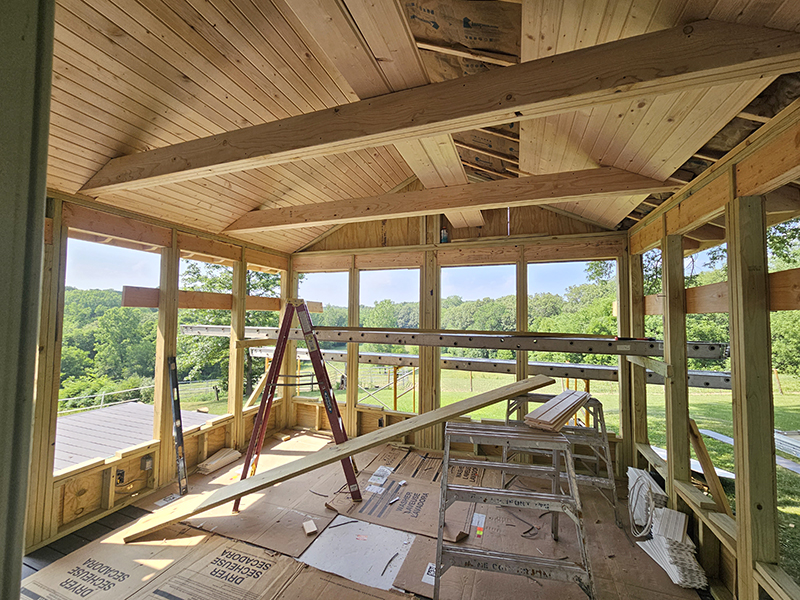
The knotty pine ceiling being installed. It still need stained. 
Some of the outside finishing touches being added. 
It’s getting closer! Most of the white pvc boards and trim have now been added. 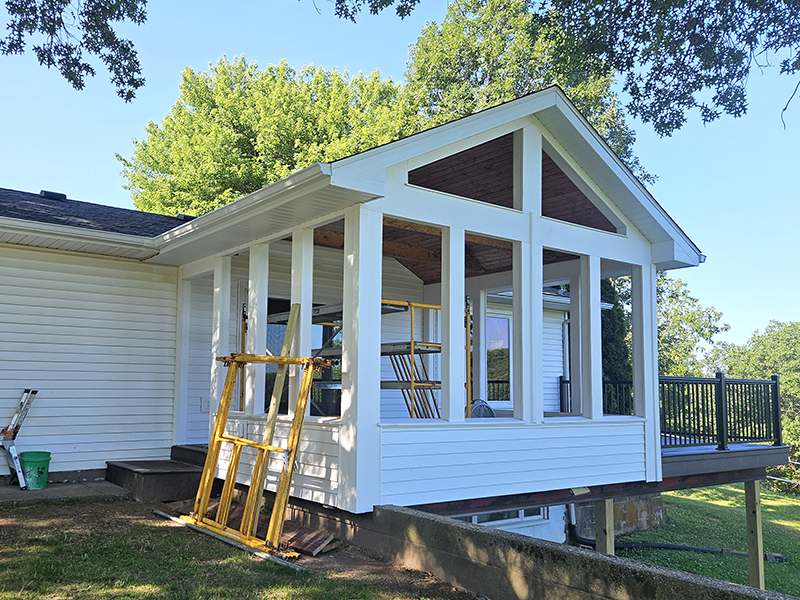
The progress on the outside shows the roof, the soffits, and gutters installed. 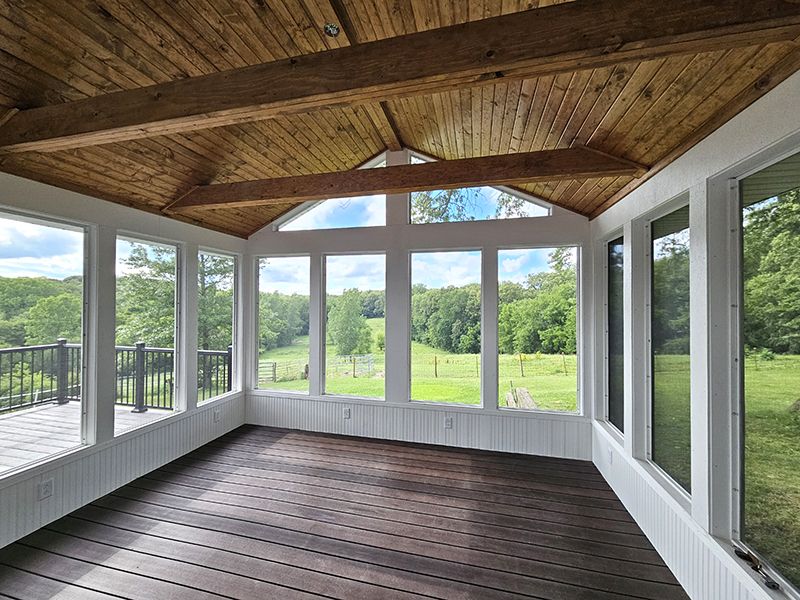
The new screened-in porch is finally done! 
The outside of the finished product, including the semi-private screens.
We were able to save some money in the long run because the contractor let us purchase most of the products through Menards, which always ran an 11% rebate offer. By the time all was said and done, we had quite a bit saved up that we could then use for other household purchases.
Adding The Finishing Touches To Our New Screened-In Porch
Now, the only thing left was for me to decorate.
I ordered a large 9’x12′ rug that would help to keep bugs from crawling up through the deck boards. (We later added mesh to the bottom of the deck to fully screen it in.) (Product Link: Nourison Aloha Indoor/Outdoor Rug In Natural)
The L-shaped patio couch was my favorite part! It is an Ashley Furniture brand and is perfect to give us plenty of space while not hiding the great view of the pasture. For now, we just use the patio dining set we already own. (Product Link: Signature Design by Ashley 4-Piece Set)
I also ordered two sets of 50′ patio lights to hang around the inside. The lights were a must-have in my opinion. Using a special plug, we can dim the lights and set the mood on the porch. (Product Link: Outdoor String Lights)

I did order a few waterproof pillows as well as a blanket to help tie the whole area together. The whole porch feels super inviting and has been great for family dinners. And since I work from home, I have loved being able to sit out there and work!
It’s so nice to finally have a beautiful (and safe!) new deck with a screened-in porch that we can enjoy for hopefully many years to come!
Until next time, thanks for stopping by!
– Chelsea
*This post may contain affiliate links. These are products I have used personally and highly recommend. As an Amazon Associate, I may earn a small commission from qualifying purchases if you purchase items through my links. These links and the ads on this page help to support my family and our semi homestead, so Thank You!
Discover more from Semi Homestead Life
Subscribe to get the latest posts sent to your email.