While most of your gardening and landscaping chores take place during the warmer months, there is actually one great chore you can do during the winter, and that is pruning your apple trees!
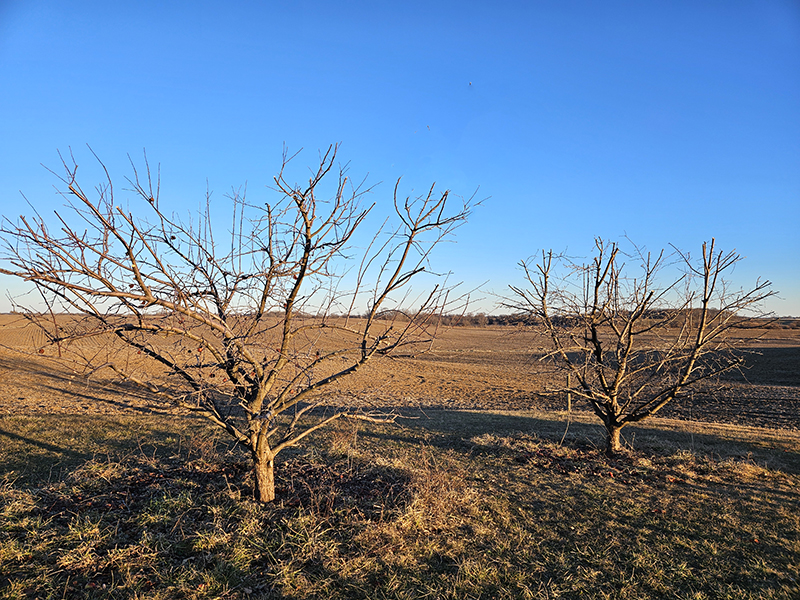
Winter is the perfect time to get your apple trees into shape, both literally and figuratively. Without proper pruning, apple trees can become very unruly and ragged in just a few years. This is especially true for trees that are supposed to be dwarf or semi-dwarf apple trees.

When you leave apple trees to their own devices, the branches will start to grow long and tangled. Add a load of heavy apples on the spindly branches and you have a big problem on your hands. Not only are these trees hard to harvest, but they will likely suffer from broken branches and damage if storms or high winds whip through your orchard.
Thankfully, it isn’t all that hard to prune apple trees. It only takes a few basic supplies and a little bit of time and your trees will be set up for a healthy start once spring rolls around!
The best part of all is that I’ve made the process really easy and simple to follow. There are no complicated charts and in-depth tips on what to do or not to do, so it makes the task way less daunting and intimidating!
The Advantages Of Winter Pruning Apple Trees
During the winter, apple trees become dormant. This means that they are no longer producing new growth. If you were to prune the trees in the fall, the plants might be encouraged to push out new growth.
This new growth is then susceptible to damage once winter does arrive. However, by pruning in the winter when they are dormant, there is no worry about plants adding new growth. This results in less stress on the tree as well as less damage.

Another advantage (and probably the most important one to you!) is that it is much easier to do in the winter! This is because the tree has already dropped all of its leaves and it is much easier to see which branches need trimmed and which can be left alone.
So even though you might have to bundle up and put a pair of gloves on your hands, the winter is the best time for pruning!
One last benefit of pruning in the winter: No bugs or bees! Need I say more?
How To Prune Apple Trees
Gather Your Supplies
The first step is to get together your supplies for pruning your apple trees in the winter. You can likely use items that you already have on hand in your garage or tool shed. Here are my must-have products:
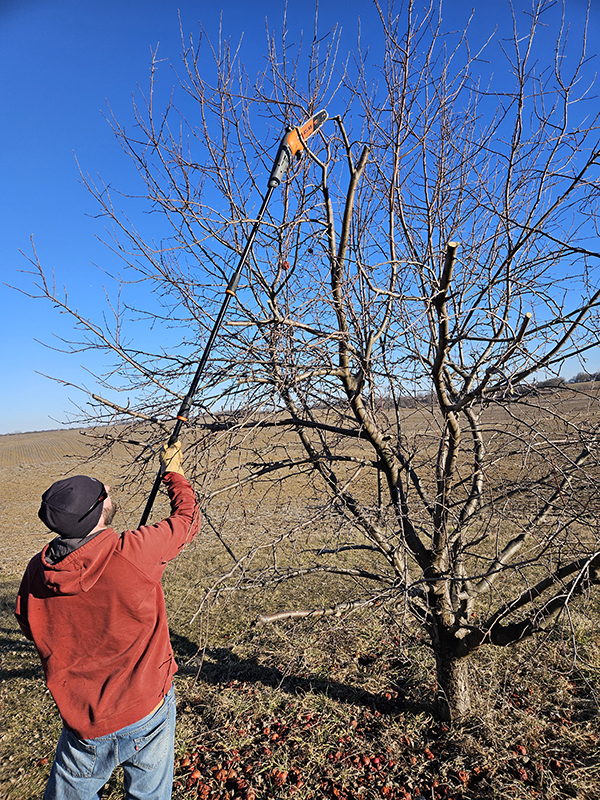
Pole Saw – Depending on the age of your apple tree and how long it’s been since you’ve pruned (ahem, never), you are going to need some decent-sized saw. We like using a pole saw because it can still handle several inch-sized branches while the pole allows us to reach taller areas in the tree’s canopy.
Loppers – Loppers are usually able to tackle branches that are up to about 2 inches in diameter. This makes them perfect for most pruning tasks. The longer handle makes it easier to reach harder to get places too. (These are my favorite loppers – Product Link: Fiskars 28″ Steel Blade Garden Bypass Lopper)
Hand Pruners – These are a must for those smaller branches. These will typically be last year’s growth that will need to be removed up to larger branches. Besides just using these on trees, I use these hand pruners all the time during the gardening season. (Product Link: Fiskars Garden Pruning Shears)
Ladder or Step Stool – This one is pretty self-explanatory. You need a ladder or step stool to be able to reach taller branches and the top of the canopy of the tree. Always use caution when using a ladder.
Optional Supplies
I highly recommend wearing a pair of gloves and having some type of eye protection as well. Since it’s the middle of winter, you will likely be wearing long-sleeves anyway but those are also highly suggested.
Get A Game Plan For Pruning Apple Trees
The next step in pruning apple trees in the winter is to take a step back and get a game plan. If you were to go in head first without assessing each tree, you would likely end up over-pruning.
Instead, take a few minutes to look each individual tree over from all sides. Take note of which branches immediately jump out at you that should be removed or are damaged. Try to make a mental note of how much you want to prune and the big issue areas.
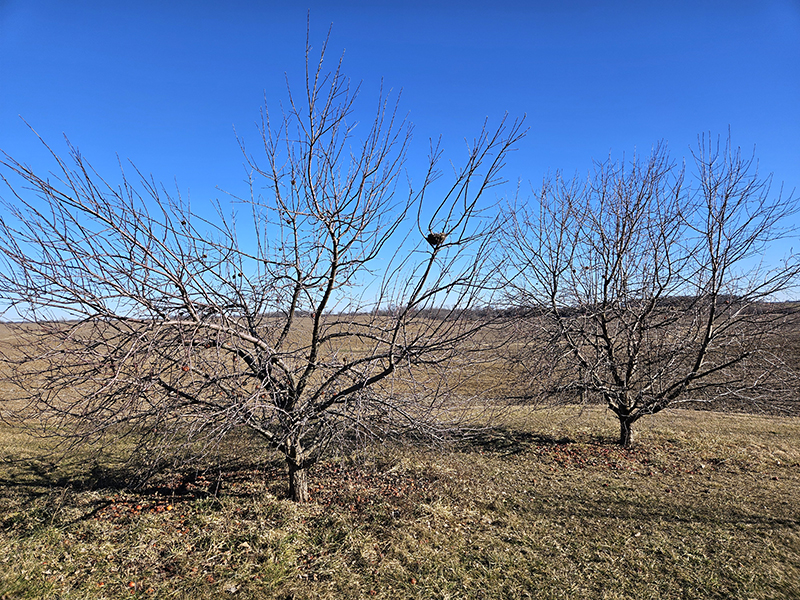
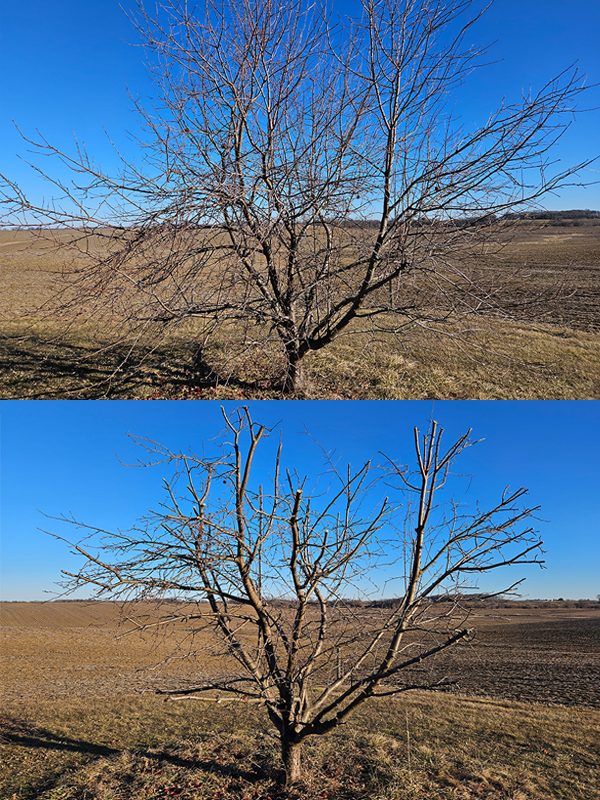
With apple trees, ideally, you want an overall triangular shape. It should have one main central branch coming up the middle with several other thick branches coming off slightly upward. If your tree has gone several years without pruning, it’s likely you won’t be able to have the “proper” triangular shape, but you can at least use that as your pruning guide.
Avoid pruning more than 20% of the tree each year since hard pruning can cause undue stress to the tree. Instead, aim to trim a little bit each year.
Removing Suckers – Pruning Apple Trees
The first branches that need to be removed are any suckers or growth that is occurring at the base of the tree. This is typically more of an issue with newly planted trees. The growth typically happens below the graft of the apple tree.
These can happen if you accidentally plant your apple or fruit trees too deeply, allowing the graft to be below the soil line. (If you want to see more information about planting fruit trees, check out “Plant Fruit Trees In The Fall“.
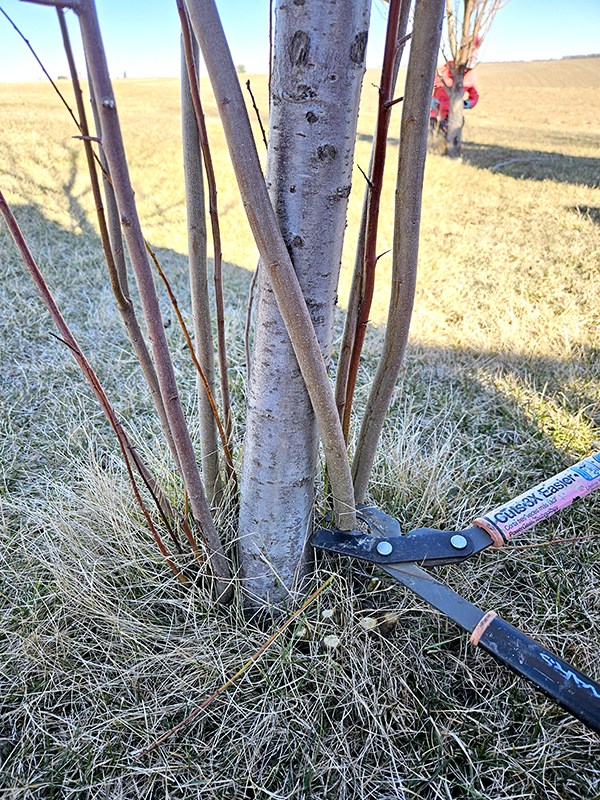
The result is sucker branches or waterspouts that are just pulling energy and resources from the tree you really want to grow. In addition, they can also harbor wooly apple aphids and be entryways for fire blight to get to the tree.
Prune these back as far as possible so that there is nothing left behind. Keep in mind that you may need to remove these suckers a few times each year since they can come back without the use of chemicals.
It’s Time To Prune – Pruning Apple Trees
The next step is to remove the damaged or broken branches. Also, check for diseased branches as well. These branches make the tree look ragged but can also leave the tree open to diseases and other issues further down the line. Prune these branches all the way back to where they meet the trunk of the tree or a thicker branch.
Next, it’s time to thin the tree overall. Doing this will allow all parts of the tree to have better airflow as well as allow pollinators to get to the blooms and do their thing.
Cut off any branches that cross paths or are rubbing against one another. The friction will cause wounds to open on the branches and invite diseases and pests. Keep the branch that is the healthiest and that is growing upward.
Next, remove any branches that are growing inward toward the trunk of the tree. These branches are not useful and will only cause issues as they grow larger.
You also need to remove any branches that are growing downward or horizontally. Again, they might not be an issue now, but they will be as they grow larger. They will also struggle to hold fruit as they grow due to gravity.
Finally, it’s time to remove some of last year’s new growth. This includes topping the tree if it is starting to grow too tall.
Clean Up
Don’t forget that after pruning your apple trees, you need to clean out all of the trimmed branches from under the tree. Do not just leave the pruned branches lying underneath because this will just invite pests and cause issues when spring rolls around.
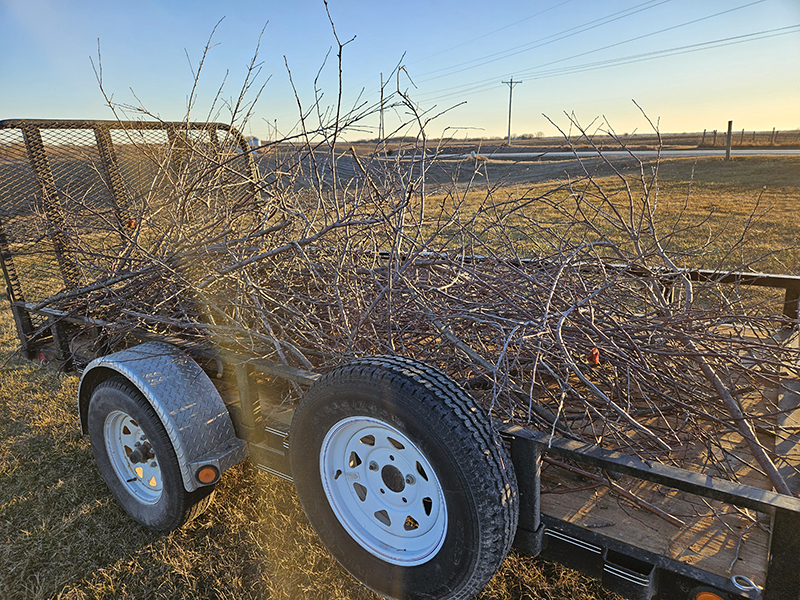
If you have access to a wood chipper, use that and add the wood chips to your garden space or as mulch. We typically end up taking the branches to the local community yard waste dump or burning the branches. Maybe someday we can invest in a wood chipper one of these years!
Now that your apple trees are pruned, they will be ready to push out new growth once spring rolls around!
Until next time, thanks for stopping by!
– Chelsea
*This post may contain affiliate links. These are products I have used personally and highly recommend. As an Amazon Associate, I may earn a small commission from qualifying purchases if you purchase items through my links. These links and the ads on this page help to support my family and our semi homestead, so Thank You!
Discover more from Semi Homestead Life
Subscribe to get the latest posts sent to your email.