Instead of needing to go to the store to purchase a large loaf of sandwich bread, you can easily make it yourself using a Pullman pan.
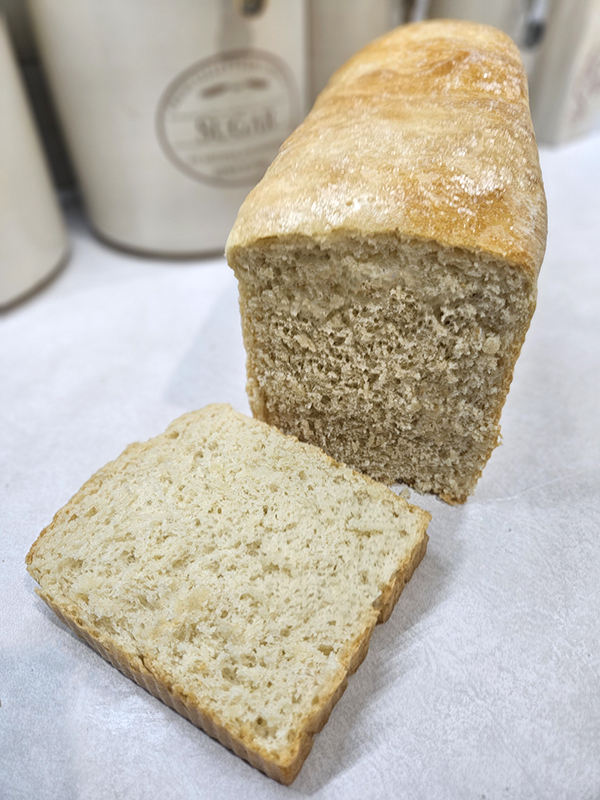
This recipe produces a large loaf of yeast bread that measures 4″ by 13″ and is perfect for a family. The crumb is just right for slicing and holding all of your favorite sandwich toppings.

Since it is larger than a traditional loaf pan, you won’t be short on bread after just a few slices – which can become a big issue in our household. I got tired of constantly running out of bread and then having to head out to the store just to get some. (What can I say, I have two teenage kids and I love my carbs!)
Lately, I’ve started on a journey to make all of our bread products from scratch. That means all of our family’s rolls, biscuits, hamburger buns, hot dog buns, and sandwich bread are made at home. And it also means trying to find the best recipes for those items.
After looking for and trying multiple different recipes and combinations, I finally came up with a yeast sandwich loaf recipe that is perfect for a 4″ x 13″ Pullman pan and can last longer than just a day or two in our home.
How To Make Pullman Sandwich Bread
*Scroll down to the bottom of this post to see the full recipe, including exact measurements and amounts. You can also print out the instructions. I go into a bit more detail about the recipe here first, just in case you need it.
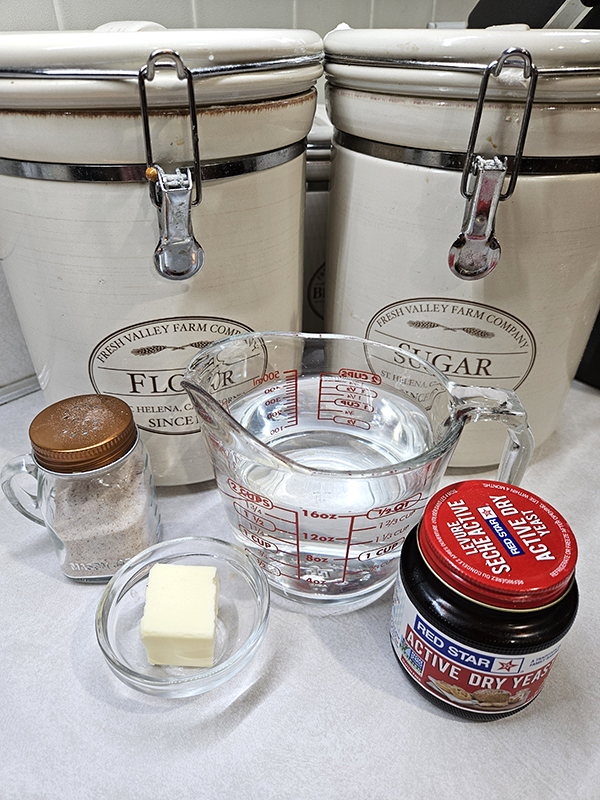
Ingredients
The ingredients for this sandwich loaf bread are very simple and likely already in your pantry. With only 6 simple ingredients, you can enjoy freshly baked bread right in your own home. No extra items, no preservatives, and no long list of ingredients like you see on store-bought loaves of bread.
- Water – You need to use warm water to help wake the yeast up. If the water is too hot, it can kill the yeast. Aim for a temperature of around 105 to 115º Fahrenheit.
- Sugar – Regular granulated sugar works fine for this recipe.
- Yeast – Active yeast is used as the raising agent. Instant yeast can also be used if that is what you have on hand.
- Fine Sea Salt – Regular table salt is fine. Our favorite is Redmond’s Real Salt (Product Link: Redmond’s Real Salt)
- Melted Butter
- All-Purpose Flour
Special Equipment
This recipe calls for the use of a 4″ by 4″ by 13″ Pullman pan. This is a specific brand of loaf pans made in the United States. There are other “knock off” brands out there, but I have such great luck with the Pullman brand that it is my go-to. (Product Link: USA Pan Bakeware Pullman Loaf Pan with Cover, 13 x 4 inch)

Pullman pans are super easy to use and don’t require grease or oil of any type. You simply add the dough, allow it to rise and bake, then wipe it clean. You can get the pans with lids or without. Using the lids allows for a perfectly rectangular loaf with a flat top. I prefer not to use the lid for this recipe for a more natural, rounded top.
You can get Pullman pans in different sizes, including a one-pound loaf size of 4″ x 9″. However, we like to use the larger one because a regular loaf of bread doesn’t last long with our family of four.
If you only have regular loaf pans on hand, you can still make this recipe, but divide the dough in half after the first proof. Just keep in mind that two regular loaves will not be as full or as tall once proofed and baked, since this recipe is specifically for the 4″ x 13″ pan. (You can find my recipe for the smaller loaf here: “Small Pullman Sandwich Bread: Homemade Slicing Bread Recipe”.)
I also use a stand mixer to help the dough come together. You can definitely make the dough by hand if you prefer. It might just take a bit more muscle and time.
Instructions For Pullman Sandwich Bread
In a stand mixer or a large bowl, combine the warm water, 1/4 teaspoon of sugar, and the yeast. You can just take the sugar from the original amount.

Allow the mixture to sit for 5 to 10 minutes or until the yeast has started to foam. If you are using Instant Yeast, then you can skip this part and move on to adding the remaining ingredients.
If your yeast has not foamed after 10 minutes, it could be that your yeast is dead. Toss the mixture and try again with a new batch. Also, make sure that your water is not too hot since this can also kill your yeast. Aim for a temperature of around 105 to 115º Fahrenheit.
Once the yeast is good and foaming, start to add the other ingredients. Mix in the rest of the sugar, salt, melted butter, and 3 cups of flour.
Combine using the bread hook attachment on your stand mixer. After a little bit, stop and use a spatula to scrape the sides of the bowl as needed. At this point, the dough will be extremely wet.
Continue Making The Bread Dough
Add another cup of flour and mix again, scraping the bowl if needed. Continue adding 1/2 cup of flour at a time, mixing in between until the dough starts to pull away from the bowl. The dough will still be slightly sticky to the touch when it is ready.
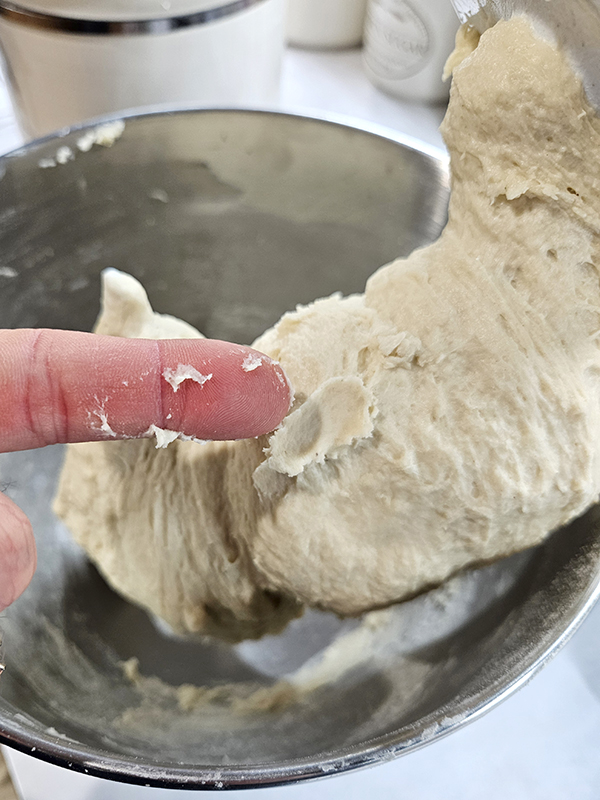
The amount of flour you use will vary because of conditions like the temperature and humidity in your kitchen. It’s best to go off of the look and feel of the dough as opposed to actual quantities of flour being used.
It can take a bit to get the hang of things, so don’t stress the first few times you try baking bread. You’ll be an expert in no time at all!
Once the dough is still slightly sticky but pulls away from the sides of the bowl, continue to mix on low speed for 4 to 5 minutes. If you are doing this by hand, knead for more around 10 minutes.
During this time, lightly grease a large bowl with cooking oil and set it aside. You need a bowl or container large enough to hold double the amount of dough you just made.
The First Proof – Pullman Sandwich Bread
After the time is up, work the dough into a smooth ball and add it to the prepared bowl. Turn the dough to lightly coat.


Cover the bowl with a damp kitchen towel or a piece of plastic wrap lightly sprayed with oil. I prefer the plastic wrap since I sometimes have issues with the dough sticking to the towel.
Place the bowl in a warm location to allow it to rise. Our oven has a “bread proof” setting, so I like to put the bowl in there to allow it to rise a bit quicker, especially if our kitchen is cold.
You can also just put the light on in your oven for a bit of extra heat. Just don’t forget it’s in there and accidentally preheat your oven!
Allow the dough to rise until it has at least doubled in size. The one I have in these photos is probably more like triple in size, but it will still produce a great loaf of bread.
Shaping The Dough
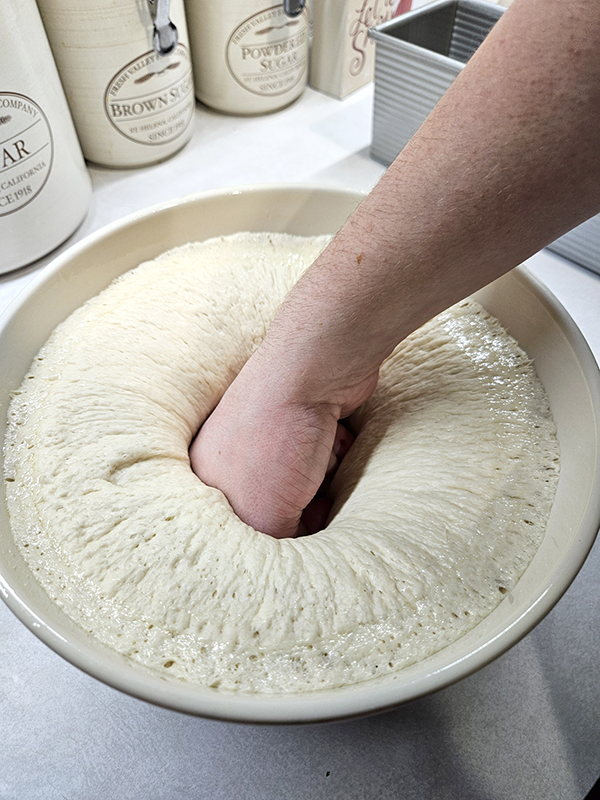
Once the dough has doubled, remove the towel or plastic wrap and punch down to knock out some of the excess air. This is one of my kids’ favorite parts of baking bread!
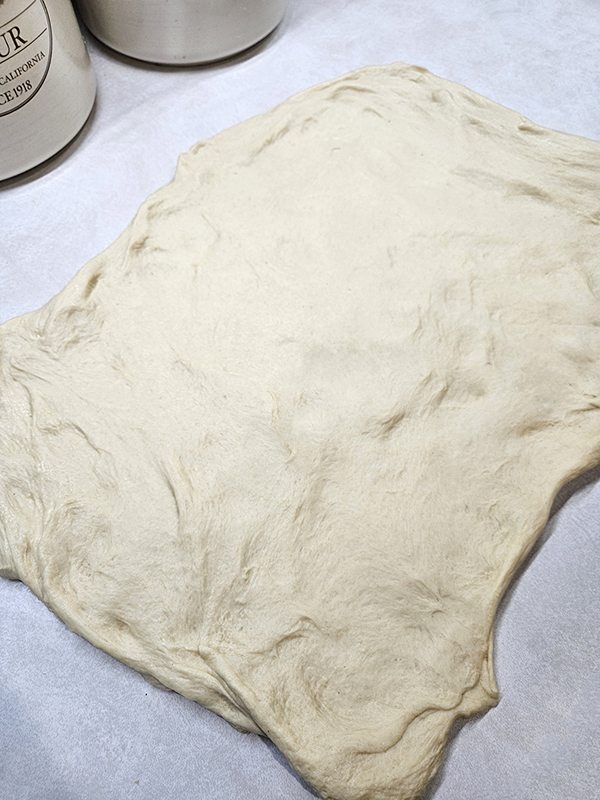
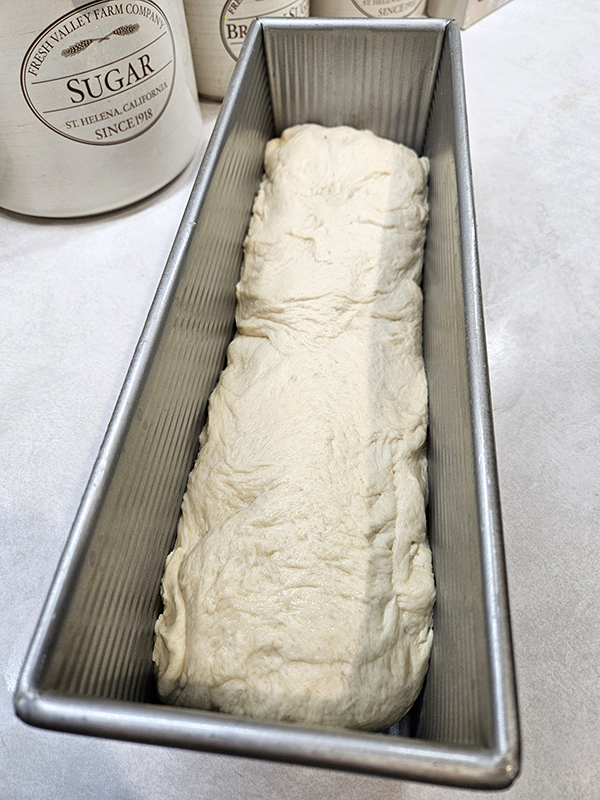
Dump the dough out onto a clean, smooth surface. Shape it into a large rectangle about the length of 12 to 13 inches to match the length of the Pullman pan. Roll the dough into a long loaf shape and place it into the pan.
Don’t worry if your dough isn’t nice and smooth. You can see how not picture-perfect mine looks below! It will even out and smooth as it rises and bakes.
If you aren’t using a 4″ x 13″ Pullman pan and are using a regular loaf pan, divide the dough into two halves. Shape the dough and place each half into regular loaf pans.
Please note that two regular pan loaves may not bake as high as the long Pullman loaf since this recipe is specifically for a 4 x 13″ Pullman pan. The baking time will also be slightly less.
The Second Proof & Baking
Preheat your oven to 350º Fahrenheit. As it is warming up, cover the pan with a piece of lightly greased plastic wrap or a damp kitchen towel. Allow the dough to rise until it has gone slightly above the sides of the pan.

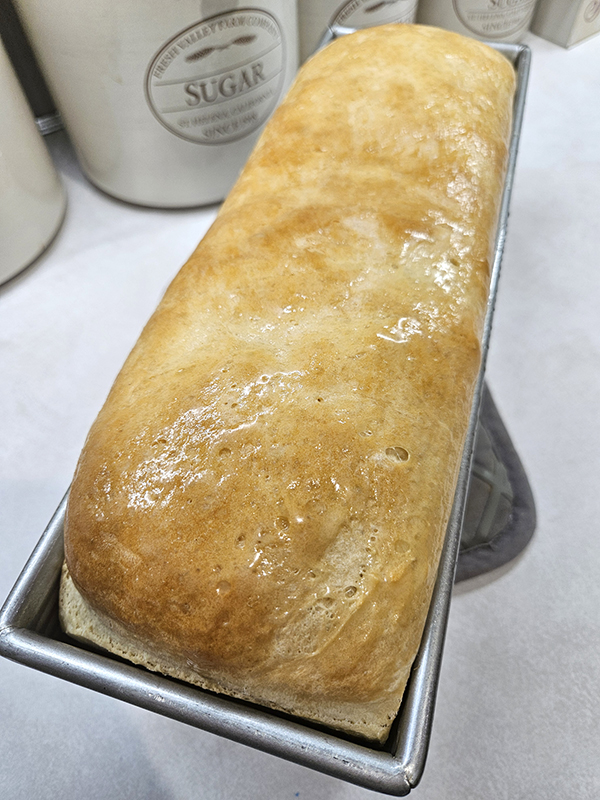
After the dough has risen, remove the cover. Bake the loaf in your preheated oven for 30 to 35 minutes or until the top is lightly golden brown.
Remove the loaf from the oven and coat the top with butter for a softer crust while the bread is still warm. Allow the bread to cool on a rack before slicing. (Although, there’s nothing like a slice of warm, freshly made homemade bread! It will just be harder to cut smoothly.)
Once the loaf has cooled, store the bread in a sealed plastic bag or container. (Be sure to enjoy a slice of two first!). You can also slice the bread and store it in freezer-safe plastic bags in the freezer for later use.
I hope you enjoy!
Until next time, thanks for stopping by!
– Chelsea
*This post may contain affiliate links. These are products I have used personally and highly recommend. As an Amazon Associate, I may earn a small commission from qualifying purchases if you purchase items through my links. These links and the ads on this page help to support my family and our semi homestead, so Thank You!

Pullman Sandwich Bread
Ingredients
- 2 cups warm water (around 105-115º Fahrenheit)
- 1/4 cup granulated sugar (divided)
- 1 1/2 Tbsp active yeast
- 2 tsp salt
- 2 Tbsp melted butter
- 4 1/2 to 5 1/2 cups all-purpose flour (more or less)
- Small amount cooking oil (for greasing)
Instructions
- In a stand mixer, combine the warm water, 1/4 teaspoon of sugar, and yeast (take the sugar from the 1/4 cup amount). Allow to sit for 5 to 10 minutes or until the yeast has started to foam.
- Add the remaining sugar, salt, melted butter, and 3 cups of flour. Mix using a bread hook. Use a spatula to scrape the sides of the bowl if needed.
- Add another cup of flour and mix again. Continue adding 1/2 cup of flour at a time, mixing in between until the dough starts to pull away from the bowl. The dough will still be slightly sticky to the touch.
- Continue to mix the dough on low speed for 4 to 5 minutes. Meanwhile, lightly grease a large bowl with cooking oil and set aside.
- Work the dough into a smooth ball and add to the greased bowl. Turn to lightly coat. Cover with a damp kitchen towel or a lightly sprayed plastic wrap and allow to rise in a warm location until the dough has doubled or more.
- Once the dough has doubled, punch down to knock out some of the excess air. Dump the dough out onto a clean smooth surface and shape into a large rectangle about the length of a 4" x 13" Pullman loaf pan. (*See note below.) Roll into a long loaf shape and place into the pan.
- Preheat your oven to 350º Fahrenheit. Cover the pan with lightly greased plastic wrap or a damp kitchen towel. Place the pan in a warm location until it has risen slightly above the sides of the pan.
- After the dough has risen, remove the cover. Bake in preheated oven for 30 to 35 minutes or until the top is golden brown. Coat the top of the loaf with butter for a soft crust.
- Once cooled, store the bread in a sealed plastic bag. You can also slice the bread and store in freezer-safe plastic bags in the freezer. Enjoy!
Notes
Discover more from Semi Homestead Life
Subscribe to get the latest posts sent to your email.