If you purchased or were gifted a modern cast iron skillet and feel like all your foods do is stick horribly to the cooking surface, then you need to learn how to refinish it. By using a couple of simple tools and a bit of muscle, you can give your modern cast iron skillet a smooth, glass-like cooking surface that is just like those 100-year-old handed-down vintage skillets.
Most modern day cast iron skillets claim to be “preseasoned” and ready for cooking right out of the box. However, it probably won’t take very long before you end up frustrated using it. Between the stuck-on food and burnt bits, it can be enough for even the most patient person to cast the skillet aside (bad pun intended).

I cherish my beloved vintage cast iron pieces which were my late grandma’s and use them almost daily. But before I got those, I got both a 10-inch and a 12-inch modern Lodge skillet a few years back.
Modern-day cast iron skillets are definitely beautiful. They are pitch black with all the promises of being just like non-stick skillets. However, using them is anything but beautiful! I always felt like I couldn’t figure out how to properly use cast iron, even though I was following all the tips and tricks out there.
Come to find out that it wasn’t my technique that was the issue but my pans! Thankfully, by refinishing and smoothing out the surface of these pans, I was able to make my inexpensive modern-day cast iron act just like my well-loved late grandma’s vintage skillet.
The Difference Between A Vintage And A Modern Cast Iron Skillet
Not everyone has access to vintage cast iron skillets. While you can often find them at estate sales or antique shops, they usually cost a pretty penny. But you can go out to your local Target or on Amazon and purchase a brand new modern Lodge cast iron skillet for under $30. That’s a steal for something that can last your lifetime and beyond with proper care! (Product Link: Lodge 12-Inch Cast Iron Skillet)

One of the biggest differences between vintage skillets and modern ones is the overall weight. For whatever reason, the newer pans are just a lot heavier and bulkier than the antique ones. Unfortunately, that’s not anything I can really help with.
However, I can help when it comes to refinishing the actual cooking surface. Back in the day, the skillets were machined to remove their sand cast finish. To save on costs (and likely time), this process is often skipped with new cast iron pieces. Thus your modern cast iron ends up with a rough and sand-like texture on the bottom.
Comparing The Two – Refinish A Modern Cast Iron Skillet
If you compare my late grandma’s Wagner skillet to my new modern Lodge skillet, you can visibly see the texture that is on the newer one (see picture below).
Not only can you see the difference, but you can feel the difference if you run your fingers along it. (You’ll just have to trust me on this or go to a local store and feel one for yourself.) The modern skillet has a much rougher and more pronounced texture while the antique one is smooth as glass.

While some might say that this texture allows more places for the fat and seasoning to adhere to, I find it extremely difficult to cook with. Most foods end up stuck to the bottom of it, even though I am using the same techniques that I use with my Wagner pan.
This is where refinishing comes into play. By getting rid of that bumpy, rough texture, you will be able to get a smooth-as-glass cooking surface, just like those vintage skillets.
Note: Refinishing is not the same as restoring cast iron skillets. If you want to learn about restoring old or rusty cast iron skillets, check out my article, “How To Easily Restore Cast Iron Cookware Using Your Oven“.
How To Refinish A Modern Day Cast Iron Skillet
Required Tools
There are some basic tools that you need in order to refinish a new skillet. First, you need a 4.5-inch angle grinder. (The one my husband has is no longer sold, but here is a very similar inexpensive one – Product Link: Metabo HPT Angle Grinder.) You can also typically rent an angle grinder through most home improvement stores.

Then you are also going to need a couple of flap discs to go on the angle grinder. The grits we used are 80 and 120 grit. This allows you to get the majority of the raised surface off with the 80 and then smooth it out a bit with the 120.
We purchased ours in an 8-pack at Harber Freight, but these Workpro discs are the same concept if you don’t have one of those stores locally (Product Link: Workpro 10-Pack Flap Discs). Again, most home improvement stores should sell these and you might be able to get them a bit cheaper than online.
You also need a polycarbide abrasive wheel (sometimes called a “strip disc”). This is a different brand than what we had on hand, but it’s the same style needed – Product Link: SATC Strip Disc.
Other than that, you will need protective clothing, gloves, eye protection, and a mask. Make sure to do the grinding outside or in a well-ventilated area because it gets a bit messy.
Please Note!
As with any machine or tool, please use caution when working with an angle grinder. Work slowly and carefully since these can be dangerous if not used properly.
If you are not comfortable doing this, see if a local machinist can help you with this process. Use these tools at your own risk.
Grinding Off The Texture – Refinish A Modern Cast Iron Skillet
Next, you are going to need to set up a small workstation outside. We have an old bench that we used to set the cast iron skillets on.
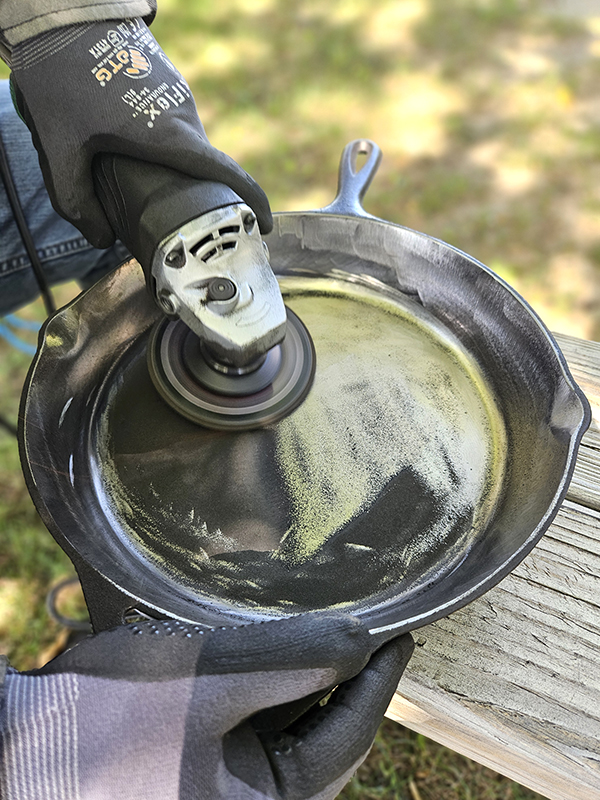
Start by putting the 80-grit disc or similar on your angle grinder. Follow the directions on your particular grinder for swapping out the discs. Once that is secure, it’s time to get to work!
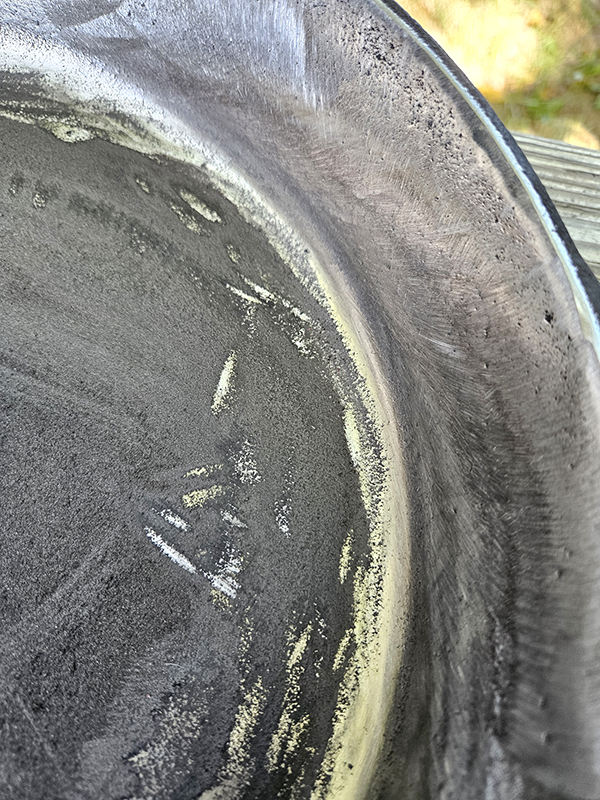
Working at a slight angle, start to scrape off the rough texture on the skillet using the edge of the angle grinder. Since the preseasoning is black in color, it’s easy to see where you’ve been and what still needs to be removed.
Some Grinding Tips
Take your time on this process. You will start to get a feel for what movement is required as you work. After a bit of trial and error, my husband found it was much easier to do the sides of the pan first and then work on the bottom. (While doing the sides, you tend to scuff up the bottom a bit which can be frustrating if you already have the bottom done.)
Don’t stay in the same spot for too long since you can wear down an area. Constantly keep the angle grinder moving going back and forth as needed.
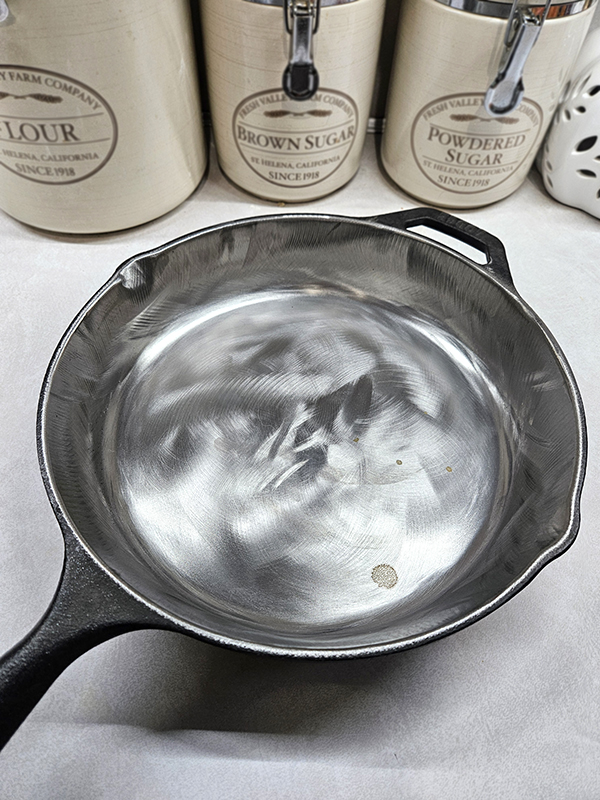
You do not need to do the outside or handle of the pan since these will never touch the food. Only the bottom and sides are needed. Once you are done, the pan should have a nice shiny silver look to it with no black raised texture.
Smoothing Things Out – Refinish A Modern Cast Iron Skillet
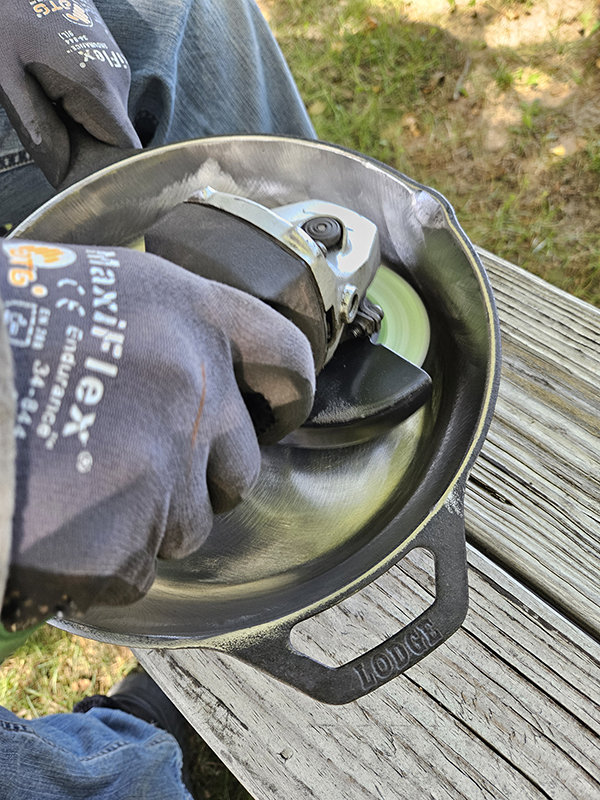
Once you have the pan done using the 80-grit disc, switch to the 120 grit. (Make sure to unplug your grinder when swapping out discs.)
Take a dry, clean cloth and wipe down the entire pan before starting. This will help to remove any dust or particles that have been sanded off.
Now, do the same thing with the 120 disc that you did with the 80, starting with the sides first. This will help to smooth down any lines or texture that you might have put into the pan with the 80 grit.
Once done, repeat the process of wiping down the pan with a clean cloth and switch to the stip disc. Think of this last wheel as sort of a buffer. It is going to polish the pan and get it as smooth as possible.

Time To Clean The Skillet
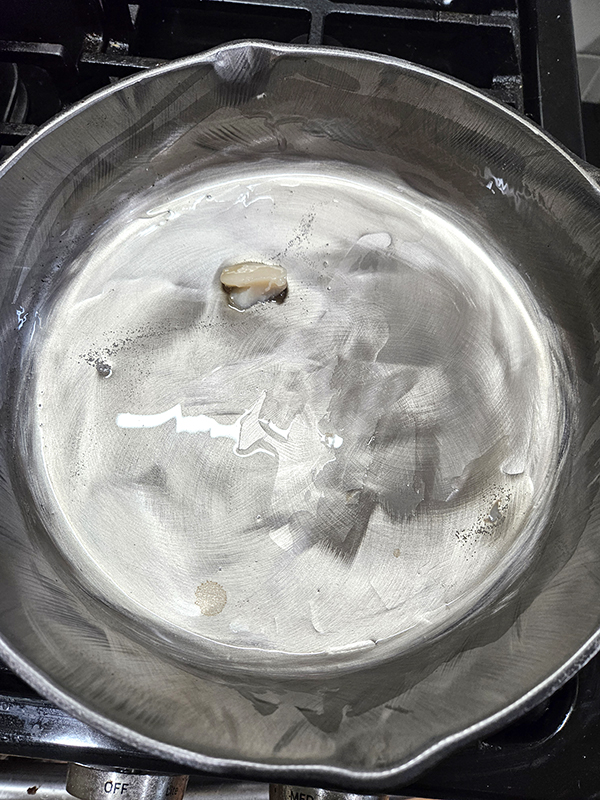
Now that your modern cast iron skillet is stripped clean and refinished, it’s time to season it. Do not put this step off for very long because the raw metal is now exposed and will start to rust pretty quickly.
In fact, After waiting just an hour or two, one of my pans started to have a small circle of rust appear. It’s no issue, just something to keep in mind. I would not wait more than a few hours before seasoning the pans.
Begin by washing your newly refinished cast iron skillet with soap and water. You want to remove any tiny particles or dust that might be on the pan from the grinding process.


Use a white cloth or paper towel to dry the pan. If you are getting dark on your paper towels, repeat the washing process a second time. Dry your pan thoroughly.
Reseasoning The Skillet
Next, it’s time to add your seasoning. In my case, I used bacon grease but you can use tallow, vegetable oil, shortening, etc. (Every cast iron owner has their own preference on what to use. I typically use either bacon grease, shortening, or tallow.)
Wipe the entire surface of the pan with the seasoning. Don’t forget to do the bottom as well as the handle since the pan was washed with soapy water. Next, take a paper towel or cloth to remove any excess oil from the pan once done. You only want a nice light layer of seasoning or else it will become gummy.
Place your cast iron skillet upside down into a 350º oven and “bake” it for an hour. Turn the heat off and allow the skillet to cool down naturally. Once cool, wipe it down with a clean cloth. If you see any black, repeat the process of the seasoning and baking. Don’t be surprised if the bottom of your skillet is still silver or is even blotchy. It will darken with use.

Now you have a beautiful, refinished modern day cast iron skillet that works just like a vintage skillet would!
Until next time, thanks for stopping by!
– Chelsea
*This post may contain affiliate links. These are products I have used personally and highly recommend. As an Amazon Associate, I may earn a small commission from qualifying purchases if you purchase items through my links. These links and the ads on this page help to support my family and our semi homestead, so Thank You!
Discover more from Semi Homestead Life
Subscribe to get the latest posts sent to your email.