Tradescantia Zebrina is one of the easiest houseplants for growing and repotting. I have had the same plant for several years now and although it has gone through some really (REALLY) rough patches, it always bounces back with vigor – with a bit of help from repotting!
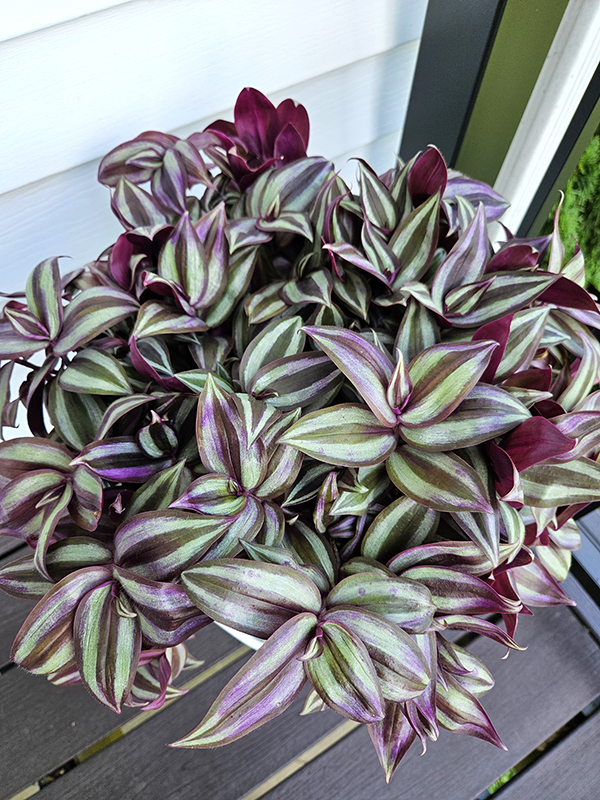
Tradescantia Zebrina, also known as Creeping Inch Plant and Wandering Dude (Jew), is a popular houseplant that has stunning purple, green, and silver leaves. It has a wandering growth habit that makes it the perfect ground cover plant for growing outdoors. In fact, it grows so well that it is even considered invasive in some locations.
However, many people (like myself) prefer to grow Zebrina in pots and containers. During the warmer months, Zebrina can stay outside out of direct sunlight. Once the weather starts to turn in the fall, it needs to be brought inside and kept as a houseplant in a bright window or with a grow light.
As long as it has the right amount of sunlight or artificial light and is kept properly watered, Tradescantia Zebrina is a relatively easy plant, especially when grown outside. But there might come a time when the plant needs a little help getting back to a healthy place.
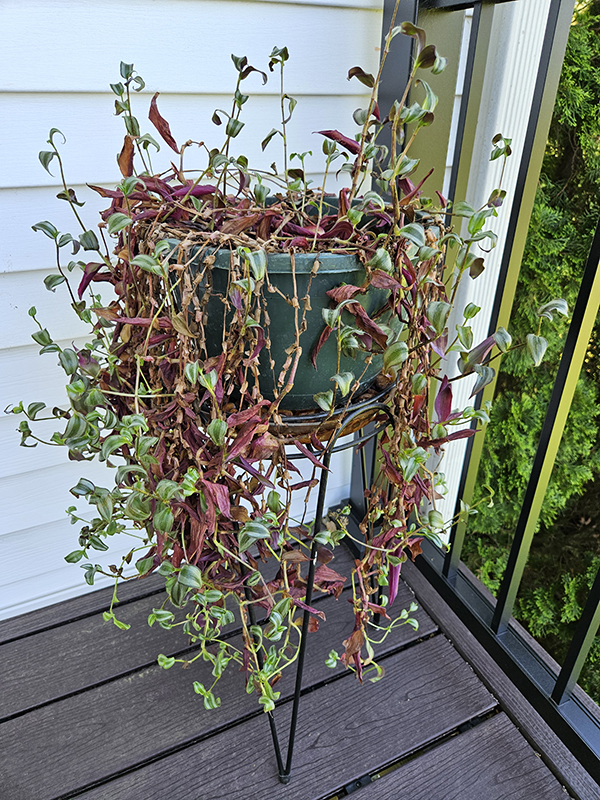
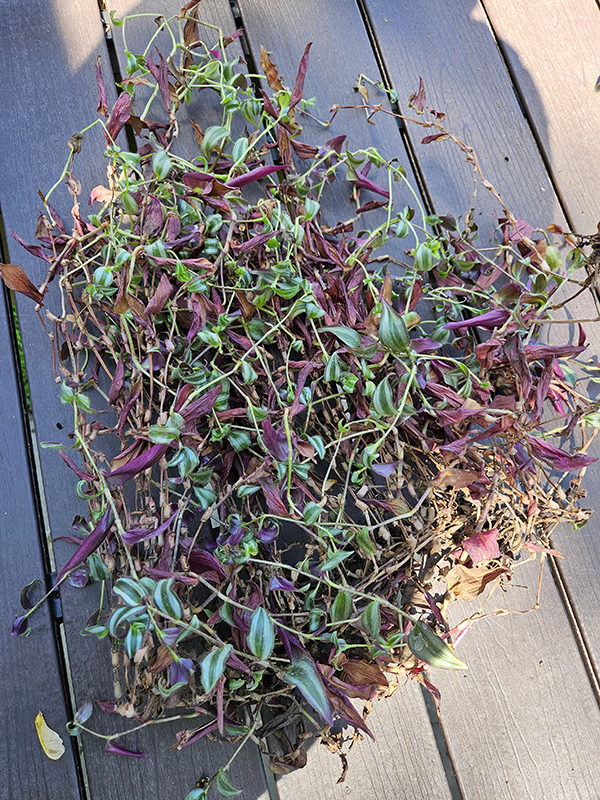
Thankfully, even if your Zebrina looks like mine above, you can easily repot it with just a few simple tips and tricks and bring it back to it’s beautiful glory!
Tips On Repotting Tradescantia Zebrina
One of the best parts of growing a Tradescantia Zebrina is that they are relatively hard to kill. That’s not to say that I haven’t come close a few times with mine! In fact, my plants often look pretty sad and ragged after being inside all winter long (see above).
When it’s time for me to take them back outside in the spring, I typically like to start the plants fresh by repotting only the healthy portions of the plant. Usually, I do this by removing all of the stems and growth from the container and starting over from scratch.
It sounds drastic, but the plant handles it with hardly any issues at all. By the end of the fall, it is back to being full and beautiful (just in time for me to take them back inside!).
Here are the steps I take when repotting my Tradescantia Zebrina:
1. Remove Any Dead Growth
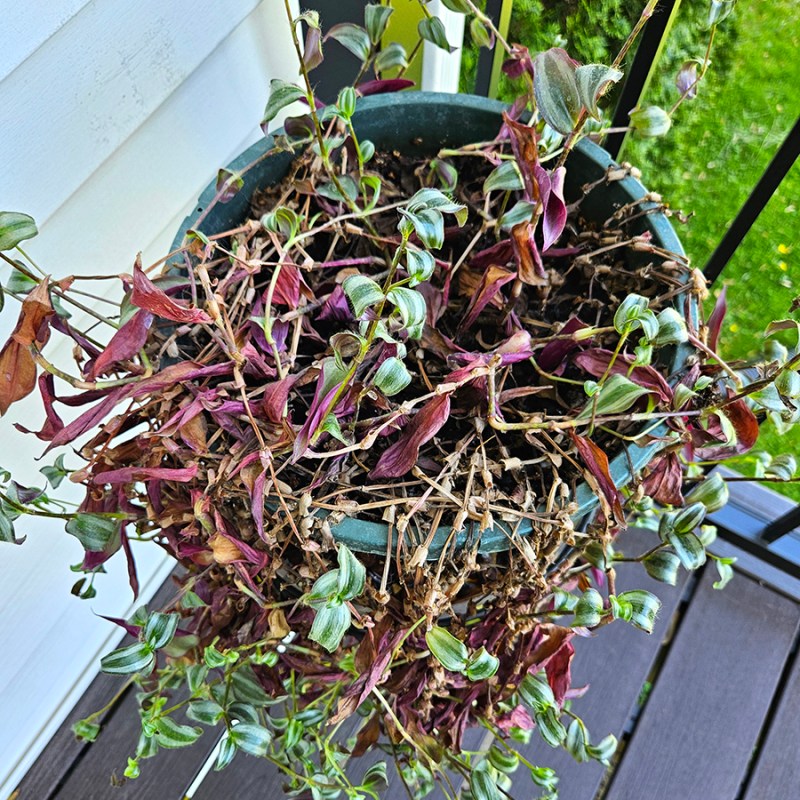
The first step in repotting Tradescantia Zebrina successfully is to look the plant over and remove any old or dying growth. In my case, this usually is quite a bit of the plant!
You might notice that the leaves at the end of the long stems are nice and healthy – albeit maybe a tad small. However, up at the base of the plant looks dried and brown. This plant will only continue to deteriorate if left as-is.
But by removing the entire plant, it can have a fresh, strong start without me needing to throw the plant away completely. Be gentle and pull out the entire stem – roots and all. Don’t worry – these are tough plants and can take some abuse!
If only a few of your stems are showing signs of damage, you only have to remove those pieces. Whatever you remove from the container, don’t toss them in your compost just yet!
2. Sort Through The Pieces – Repotting Tradescantia Zebrina
Next, you want to go through each stem piece by piece. The goal is to keep the strongest, healthiest-looking parts of the stem and toss the rest.
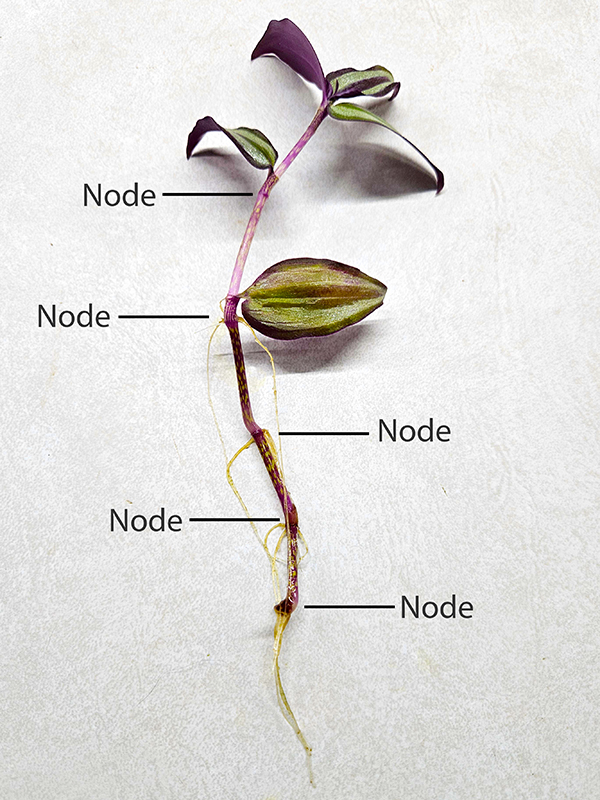
If you look closely at the stem of a Tradescantia Zebrina, you will notice that there are these little nodes on them every few inches. These nodes, if placed in either soil or water, can produce roots.
The goal is to cut your Zebrina stems so that you have at least a few nodes left behind. Using a pair of disinfected scissors or micro pruners (my fav), snip off all of the dead parts from each stem. (Product Link: Fiskars Micro-Tip Pruning Snips)
Next, remove all of the bottom leaves from each cutting and keep only the top few as long as they are healthy. I like to have about a pencil-length of stem without leaves and a few healthy leaves on top. The “naked” part of the Tradescantia Zebrina stem is what you plant back into the container.
Now, you want to organize the stems. Put the healthiest stems in one pile. In another pile, place the stems that might be a bit weaker but still have plenty of green on them.
In the last pile, place any dead pieces or stems that might have fading leaves which indicates they are on their way out. Those can be tossed or added to your compost pile.
3. Planting Back Into The Container
Next, you want to prepare your container. Below is how my container looked after removing all of the old and tired Zebrina stems. Remove any left-behind dead growth and refresh it with more potting soil. Or, add the spent potting soil to your compost and start all over with new.
Once that is done and ready to go, you are now ready to plant the trimmed, healthy stems back into the container. Repot the healthiest pile of Tradescantia Zebrina stems first.
To do this quickly and easily, I like to take a pencil and use that to make long holes in the soil for my Zebrina cuttings to slip into.
Unfortunately, you can’t just shove a Zebrina stem into the soil. The stems are really fragile and will snap easily if they are met with resistance. The pencil does a nice job of making a big enough space for you to slip the stem into.
Be sure to bury at least 2 to 3 nodes for the best chance of the stem taking root. Backfill gently with additional soil so the stem is surrounded on all sides. Repeat as needed to fill your container.

Once you have the container repotted full of healthy Tradescantia Zebrina stems, water well. Don’t worry if the plant looks a little ragged at this point. It will take some time for the plant to fill back out with new, healthy growth.
Maintenance – Repotting Tradescantia Zebrina
Continue to water the plant as needed. I’ve written an entire article about taking care of Inch Plants if you want to take a look at that: “Growing Tradescantia Zebrina – How To Grow Inch Plant“.
Keep the plant out of direct sunlight if growing outdoors. The harsh sun can damage the leaves and might put a halt on rooting.
As the new cuttings start to take root, the stems will start to grow and produce more leaves. Trim the longer stems as needed to allow the plant to concentrate on producing leaves at the base of the plant.
Also, remove any cuttings that might not have taken and have started to dry up or rot. There will likely be a few that don’t take for whatever reason or another.


Before long, your plant will have filled out and become a healthy, full Tradescantia Zebrina once again – Just in time for you to move it back indoors for the winter!
Until next time, thanks for stopping by!
– Chelsea