Flaky and buttery rustic pie crust recipe that is easy to make and results in two homemade pie crusts that can be used right away or frozen for future use.
There are hundreds of different pie crust recipes out there. Some have been handed down for generations, while others are basic, tried-and-true recipes.
This double pie crust recipe is a combination of both my late grandmothers’ recipes. It uses a mixture of both shortening and butter to provide crusts with those flaky layers and the rich buttery flavor but with structure. It’s the best of both worlds, in my opinion!
The recipe makes enough for two pie crusts, so it is perfect for those double-pie recipes like apple or rhubarb. If you only need one crust, use the one and freeze the other until it is needed for next time. Or, make several batches of dough so you always have a few on hand whenever the need for a homemade pie arises.
Not only is the recipe easy to put together, but the flavor and texture are so much better than those premade, store-bought pie crusts. Trust me, once you try the rustic homemade version, you won’t want to go back!
How To Make Rustic Pie Crusts
*Scroll down to the bottom of this post to see the full recipe, including exact measurements and amounts. You can also print out the instructions. I go into a bit more detail about the recipe here first, just in case you need it.
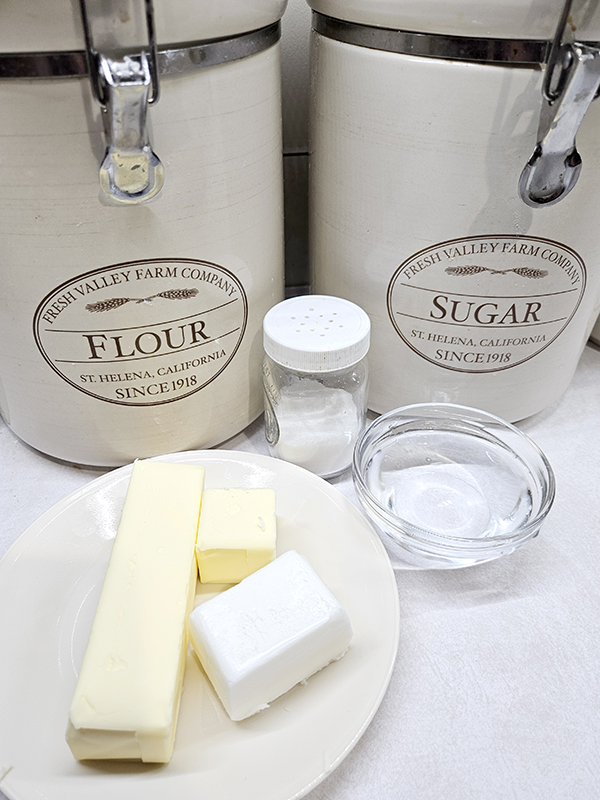
Ingredients
- All-Purpose Flour – Any type of all-purpose flour works well for this pie crust recipe. We prefer to use unbleached flour whenever possible. (This is my go-to flour – Product Link: King Arthur All Purpose Unbleached Flour)
- Sugar – The granulated sugar helps to add a bit of sweetness to the pie dough. You can also use a bit of extra sugar for the mini crust. (Scroll to the bottom of the article for info on this bonus treat!)
- Salt – Regular old table salt helps to balance out the little bit of sweetness the sugar provides.
- Shortening – I like to use Crisco shortening for my pie crust. You can also swap out the shortening for lard if you prefer. The shortening helps to create a dough that is easy to roll out and holds its shape well when baking. (If you’ve ever baked a pie where the crust has shrunk in the pan, it’s likely an all-butter recipe. The shortening helps prevent that from happening.)
- Butter – Use real butter here if possible to add amazing flavor and texture to the pie dough. The key is to use cold butter. (I actually place my sticks of butter into the freezer before using. More on this in the instructions.) My original recipe called for all shortening, but I like the flavor that the butter adds to the pie crusts. However, I still like the structure the shortening provides, so I do a mix of both shortening and butter.
- Water – The water helps to bring the pie dough together. Start on the low side of the amounts and add more as needed. Like the butter, you want he water to be ice cold when adding.

Instructions For Rustic Pie Crusts
In a large bowl, sift together the flour, sugar, and salt using a whisk. Set the bowl aside.
Next, it’s time to prepare your butter. There are many different ways to incorporate the butter and shortening into your dough. The biggest key is to make sure the butter stays cold!
The way I personally go about doing this is I place my sticks of butter in the freezer for about an hour before using. Then I take a large-holed grater and shred the butter onto a cutting board. Since the butter is frozen, it shreds easily without becoming a blob. If needed, pop the butter back in the freezer after shredding for about 5 to 10 minutes before adding it to your dry ingredients.
Alternatively, you can simply cut your butter into small chunks and add it that way. It does take a bit longer to shred the butter, but I just feel like shredding the frozen butter allows it to get incorporated into the dry ingredients better without melting or having too large of chunks floating throughout the dough.
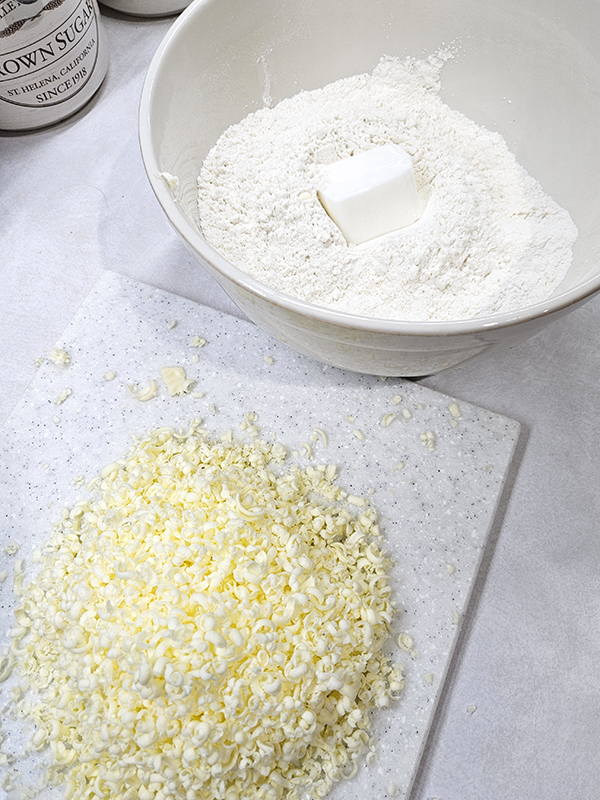
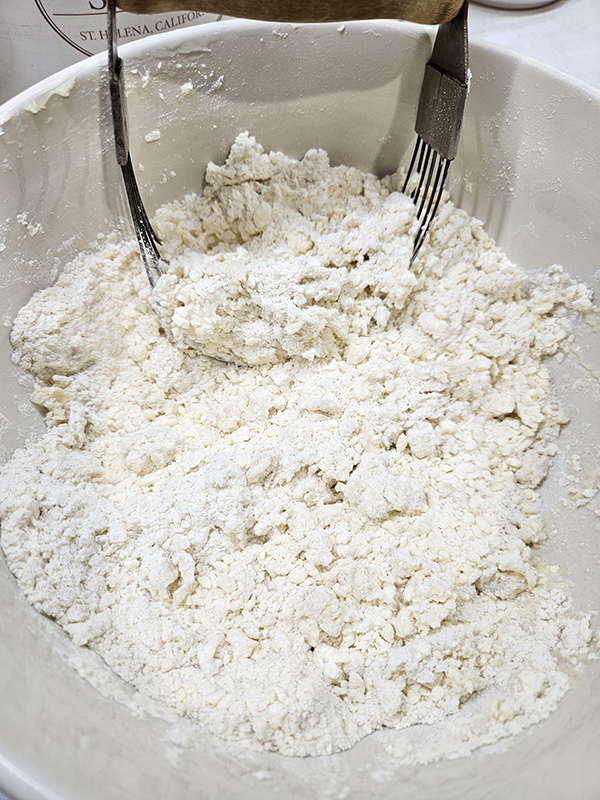
In addition to the butter, also add the shortening to the dry ingredients. Use a fork, a pastry knife, or your hands to cut those ingredients in. Continue mixing until the ingredients resemble coarse sand. The goal isn’t to incorporate the butter and shortening into the dough. You only want to distribute it evenly. (That’s why you need your ingredients to be cold.)
Note On Pie Dough Temperature
The key with good pie dough is to make sure you keep the ingredients as cold as possible as you work with them. This prevents the fats (the shortening and butter) from melting as soon as the pie is placed in the oven.
If your ingredients are kept cold, the fats will melt slowly as the pie bakes in the oven. This helps to produce steam that creates all of those beautiful, flaky layers. Your finished pie will be light, tender, and flaky as opposed to tough and dense.

If needed, pop your pie dough into the fridge or freezer for a few minutes at any point during the making process to bring all of the ingredients back to cooler temps. While it might slow down your baking, it will ensure that the finished pie is picture-perfect (well, almost!)!
Bringing It All Together – Rustic Pie Crusts
Now add in about four tablespoons of cold water and mix. Most likely, the dough will still be rather dry after just this amount. Continue adding one tablespoon of water at a time, mixing well after each addition. Only add enough water just until the dough starts to hold together when it is gently squeezed.
Next, divide the dough into two equal pieces. Shape each one into a round disc that measures about 6 inches across. Wrap each disc in plastic wrap so they are completely covered. (You don’t want the dough to try out during this next step.)

Place the dough discs in the refrigerator for about an hour to chill. Alternatively, you can also keep the dough in the refrigerator for up to about 3 days if you want to make the dough discs ahead of time and then bake the pies another day. (Please note, the dough gets a bit dry and crumbly if you wait too long before using.)
For even longer storage, place the plastic-wrapped dough discs into freezer-safe zip-lock bags. Remove all of the air and place it in your freezer for up to 3 months. Just make sure to allow the dough to thaw out overnight in your refrigerator before using.
Rolling Out The Dough
Once the dough has chilled, remove one disc from the refrigerator at a time. Remove the plastic wrap and roll each piece of dough out on a lightly floured surface. The goal is to get a nice circle that is a few inches wider than the pie plate you are using.
So, for example, if you are using a 9-inch pie plate, roll the dough out so it is a diameter of around 12 to 13 inches across. This usually results in a dough that is around 1/8″ thick.
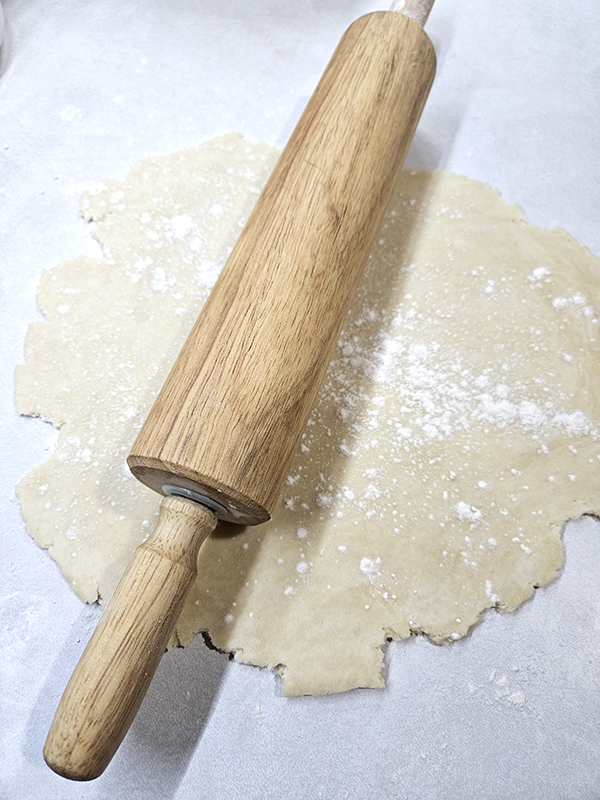
To help achieve an almost-perfect circle (trust me, mine are never perfect), try the following: First, make sure you are starting out with a round disc of dough that is chilled but not rock solid. Use a rolling pin and make a few quick rolls, working your way across the dough and rolling away from you. Rotate the dough a quarter of a turn after each roll.
The goal isn’t to get the dough super thin on these first few passes. It’s just to start spreading it out. Continue this process, but start to press a bit harder for the next round. Eventually, you will achieve the correct size and thickness needed.
If the dough is sticking to your counter or rolling pin, add a little bit of flour to each. Reapply as needed. If your dough is cracking, dip your fingers in a little bit of cold water and try “sealing” the cracks back together. Don’t worry if the edges of the dough crack; that is normal and will get trimmed off in the next step anyway.
Transferring The Dough To The Pan
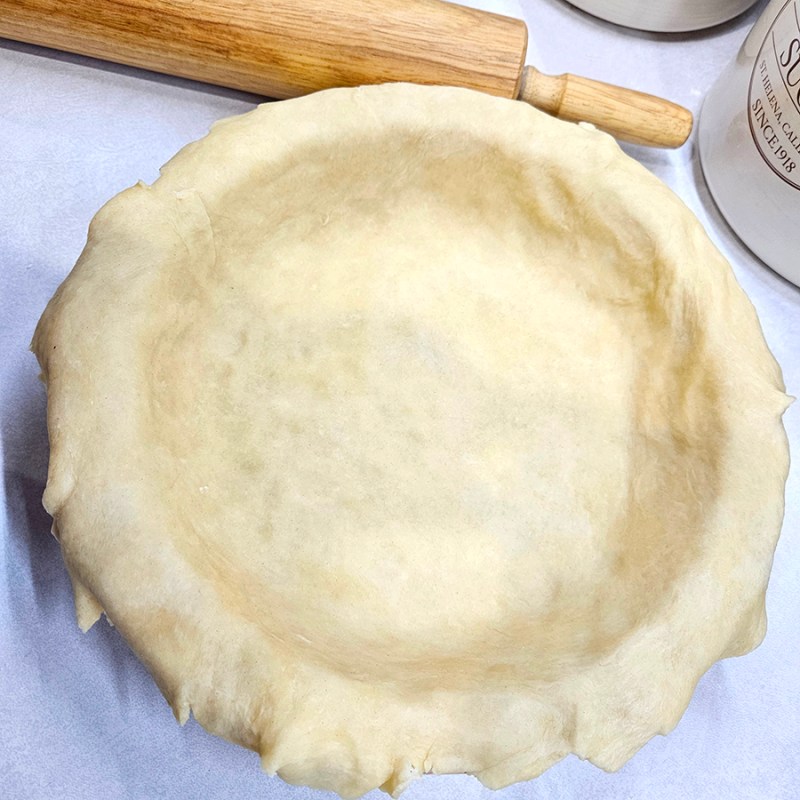
Center one of the rounded doughs over the pie plate and lay it across the top. Use your fingers to gently press it into the pan, removing any trapped air underneath.

The easiest way I have found to transfer the rolled-out dough to the pie pan is to use a rolling pin. Cover the pin with a small amount of flour (especially if your dough is slightly sticky). Then, roll one side of the dough onto the pin so it drapes across. (Picture a fancy waiter draping a towel across their outstretched arm.)
Use a bench scraper to help lift the entire piece of dough up off the counter if it starts to stick. If the dough is the right consistency, you should be able to lift it up and easily move it to your pie plate. Center the dough over the plate and set it down.
If your dough is breaking as you lift it, you might have too much moisture in the dough, or it has gotten too warm. Place the dough back in the refrigerator for a couple of minutes and try again, adding a bit more flour if needed as you rework the dough.
Trim, Fill & Bake – Rustic Pie Crusts
Trim off any excess dough around the edges. Leave about 1/2 inch of overhang for single-crust pies. For double-crust pies, trim the bottom layer to the edge of the pie pan.

Use a pair of kitchen scissors or a sharp knife to cut the extra dough off. (Don’t toss the extra dough! See the next section below for a delicious bonus treat recipe you can make while your pie bakes!)
Follow the steps in your pie’s recipe. If the crust needs to be blind baked, use pie weights to help with this process.
If you are baking a two-crust pie recipe, add your filling and the second pie dough on top. Trim the top crust with a 1/2-inch overhang, then tuck the top crust under the edge of the bottom crust. Seal the two crusts together using a fork to crimp or your fingers to flute the dough.
Bake the pie as directed in your recipe. If the edges of the crust start to brown too quickly, cover them with foil or use a cover meant for this purpose. (Product Link – Mrs. Anderson’s Baking Pie Crust Protector Shield)
(Not a huge pie fan? Try your hand at Rhubarb Crisp instead!)
What To Do With Excess Dough – Rustic Pie Crusts
My mom always had a fun treat she made with any of the excess pie dough. It’s something I remember her making, and I’ve now carried it on for my own kids to enjoy (and maybe myself).

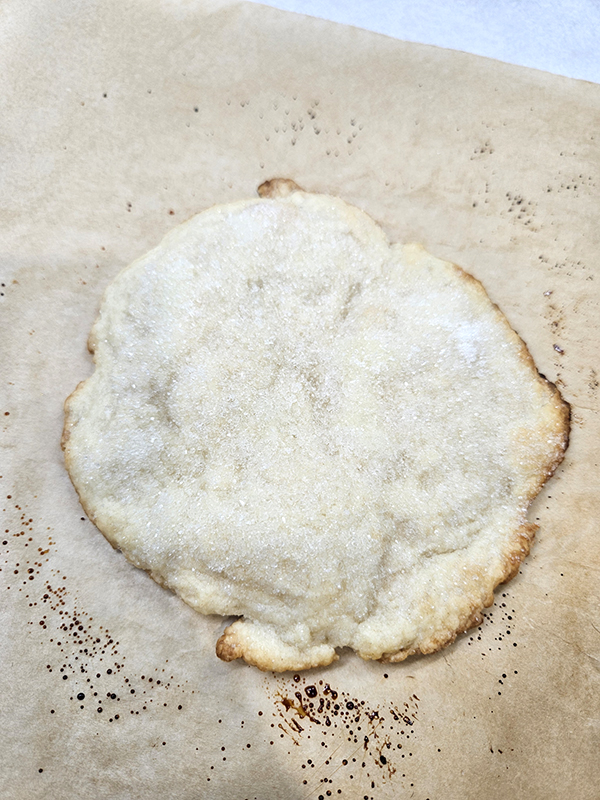
With the excess pie dough that you trim off, shape it into a round disc and flatten it out using your rolling pin. Aim for about the same thickness as your normal pie dough.
Place the disc on a piece of parchment paper on a small baking sheet. Sprinkle the top with a decent amount of granulated sugar.
Bake the mini crust along with your regular pie until the edges are lightly browned and crispy. The amount of time for this will vary depending on how much extra dough you have and its thickness.
Remove the mini crust from the oven and allow it to cool slightly. You can then eat the mini crust as a fun bonus snack while you wait for the pie to bake! Enjoy!
Until next time, thanks for stopping by!
– Chelsea
*This post may contain affiliate links. These are products I have used personally and highly recommend. As an Amazon Associate, I may earn a small commission from qualifying purchases if you purchase items through my links. These links and the ads on this page help to support my family and our semi homestead, so Thank You!


Rustic Pie Crusts
Ingredients
- 2 ½ cups all purpose flour
- 2 Tbsp sugar (plus a little extra for the optional mini crust; see Note below)
- 1 tsp salt
- 4 Tbsp shortening (or ¼ cup)
- 10 Tbsp cold shredded butter
- 7 to 10 Tbsp cold water
Instructions
- In a large bowl, sift together the flour, sugar, and salt using a whisk. Set aside.
- Cut in the shortening and cold butter using a fork, a pastry knife, or your hands. Continue mixing until it resembles coarse sand.
- Add in 4 tablespoons of cold water and mix well. Continue adding an additional tablespoon of water and mixing well after each addition. Only add enough water until the dough holds together when it is squeezed.
- Divide the dough into two equal pieces. Shape each one into a flat disc that is about 6 inches wide. Wrap each one in plastic wrap. Place them in the refrigerator for an hour to chill.
- Once chilled, work with one disc at a time. Remove the plastic wrap and roll each piece of dough out on a lightly floured surface until it fits a few inches larger than the pie plate you are using. Sprinkle the top of the dough and your rolling pin lightly with flour if it sticks to your rolling pin.
- Center one of the rounded doughs over the pie plate and lay it across the top. Use your fingers to gently press it into the pan, removing any trapped air underneath.
- Trim off any excess dough. (See Note below on a fun treat to make with the excess.) For a single pie crust, leave ½" extra overhang and flute/decorate if desired. For double pie crusts, trim the bottom crust to the edge of the pan.
- Follow the filling and baking directions for your pie. If needed, blind bake the bottom crust using pie weights. If you are baking a two-crust pie, add your filling and the second rolled-out pie dough on top. Trim the top crust, leaving a ½" overhang. Tuck the top crust under the edge of the bottom crust and seal them together using a fork or your fingers.
- Cover the edges of the crust with foil or a pie crust shield if you are worried about burning. Bake the pie according to the directions.
Notes
Discover more from Semi Homestead Life
Subscribe to get the latest posts sent to your email.