There are so many different types of seeds you could be saving from your garden each year, and one of the best ones to save is nasturtium! These bright and cheerful flowers do way more than just look pretty in your garden space.
With the cost of seeds going up each year, it’s a great practice to start learning how to collect seeds and store them for use the following year. Not only can this save you money in the long run, but you are able to ensure that you have control over the health and vitality of your plants.
The first seeds I ever saved from my garden were marigolds and zinnias. Both of these flowers are easy to grow, they do well with deadheading, and they produce an abundance of seeds.
Nasturtiums are a new addition to my garden, but they are a flower I will include every year from now on out! So in order to save myself money and duplicate the beautiful plants that grew this year, I decided to save their seeds.
Not only is this an easy process to do, but it doesn’t require any special equipment. After just a couple of weeks, I now have multiple seeds from the exact same plants I grew this year that I can use for growing new plants next year – and all for free!
Why Grow Nasturtiums
Nasturtiums are one of those dual-purpose flowers that are a true garden powerhouse!
The first benefit to growing them around your garden is that they help to bring in pollinators in droves. Each single plant grows and expands, putting out multiple vibrant blooms from late spring until the first frost.
In fact, even after looking super scraggly and damaged toward the middle of the summer, my nasturtium plants are bouncing back and producing even more blooms than before. That is a huge plus for me since I am still trying to encourage pollinators to visit my fall garden.
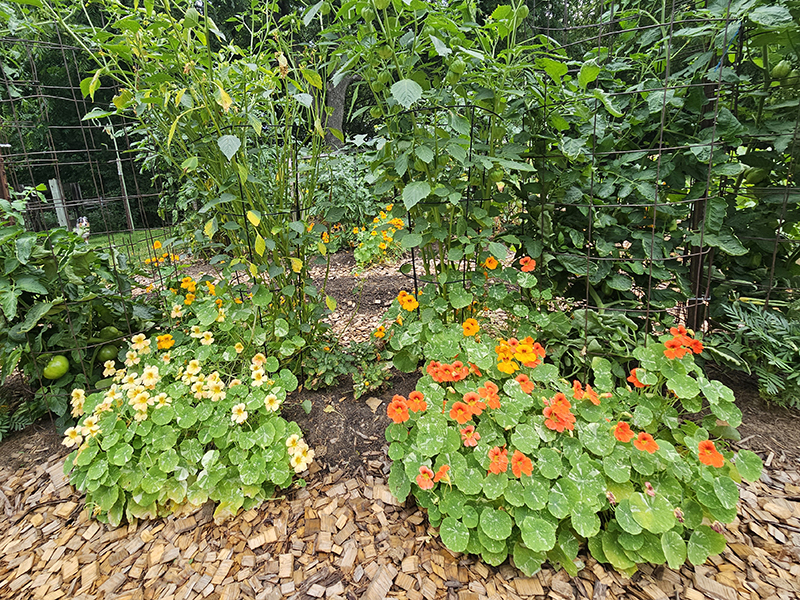
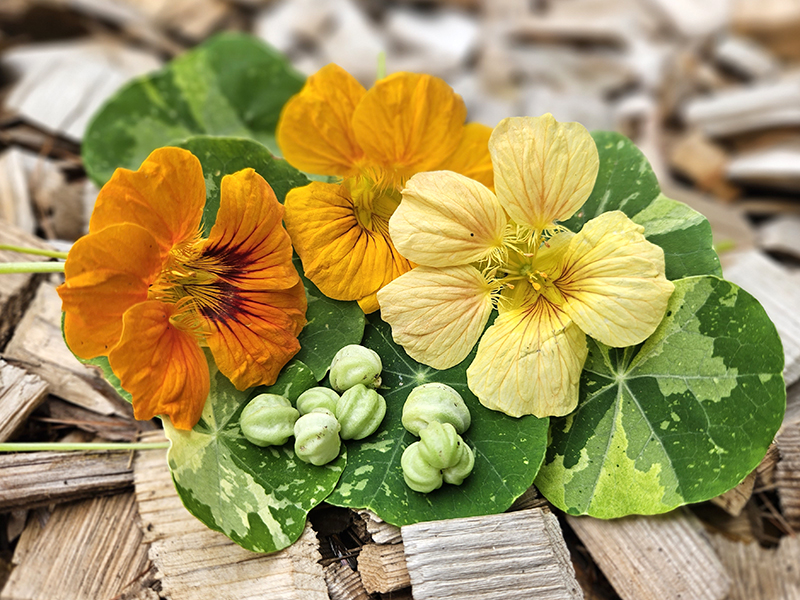
In addition to having beautiful blooms, many nasturium varieties have stunning foliage. The variety I chose, Alaska Mix, has amazing variegated green and cream foliage. So in addition to the cream, orange, and yellow blooms, I get to enjoy beautiful greenery as well!
Another bonus of growing nasturtium is that the foliage and the blooms are actually edible. They feature a peppery flavor that can be added to salads or soft cheeses. (Your chickens will also enjoy munching on the blooms, too!)
The last and maybe best feature of nasturtiums is that they are excellent companion crops. They are considered to be “trap crops”, which help attract unwanted pests. This leaves your more desirable vegetables and other plants free from pest damage. Talk about your do-it-all plant!
Tips For Saving Nasturtium Seeds
Choose Open-Pollinated Varieties
The variety of nasturtium I grew in my garden this year is an open-pollinated plant. This means that the seeds from these plants will produce almost exact replicas of the parent plant. Heirlooms are an example of open-pollinated plants.

In order to save seeds from plants and have them turn into similar copies of the plants you grew, they need to be open-pollinated varieties. This concept is the same whether you are saving nasturtium seeds or tomato seeds. (See, “Fermenting Tomato Seeds – Save Your Favorite Tomato Plants!“)
The other types of plants are called hybrids. These plants are created by combining two (or more) different plants to create the one you are growing. If you save the seeds from these plants, you will likely end up with a plant that resembles one of the plants used to create the hybrid.
Since most gardeners probably want a bit more control over what they are growing, make sure you choose only open-pollinated varieties when saving seeds.
The Right Timing – Saving Nasturtium Seeds
Nasturtium seeds will start being ready for harvest around late summer to early fall. You can find the seeds throughout the plant, often in a cluster of three. However, you can also find them in groups of two or even four.
The seeds will be a light green or tan color and are about the size of a pea. They might appear plump if they haven’t fully dried out or they may be slightly wrinkled if they have.
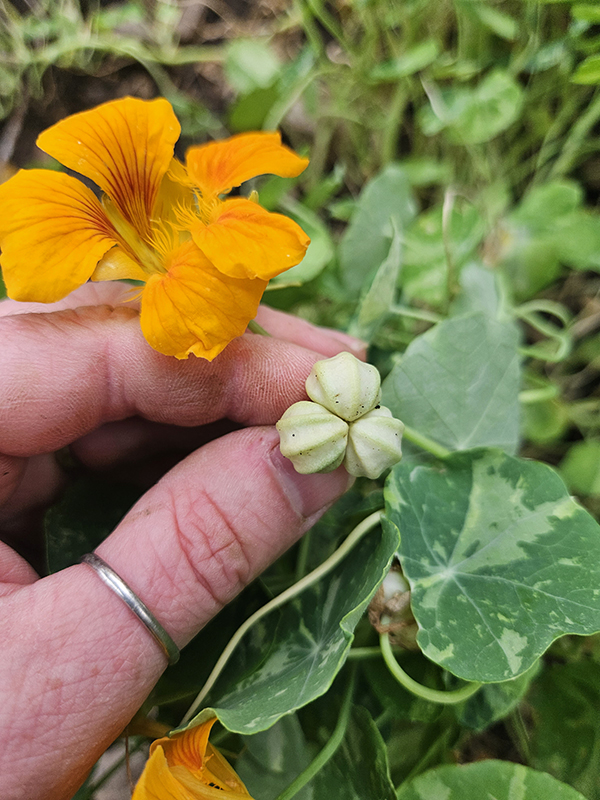
It’s best to allow the nasturtium seeds to dry out slightly while they are still on the plant. But you can still harvest the seeds while they are green in color.
Just make sure that the seeds detach easily from the plant without a lot of tugging. If they don’t come off easily, allow them to dry out naturally for a few more days and then recheck.
Drying Them Out
Once you gather up a good amount of seeds from your nasturtium plants, it’s time to allow them to fully dry out. The amount of time this takes will depend on whether you harvested them while they were still green or after they started drying out.
Place the seeds on a paper towel or plate and set them in a dry, warm location. Keep the seeds out of direct sunlight and check on them every couple of days. It won’t hurt the seeds to stay on the paper towel for longer but it can hurt them to store them before they are completely dry.
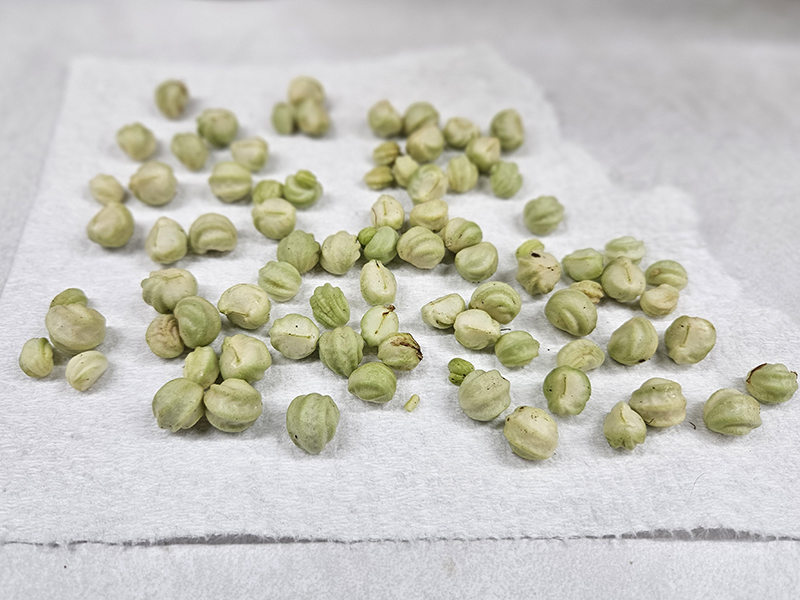
You want the seeds to be fully dry or else they might mold while in storage. I harvested my seeds while they were still slightly green, so they needed a bit more time to dry out.
After anywhere from one to two weeks, your seeds should appear small, shriveled, and completely dry. They will be light brown or beige in color. You can now store them for winter.
Long-Term Storage – Saving Nasturtium Seeds
Put the seeds in a paper envelope or even an old seed packet for your long-term storage. You can purchase inexpensive paper envelopes online for storing seeds or you can even make your own. I typically just cut up and use paper envelopes for storing my seeds.
The key is to avoid using plastic or any product that can harbor moisture. That’s why paper works best. Be sure to label your seeds with the type of seed inside as well as the date of storage. Trust me, you don’t want to get your saved seeds mixed up – Spring is a long way off!
Store seeds over the winter in a cool, dark place. A cozy spot in your refrigerator is actually an excellent spot if you have the extra space.

Right: The seeds in my paper envelope ready for storage.
I like to store all of my seeds in our dry, heated basement. While I keep the seeds in paper envelopes, I store the envelopes in a plastic container meant for storing 4×6 photos. This is the exact one I own and have used for the last few years – Product Link: Transparent Photo Case. The seed envelopes fit perfectly inside and it’s a great way for me to stay organized.
When next spring rolls around, you will have an excellent head start on your seed collection! And, you can rest assured that you already have amazing genetics for those nasturtium plants – And all for free!
Until next time, thanks for stopping by!
– Chelsea
*This post may contain affiliate links. These are products I have used personally and highly recommend. As an Amazon Associate, I may earn a small commission from qualifying purchases if you purchase items through my links. These links and the ads on this page help to support my family and our semi homestead, so Thank You!
Discover more from Semi Homestead Life
Subscribe to get the latest posts sent to your email.