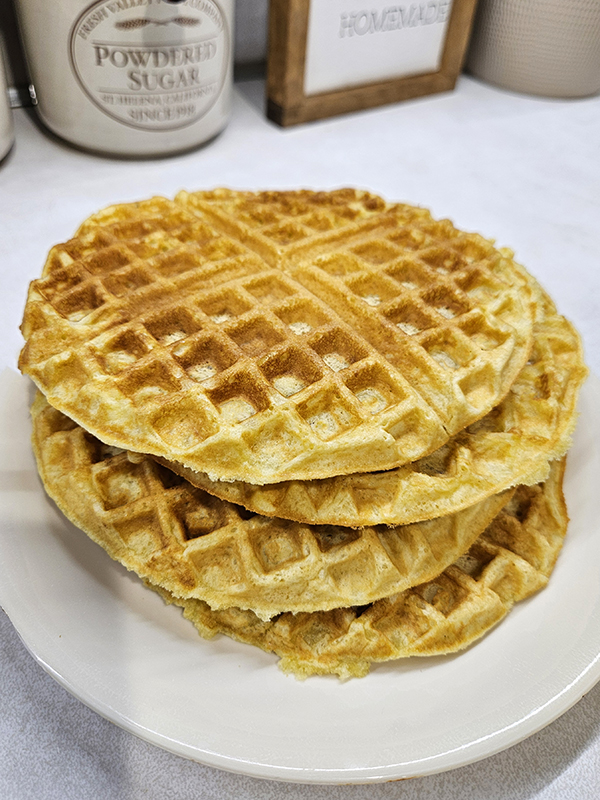
Fluffy and soft, golden brown homemade buttermilk waffles that are perfect for topping with fresh fruit, syrup, powdered sugar, and more!

There’s nothing that says “good morning” like the smell and sight of a stack of freshly made waffles! (Well, except for maybe a cup of coffee for all you caffeine drinkers out there!) Whether you cover them in rich maple syrup or a helping of fresh fruit, they are the perfect base for a filling and refreshing breakfast.
This recipe is simple to make, using ingredients you most likely already have on your pantry shelf. Instead of regular old milk though, it uses buttermilk (or a homemade version) that adds a light and fluffy texture to the waffles.
The result is soft waffles that you can enjoy as-is or crisp them up using your oven or a toaster. Using your oven also keeps the waffles warm, allowing you to serve your whole family at once as opposed to one waffle at a time.
This recipe creates about 10 buttermilk waffles when using an 8-inch waffle iron. The amounts you get will vary based on the size of your iron and how much batter you add to each one. The waffles can then be enjoyed right away or frozen for later use.
How To Make Soft Buttermilk Waffles
*Scroll down to the bottom of this post to see the full recipe, including exact measurements and amounts. You can also print out the instructions. I go into a bit more detail about the recipe here first, just in case you need it.

Ingredients
- Buttermilk – For these waffles, buttermilk is used as opposed to regular milk because the acidity helps to break down the gluten in the flour. It also helps to neutralize the flavor of the baking soda (the leavening agent) while also activating it at the same time. If you don’t have any buttermilk on hand, you can make your own, which is what I do most often. (See instructions below.)
- Butter – You want your butter to be melted and at room temperature before using. This prevents the waffles from spreading too much and becoming too thin.
- Eggs – Allow your eggs to come to room temperature before using if they aren’t fresh butt nuggets.
- Vanilla Extract – Make sure to use the real stuff here. No imitation vanilla in our kitchen! Or, make it homemade, which results in amazing flavor and a richer vanilla extract. (It also makes an excellent gift!)
- All-Purpose Flour – You can use any type of all-purpose flour. We like to stick with King Arthur Unbleached AP Flour.
- Sugar – If you are making savory waffles, you can omit the sugar and cut the salt in half.
- Baking Powder
- Baking Soda
- Salt
Instructions For Soft Buttermilk Waffles
You are going to need buttermilk in order to make these waffles. If you don’t have any on hand, don’t fret because it’s easy to make it yourself.
Simply mix together two cups of milk with two tablespoons of either lemon juice or vinegar. (It’s a one cup to one tablespoon ratio that you can use with any recipe.) Set the container aside for 10 to 15 minutes. The mixture should start to become a bit curdled when it’s ready to use.
Meanwhile, preheat a waffle iron or bring it to the right temperature per the instruction manual for your iron. You can use any size of waffle iron, just keep in mind that the number of waffles you end up with might vary based on the iron’s size and depth (i.e., Belgium vs classic waffles).
I have a classic Cuisinart waffle iron that makes about 7″ sized waffles and I can get between 10 to 12 waffles per batch of the recipe. (I couldn’t find it on Amazon, but this one is similar, even though it is a bit smaller – Product Link: 7″ Round Classic Waffle Maker Machine)
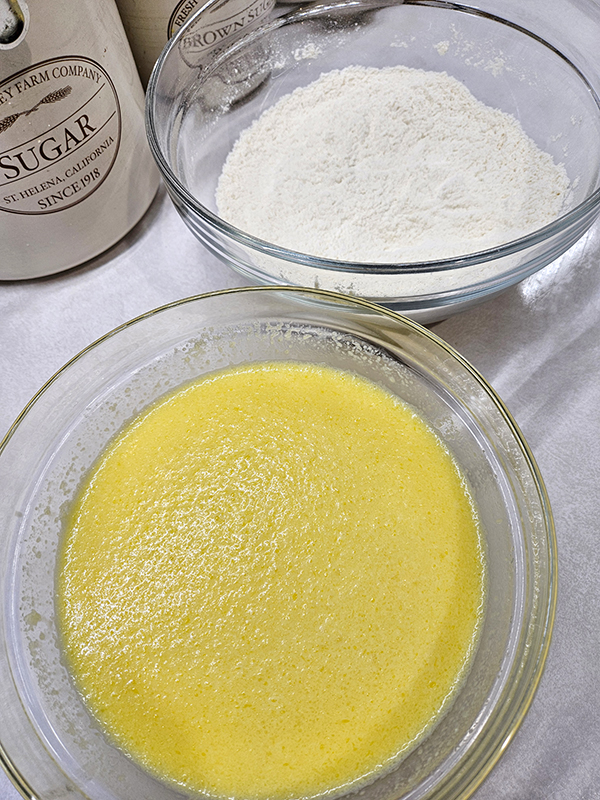
Making The Batter
In a medium-sized bowl, whisk together the buttermilk, melted butter, eggs, and vanilla until combined. Set aside.
In another bowl, combine the dry ingredients of the flour, sugar, baking powder, baking soda, and salt. Slowly, add the wet ingredients to the dry ingredients. Mix only until just combined. Avoid overmixing the batter. A few lumps and clumps are totally fine.
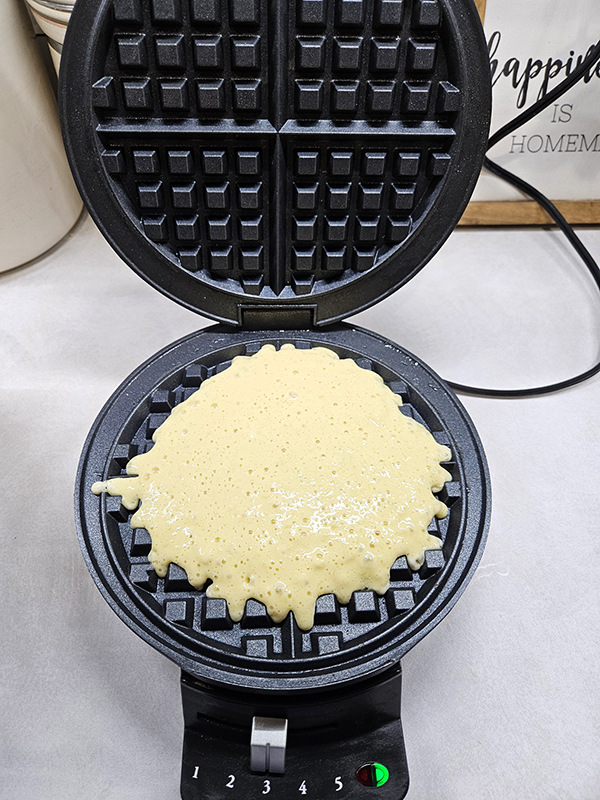
Lightly coat the heated waffle iron with non-stick spray or butter if needed. My plates are pretty non-stick, so I skip this step since I can still easily remove the waffles without the spray.
Carefully pour about a third cup of batter onto the middle of the bottom plate. This amount will vary based on the waffle iron’s size and capacity, so be sure to check your manual.
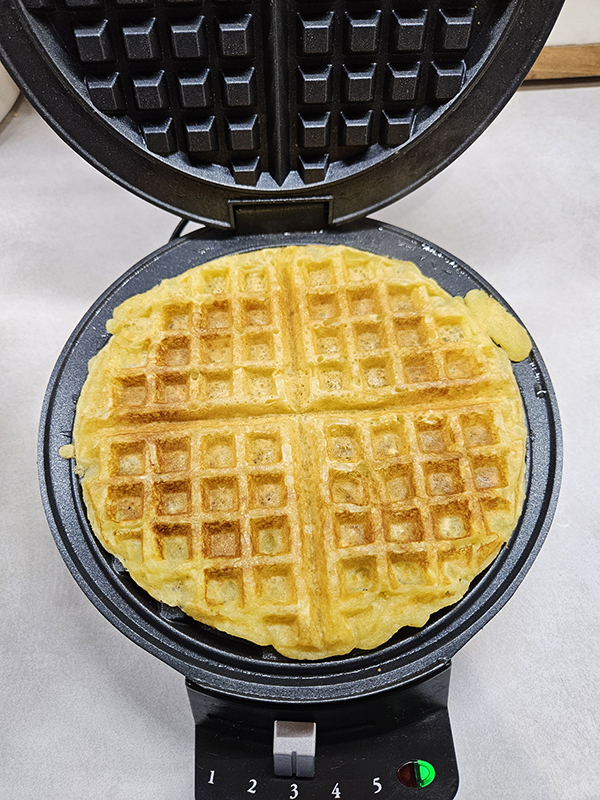
Close the lid and cook the waffles according to the iron’s directions. Usually, it only takes about 2 to 3 minutes. The waffles should be lightly golden brown when done. In the case of my waffle iron, the red light turns green when they are done. Carefully remove the waffle from the iron and allow it iron to heat back up before adding more batter.
Tips On Getting Crispy Waffles
The waffles straight from my iron are on the soft side. If that is what you prefer, you can enjoy them as-is. Or, place them on a wire rack while you prepare the other waffles.
However, if you prefer crisp waffles, then there are a couple of tricks you can try. First, you can also just use your toaster. I know it’s an extra step, but your toaster set on a low setting is a great way to crisp up those floppy waffles to your liking.
Alternatively (and the method I prefer), preheat your oven to 250º Fahrenheit prior to making the waffles. As you cook the waffles, set them on a wire rack in a baking pan.
Pop those guys in your oven while you cook up the other waffles. This should help crisp up the waffles by helping to remove any excess moisture in the dough.
When ready for eating, add your favorite toppings to the waffles and enjoy!
Until next time, thanks for stopping by!
– Chelsea
*This post may contain affiliate links. These are products I have used personally and highly recommend. As an Amazon Associate, I may earn a small commission from qualifying purchases if you purchase items through my links. These links and the ads on this page help to support my family and our semi homestead, so Thank You!

Soft Buttermilk Waffles
Ingredients
- 2 cups buttermilk (0r make your own)
- 8 Tbsp melted butter (at room temp)
- 2 eggs
- 2 tsp vanilla extract
- 2 cups all purpose flour
- 2 Tbsp sugar
- 2 tsp baking powder
- 1 tsp baking soda
- 1 tsp salt
Instructions
- Preheat a waffle iron or bring to temperature per the instruction manual. Also, preheat oven to 250º Fahrenheit. Add a wire rack to a large baking sheet and set aside.
- In a medium-sized bowl, whisk together the buttermilk, room temp melted butter, eggs, and vanilla until light and fluffy. Set aside. (See next step on how to make buttermilk if you don't have any.)
- To Make Buttermilk: Mix two cups of milk with two tablespoons of lemon juice or vinegar. Set aside for 10 to 15 minutes. Stir well before using.
- In another bowl, whisk together the dry ingredients (flour, sugar, baking powder, baking soda, and salt). Slowly, add the wet ingredients to the dry ingredients. Mix only until just combined. Avoid overmixing the batter.
- Lightly coat the heated waffle iron with non-stick spray or butter if needed. Carefully pour about ⅓ cup batter onto the iron. This amount will vary based on your waffle iron's size. Close the lid and cook according to waffle iron directions, or for about 2 to 3 minutes. The waffles should be a light golden brown when done.
- Enjoy as is for soft waffles. To help keep waffles warm and make them crispy, put the cooked waffles on the prepared wire rack and place them in the preheated oven while you cook the other waffles.
- Top the waffles with your favorite toppings and enjoy!
Discover more from Semi Homestead Life
Subscribe to get the latest posts sent to your email.