
Both early and late season tomato blight are two of the most frustrating diseases that tomato plants can get during the growing season, but thankfully, there are a few simple ways of preventing it from taking over your tomato plants.
Blight is a fungal disease that creates spores that can easily be spread by the wind, rain, animals, or even you as you walk through your garden. It thrives in moist climates, which tend to be rampant during the summer months here in the Midwest.
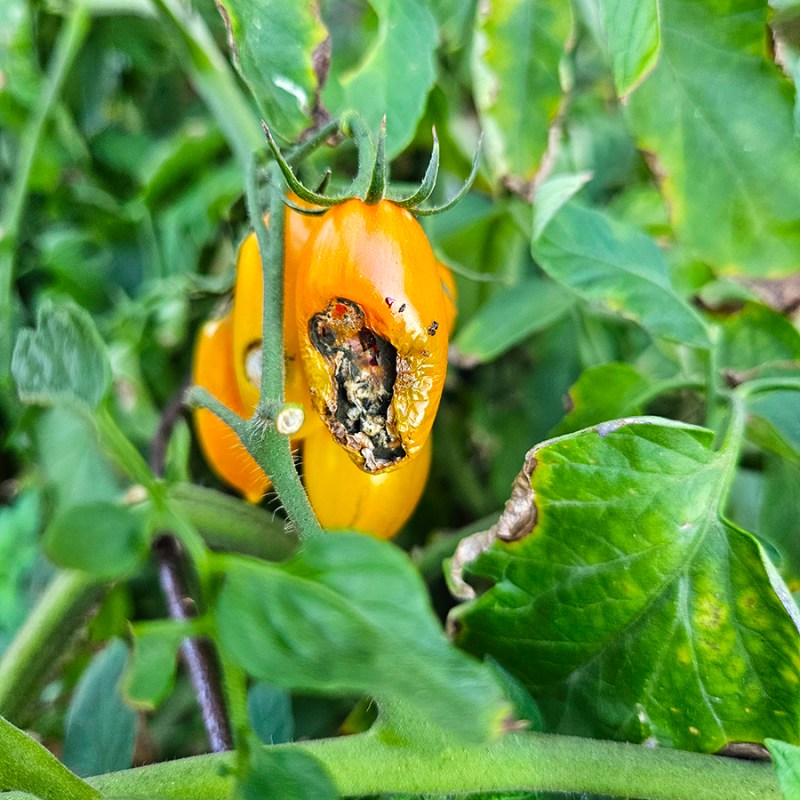
Unfortunately, it’s not just your tomato plants that can become victims of blight. Other crops in the Nightshade family are also susceptible to the disease, including potatoes, peppers, and eggplants.
While early-season blight isn’t always devastating, it usually causes a reduction in yields. Late-season blight, however, can quickly wipe out plants, so it’s important to put a quick stop to the disease before it takes over. And what’s worse, blight spores can overwinter in the soil, starting the whole devastating process all over again next year.
I’ve put together a list of eight simple yet effective ways of preventing and helping control both early and late-season blight. While any one tip likely won’t be effective on its own, it’s best to use a combination of these methods to have the best chance of success.
Early Blight Vs Late Season Blight
The term “early blight” is a bit misleading. Although it usually appears on your nightshade plants early in the growing season, it can occur at any point during the summer months. Early tomato blight thrives in moist, warm environments.
Early blight tends to start on the lower leaves, working its way up the plant. It appears as small brown spots on the leaves that enlarge as the disease progresses. The surrounding leaves turn yellow and eventually dry up completely. It can also affect the blooms and fruit of the plant.

Late-season blight is often a more devastating disease. It thrives in cooler, damp conditions that often occur later in the growing season, thanks to cooler nights and humid weather.
This fungal disease produces irregularly shaped dark brown spots on the foliage of the plants. These spots appear to have a halo around them. Eventually, the leaves wilt and die completely, often defoliating the plant starting from the crown and working its way down. On the fruit of the plant, it creates dark spots that render the fruit inedible.
Now that you’ve read all the doom and gloom about tomato blight, take a deep breath because all is not lost!
8 Tips For Preventing Early and Late Season Tomato Blight
The best way to help deal with blight is to prevent it from occurring in the first place. There are several early prevention methods that you can use to help keep these spores at bay. However, once the disease starts to take hold, there are still some steps you can take to keep it from ruining both this year’s crops as well as next year’s.
The key is to check your plants often. Walking around your garden daily is not only good for your mental health, but it is also the best way to catch any issues early. Even if you do start to see signs of blight, there are still a few things you can do to help slow down its spread.
1. Practice Crop Rotation
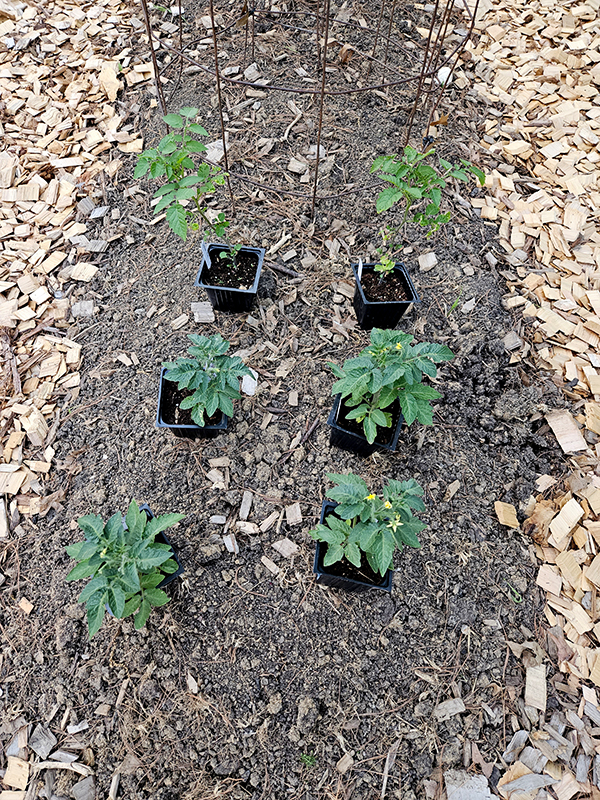
This tip happens long before your plants are growing in your garden. In fact, this is a process I start thinking about in the dead of winter when there is snow all over the ground outside. And that’s to practice crop rotation. Not only is this process important to keeping your soil healthy, but also the plants growing there.
If your current crop has blight, those fungal spores are continually multiplying and dropping onto the soil. Even though we have frigid temperatures here in the Midwest, those spores are capable of overwintering in the soil and dead plant matter. If you grow tomatoes and other susceptible crops in the same spot the following year, those plants will easily get infected due to the overwintered spores.
Instead, move your plants around from year to year. Instead of growing tomatoes in the same spot as last season, plant a crop that isn’t susceptible to getting blight. In fact, don’t plant the same type of crop in the same soil for at least 2 to three years, if possible.
2. Proper Planting Spacing – Preventing Tomato Blight
Using proper plant spacing is a tip that helps to prevent blight spores from taking over in the first place. While I don’t always use the “proper” spacing that you read on the back of seed packets or from “processional” gardening sources, I still try to space my plants out.

The reason behind this is that it helps to provide adequate air flow around plants. This good airflow will allow the plants to dry out quickly, reducing the amount of humidity and moisture on the foliage.
If you grow your plants too close together, all that foliage retains moisture and creates a perfect environment for blight spores to multiply and take hold. Good plant spacing also allows each plant to have plenty of access to full sun.
3. Use Mulch
Mulch . . . I’ve talked about using mulch in your garden in so many of the articles on my website. It is HUGE when it comes to benefiting your garden soil as well as your plants.
Adding a nice, thick layer of mulch around your tomato plants can help prevent early blight from happening in the first place. Why? Because the mulch adds a barrier layer on top of the soil that prevents the spores from jumping ship. If the spores can’t get splashed up on the plant tissue, they can’t cause any damage.
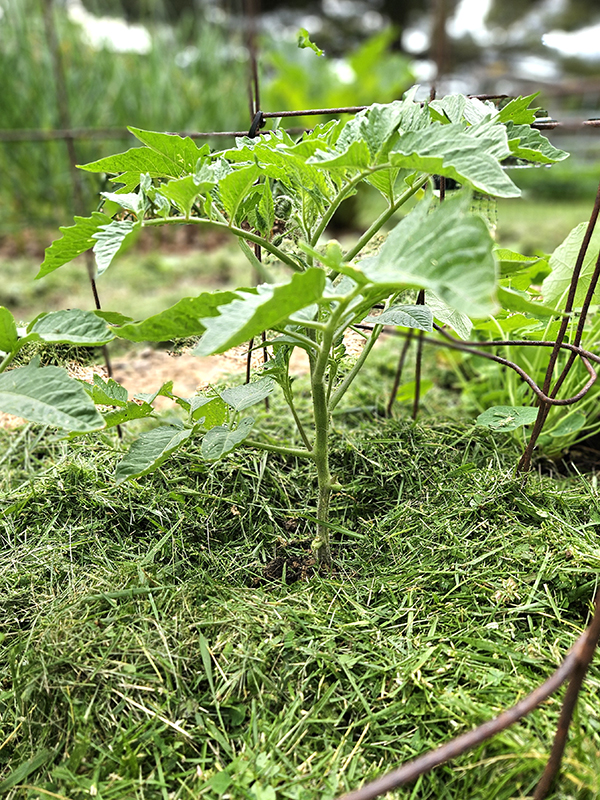
The key is to keep the mulch nice and thick. As the growing season goes along, add more mulch if it starts to break down. This can easily occur if you are using an organic material like grass clippings (my favorite garden mulch).
4. Supports & Cages – Preventing Tomato Blight
Another way to help prevent early blight is to support your tomato plants. Most tomato plants (aside from a few dwarf and determinate varieties) need some type of support to help keep the foliage up off the ground. Think tomato cages, cattle panels, t-pots, the Florida weave, etc. There are many different ways to support tomato plants.
You just need some way to keep the plants growing upward and to help keep the weight of all that growing fruit. In addition, use ties to help keep drooping stems and vines growing along the supports. (Here are the garden ties I love to use in my garden – Product Link: Soft Garden Plant Ties for Indoor & Outdoor Plants.)
Without any supports or cages, your tomato plants will likely start to fall over and grow along the soil. While this won’t be as big of an issue if you use mulch under your plants, it’s just not a good idea to let tomatoes grow in this fashion. (Think of other diseases, pests, insects, harder to harvest, and so forth.)

5. Prune Properly
In addition, as the tomato plants get taller, prune up the bottom 12 to 18 inches of stems off the plant. Just take a pair of clean pruners and cut off any stems that come off the main one. (I use these pruners when it comes to tomato plants – Product Link: Fiskars Bypass Pruning Shears.)
Remove all of the stems up until you reach the first one that contains the first set of blooms or fruit. This should be done on both determinate tomato plants and indeterminate tomato plants. If desired, also remove any tomato suckers off of indeterminate plants. Just don’t remove the suckers from determinate plants. (You can read more about Indeterminate and Determinate plants here.)
Again, this is to help keep the plant matter up off of the soil and further away from and spores that still might try to splash up onto your plants. In addition, it helps improve airflow around the base of each plant. (And, it helps to make it harder for creepy crawly pests to make their way up your plant!)
6. Water Correctly – Preventing Tomato Blight
Another great way of preventing tomato blight is to water your plants at the proper time of day. While it might be easiest to water plants during the nighttime after you get home from work or a kids’ sporting events, the best time for watering is actually early in the morning.

This allows the excess moisture to evaporate during the day before the cooler temperatures of nighttime occur. (Remember, late-season blight thrives in humid, cool conditions.)
Also, when you go to water your tomato plants, do so at their base as opposed to overhead. This will help to prevent the water from splashing up onto the lower foliage of the plants, possibly bringing blight spores along with it.
7. Clear Out Diseased Plant Matter
If your tomato plants do end up getting blight, remove all of the diseased plant matter as soon as possible from your garden space.
Slowly and carefully prune and remove the infected plant matter. Place the stems and fruit into a garbage bag and dispose of them immediately. Make sure to disinfect your pruners before moving from plant to plant.
Do not place the pruned diseased plant matter in your home compost piles. These piles just can’t get hot enough to kill off the bad bacteria and spores. When you go to use the finished compost, you would only be introducing the blight back into your garden space.

Also, at the end of the growing season, remove all dying plants, foliage, fruit, etc. from your garden. Do not allow the plant matter to overwinter where it is.
Not only will clearing out the garden help prevent blight, but also help prevent other diseases and unwanted garden pests, too. (Don’t worry, there are plenty of other spaces for the “good guy” insects to hibernate overwinter that don’t include your garden!)
8. Grow Resistant Varieties – Preventing Tomato Blight
If you’ve tried almost every method here and still have issues with blight in your garden, that doesn’t mean you are doomed to a growing season with no tomatoes. Thankfully, there are several tomato varieties out there that are less susceptible to blight.
Try growing resistant varieties like Celebrity, Brandywine, and Sun Gold tomatoes. While they might not be able to completely eliminate blight, they can still grow and produce despite blight hanging around.
Hopefully, these 8 tips will help with preventing tomato blight or give you some ideas on how to stop or slow the spread so you can enjoy your tomato harvest this season – and next!
Until next time, thanks for stopping by!
– Chelsea
*This post may contain affiliate links. These are products I have used personally and highly recommend. As an Amazon Associate, I may earn a small commission from qualifying purchases if you purchase items through my links. These links and the ads on this page help to support my family and our semi homestead, so Thank You!
Discover more from Semi Homestead Life
Subscribe to get the latest posts sent to your email.