One of my favorite skills that I have learned during my semi homesteading journey has been how to render and use beef tallow. It’s a process that allows us to make a product that we can use in all sorts of ways in our kitchen – just like grandma used to!
Tallow was the go-to fat product back in the day, especially for cooking. Now, there are so many different types of fats out there that are commercially made. Unfortunately, many of them are tied to ultraprocessed foods and undesirable ingredients.
Now I’m not going to get into a debate on ultraprocessed foods and whatnot on here. But I do tend to personally try to use more natural products when possible for myself and my family (i.e., making my own bread or seasoning mixes). Again, not all the time, but if I can find healthier and more natural alternatives, I try to go that route.
We use beef tallow in all sorts of ways, but especially for sauteing and frying and for seasoning our cast iron cookware. You can also use beef tallow for skincare products, soaps, and even candles.
To us, it’s a no-brainer to render tallow. Each year, we get half a beef from a local farmer and have it butchered locally. The butcher is more than happy to save the beef fat back for us to pick up when we get the rest of our beef. Then I just pick a day and get to work, allowing me to have a natural fat product I can use all year long.
All About Beef Tallow And How To Easily Render It
What Is Beef Tallow?
Simply put, tallow is beef fat (also called suet) that is rendered down to remove all of its impurities. To “render” something, in this case, means to cook it down nice and slow. Sheep fat is also referred to as tallow. If you are talking about pig fat, then the rendered product is referred to as “lard.”

Long before seed and vegetable oils came onto the scene, tallow was pretty much the main source of fat to use for cooking. In fact, I’m sure many of your grandmothers and/or great-grandmothers used tallow back in the day.
Convenience and studies on the effects of animal fats on health kicked the use of tallow to the wayside over the years. However, the “trend” of homesteading or getting back to more natural diets (i.e., REAL food!) has helped bring the skill of rendering tallow back. At least for some, anyway!
There are many health benefits to using tallow. It is a great source of monosaturated fats, choline, and many fat-soluble vitamins like A, D, E, and K. It has a high smoke point, which makes it great for using in cast iron cooking or frying.
There are also no synthetic products in beef tallow because it is in its purest form. In addition, tallow is a great sustainable source of fat compared to processed or manufactured fats.
What To Use Tallow For?
Beef tallow you render is great for any type of frying, sautéing, and even baking. You can use it to fry up a batch of homemade French fries or to cook a perfectly seared steak. (In fact, several fast food chains used to cook their French fries in tallow way back when!) Beef tallow does provide a mild umami flavor when it is used.
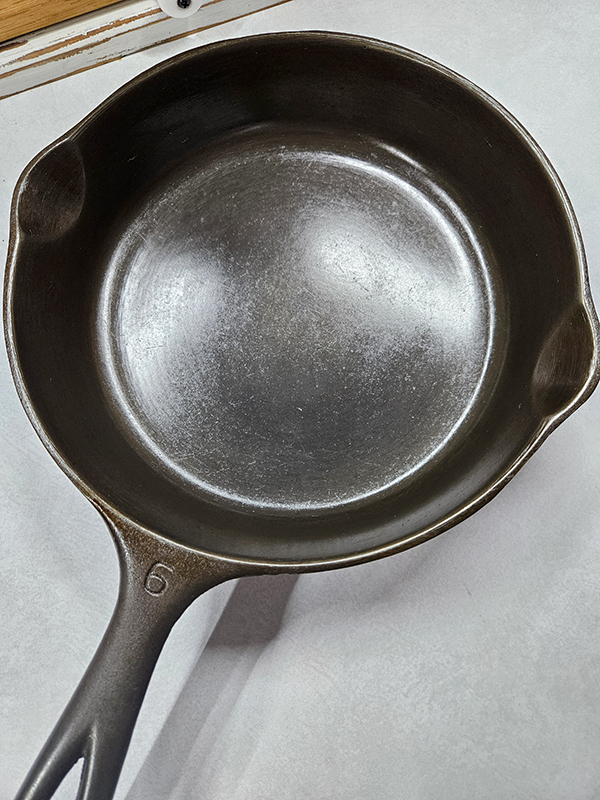
We also use tallow to season our cast iron cookware. Cast iron needs a protective coating to help prevent it from rusting and to allow the cookware to become non-stick. A thin layer of tallow is a perfect option for that. If it is rendered properly, there is little worry about it going rancid like some other oils and fats.
In addition to being used in the kitchen, you can use tallow to make skincare products. Yep, you read that right! You can use rendered beef fat on your face as the perfect, all-natural, and high-vitamin skincare product. I personally don’t use it in this manner, but I do know several people who do with great results. (My face tends to break out when I use any type of skincare product on it.)
Tallow can also be used to make other household products like soaps or candles. If we ever get a huge batch of tallow made, mason jar candles are on my to-make list for sure!
Where To Get Beef Fat – Easily Render Tallow
We do not raise our own beef, so we get our beef fat from a local butcher. When we order our half beef each year, we always request that they save the beef fat trimmings for us.
They are always more than happy to oblige because normally it just gets tossed with the rest of the unused bits. In fact, we get our beef fat at no extra cost. Who can argue with that?!
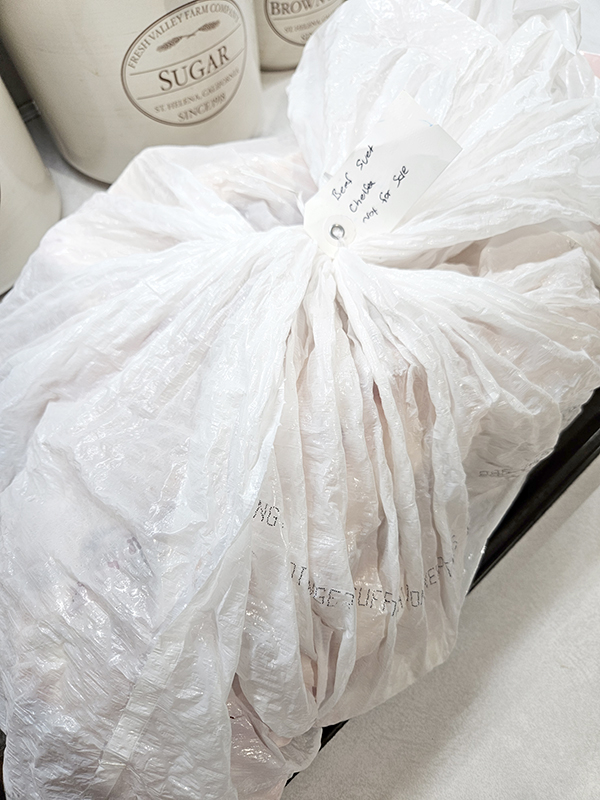
The beef fat usually comes in big chunks in a large bag that we throw into the freezer until we get a chance to render it down. The fat freezes beautifully, and there are no issues thawing it out when the time comes.
The best type of beef fat to get is called the “leaf fat”. This is the fat that is found around the kidneys of the cow. It results in a cleaner, mild-tasting tallow. However, we just take whatever type of beef fat the butcher provides us. Again, it’s free so we won’t be picky!
If you have a local butcher, call them up and ask if you can buy beef fat for making tallow. Most will be happy to reserve some for you, possibly for free or for a small fee. You can find tallow in some stores. Just check to make sure there aren’t any additional ingredients added.
The Smelly Truth – Easily Render Tallow
Now, for a little side note on the scent of rendering beef fat…
I am cursed/blessed with a rather strong sense of smell. It’s great when I am cooking my favorite foods or smelling flowers in my garden. However, there are other times when this “blessing” is not so nice, and rending beef tallow is one of those times.
When you render tallow, it is not an aroma-free task. In fact, I highly suggest tackling this process on a day you can open up your windows to allow some fresh air to flow in. Or, do like we do and set the process up in another place in your home that won’t allow the smell to escape. (We use our attached garage.)
For some, the smell of rendering fat might not be too bad. It just isn’t a scent that I don’t particularly like. However, it’s not bad enough for me to not want to do the process because the finished product is more than worth a day or so of stench!
Ok, now onto the rendering steps! (You can use these steps for rendering lard as well.)
How To Render Beef Fat Easily In 4 Simple Steps
Step 1: Trim The Fat & Cut Into Chunks
For this process, you are going to want to work with either slightly frozen or at least cold beef fat. It makes it much easier to cut and work with if the fat is more on the solid side.

Start by using a very sharp boning knife to trim off any gristle, blood, or meat from the beef fat. The goal is to remove as much of it as possible. This will not only make the rendering process go faster, but it will also help the tallow have less of an odor.
Cut the beef fat into small chunks. The smaller the pieces, the quicker the fat will melt down. We aimed for around 1 to 2-inch-sized pieces. You can also use a meat grinder or food processor to grind the beef fat down even further if you choose.
Step 2: Add To A Slow Cooker
Next, you want to cook your beef fat nice and slow. The goal is to use as low a heat as possible. To help with this, I use my large slow cooker set on “low”. At this temperature, I don’t have to worry about the fat burning. (Here’s the slow cooker I use: Product Link: Crock-Pot 7 Quart Oval Manual Slow Cooker)
You can also cook the beef fat down on your stove. Just make sure to have the heat as low as possible and keep an eye on it. Stir the fat often to prevent any burning on the bottom of the pan.


The amount of time that you need to melt the beef fat will depend on the temperature used and how small you cut up your pieces. Keep an eye on the fat and check it every hour or so, stirring each time. It will likely take anywhere from 4 to 6 hours for the beef fat to completely melt.
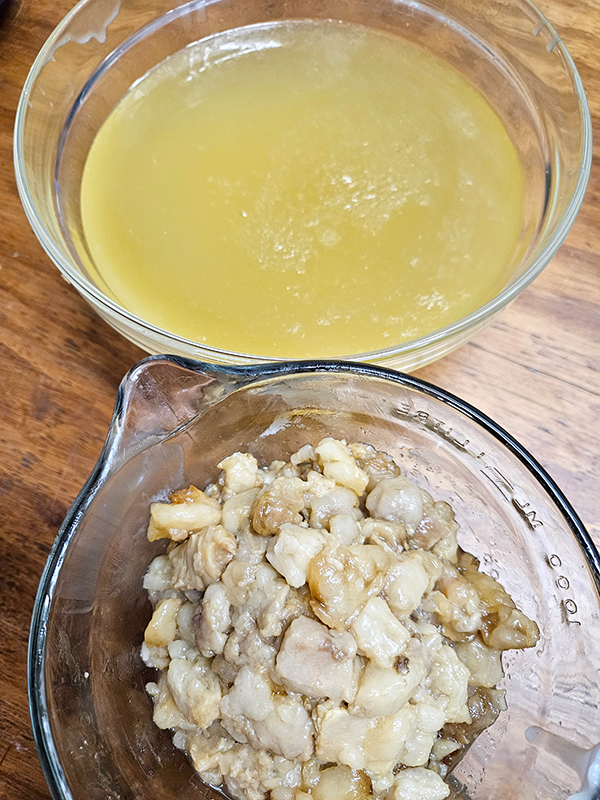
Please note, not all of the beef fat will melt completely. You are left with bits and pieces here and there. These are referred to as “impurities”.
This is something I didn’t realize the first time I rendered our beef fat and wondered if we had done it incorrectly. I found out that we had larger “impurities” because our beef fat was cut into larger pieces. You will know it is done when you can start to see crispy impurities float to the top of the liquid.
Step 3: Strain & Drain
Now that your beef fat has been liquified, it’s time to strain out the impurities and pieces. We like to strain ours twice. First, we use a fine mesh strainer, and then we use multiple layers of cheesecloth. This will allow all of the bits and pieces to separate from the tallow.


Once that process is done, you need to pour the liquid fat into the desired containers. You can use all sorts of options for hardening the tallow. We have two favorite methods.
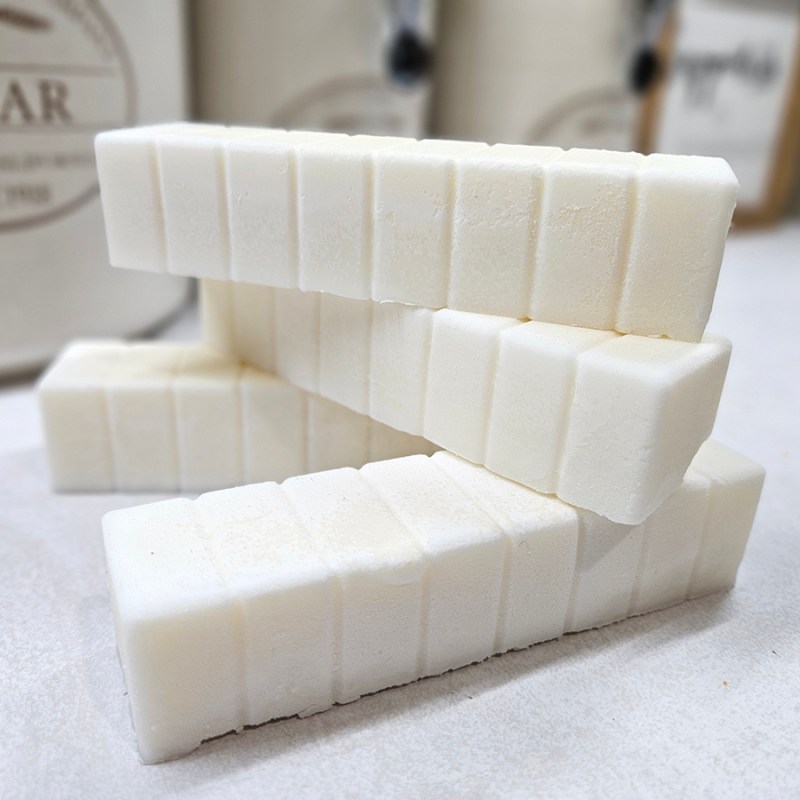
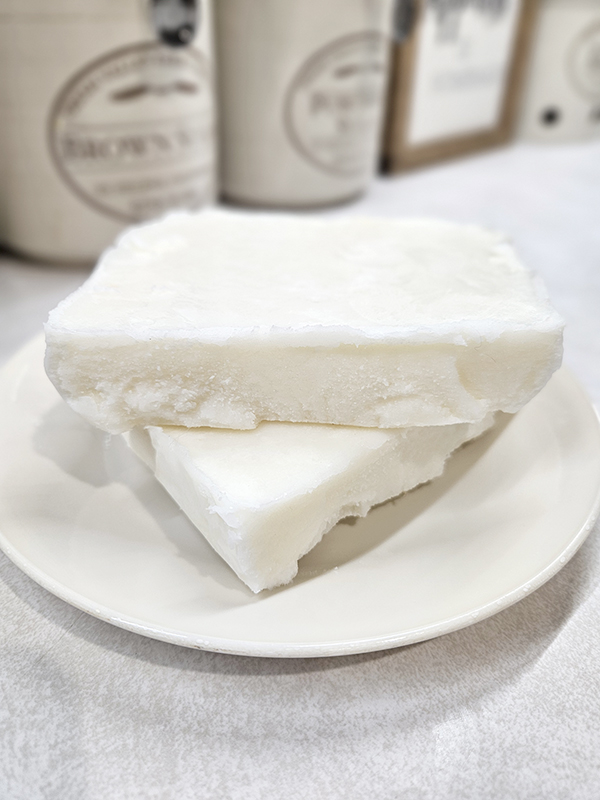
First, I like to line glass rectangular containers with parchment paper and pour the tallow in. This provides us with a large chunk of tallow to use however we see fit.
The second way I like to harden the tallow is to use silicone butter molds. I found these on Amazon (surprise, surprise). You can use them for all sorts of products, but I like how they have indents that indicate tablespoons. They also have lids so you can easily stack the tallow in the freezer while it hardens. (Product Link: Silicone Butter Mold with Lid)
Some people like to store tallow in glass canning jars. However, I have read that it is difficult to get the tallow out once it hardens. I think they would work fine if you keep the tallow at room temperature. But we stick to blocks and bars.

Step 4: Storing Hardened Tallow Long-Term
The tallow then goes into the freezer to harden. It will turn a beautiful creamy white when it is fully hardened.
At this point, we remove the blocks and bars from the molds and containers and store them in freezer-safe zip-lock bags. We only remove a block or two of tallow at a time to keep in our refrigerator. Everything else stays in the freezer. While you can keep tallow at room temperature, we just keep ours in the refrigerator and freezer out of extra precaution.
You can now use the tallow however you please. If you use large amounts of tallow for frying, strain the product after use and pour it back into a container to re-harden and use again.
The tallow might still have a slight scent to it, but it shouldn’t be anywhere as bad as when you were rendering it. Enjoy!
Until next time, thanks for stopping by!
– Chelsea
*This post may contain affiliate links. These are products I have used personally and highly recommend. As an Amazon Associate, I may earn a small commission from qualifying purchases if you purchase items through my links. These links and the ads on this page help to support my family and our semi homestead, so Thank You!
Discover more from Semi Homestead Life
Subscribe to get the latest posts sent to your email.