
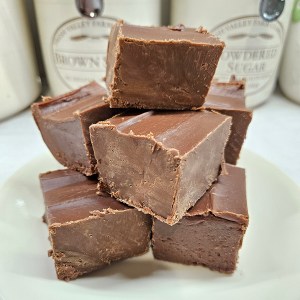
There are so many different homemade fudge recipes out there, including lots of copycats, but most can’t compare to the richness and creaminess of this recipe! This chocolate fudge recipe is simple to make and almost foolproof, resulting in a decadent dessert that is smooth and chocolatey every time!
I can be a bit of a snob when it comes to fudge. I found this recipe for “See’s Fudge” several years ago and decided to give it a try. Admittingly, I have never had See’s Fudge before. However, I grew up enjoying Mackinac Island fudge when my parents took us there on vacation, so I know good fudge when I “see” it (pun intended!). Anyway, I always figured I’d never be able to enjoy fresh fudge like that unless I visited there. Thankfully, I found this recipe!

The combination of two different types of chocolate mixed with all the other sweet flavors really helps this fudge stand out. It isn’t so rich that you can’t enjoy a decent-sized piece yet it still feels like a guilty pleasure with every bite!
The best part is that it is really simple to make. Once you try making fudge homemade, you will never go back to the store-bought kind. Whether it’s for the holidays, a family gathering, or just a sweet treat for your family, this homemade fudge recipe is perfection!
Another great part about this fudge is that you can freeze it for later. This allows me to make a huge 9×13 batch and freeze half of it for some other time when I have a hankering for something chocolaty and sweet while enjoying the rest now!
Homemade Chocolate Fudge Recipe
*Scroll down to the bottom of this post to see the full recipe, including exact measurements and amounts. You can also print out the instructions. I go into a bit more detail about the recipe here first, just in case you need it.

Ingredients
This homemade chocolate fudge recipe only takes 7 ingredients to make. You will end up with a huge 9×13 batch of fudge. It’s perfect for cutting up and adding to your next holiday treat platter or Christmas goodies gift exchange. (Or keep it all for yourself like we sometimes do!)
Chocolate Chips – This recipe has a combination of both semi-sweet chocolate chips as well as milk chocolate chips. The semi-sweet chips help to cut through some of the sweetness in the fudge while keeping the rich chocolatey taste. The milk chocolate chips help to reduce the bitterness that can come with semi-sweet chips.
As an alternative, you can use chocolate bars like Hershey’s or Ghirardelli in exchange for the chips if you want. However, I have never had any issues with just using chips.
Butter – Like any good dessert recipe, the homemade chocolate fudge recipe requires a decent amount of butter. We like to use salted butter for this recipe. I highly suggest using real butter if you can. You want the butter to be at room temperature.
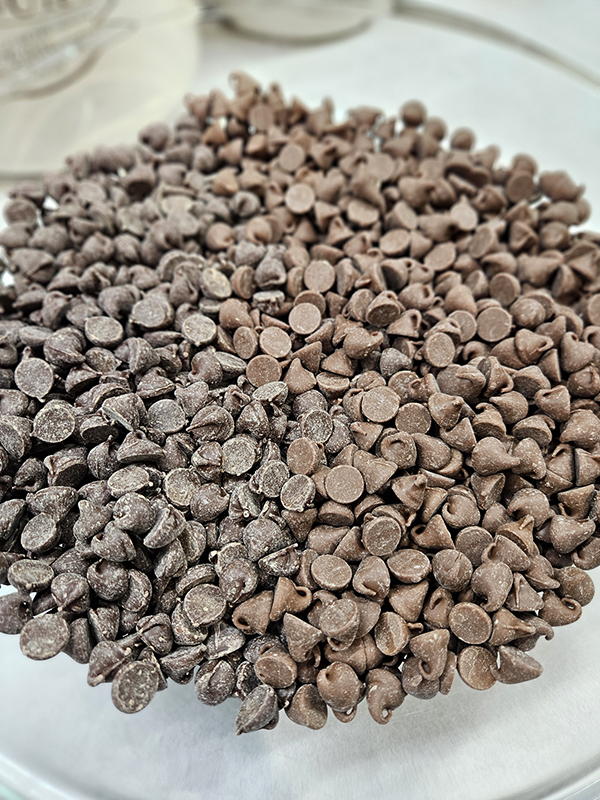
Marshmallow Fluff – To help give the fudge a nice creaminess, marshmallow fluff is used. You can of course make your own marshmallow fluff, but I like the convenience of store-bought. I do not recommend using marshmallows.
Sugar – Yes, there is a lot of sugar in this recipe. However, this is a sweet treat and not something you will be making on a daily basis. Sometimes you just have to give yourself some grace and enjoy! Just don’t think about the calories.
Evaporated Milk – Make sure you are using evaporated milk as opposed to sweet condensed milk. There is a big difference between the two! (Product Link: Carnation Evaporated Milk)
Instructions For My Homemade Chocolate Fudge Recipe
First, start by lightly buttering a 9×13 baking dish. This will help to prevent the fudge from sticking to the pan. (Product Link: Pyrex Basics 9×13 Glass Baking Dish With Lid)
As an alternative, you can also line a pan with foil, making sure to leave a few inches overlapping the sides. Then, spray the foil with a non-stick spray of some sort. Leaving a few inches of overhang will allow you to easily lift out the entire 9×13 contents of fudge for easy cutting.
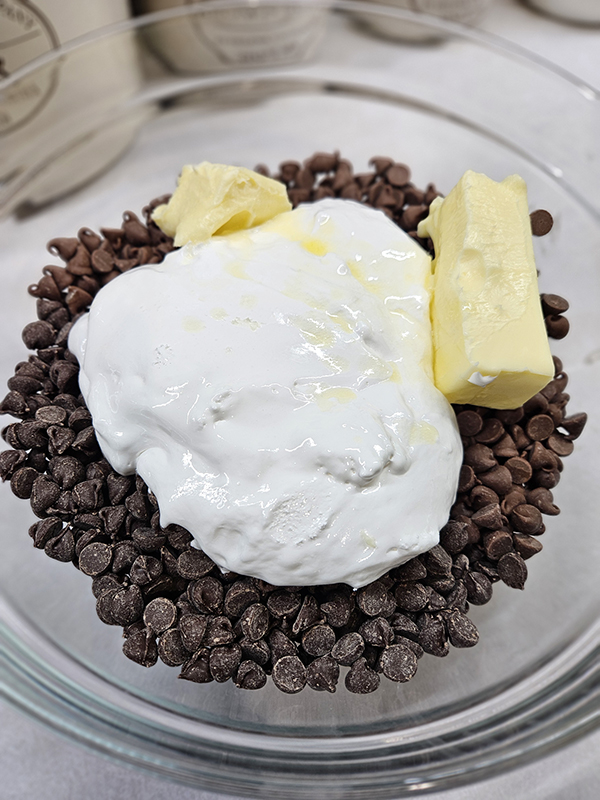
Next, add both types of chocolate chips, the room-temperature butter, and the marshmallow fluff into a large bowl. I’m not going to lie that it is a pain in the butt to get the marshmallow fluff out of the container. The smaller containers are a lot easier though than larger ones thankfully. (These are my absolutely favorite kitchen product that I use every single day and highly suggest – Product Link: Luminarc Stackable Bowl 10-Piece Set)
To help prevent the marshmallow from sticking to your spatula or spoon, dip your spoon in hot water before going in for the fluff. Just go slow and be patient. Once the marshmallow is all out, set the bowl aside.
If you are a fan of fudge with nuts, you can add them at this time. Use 1 to 2 cups of chopped walnuts or pecans, depending on how “nutty” you like the finished product. We usually don’t add nuts to ours, but you do you!
Heat Up The Sugar
Next, get a large pot or saucepan and add your sugar and evaporated milk. Do not use too small of a pan – just trust me on this one! The mixture will expand quite a bit once it starts boiling, so make sure to use a pot that can handle at least triple the amount. If the mixture starts to bubble up too much, reduce the heat while still maintaining a low boil.

Heat those two ingredients slowly on medium-low heat. Bring the mixture to a rolling boil, stirring constantly while also scraping the sides of the pan. Be patient as this might take a few minutes before it starts to boil.
Once the mixture starts to boil, stir it continually for 4 minutes. The sugar needs to be completely dissolved and the mixture heated for that specific time to heat up enough to eventually melt the chocolate.
After 4 minutes is up, carefully pour the mixture over the chocolate in the bowl. Do this slowly in a few intervals, stirring constantly each time. By the last pour, the chocolate should be fully melted and have a smooth consistency.
Setting The Fudge – Homemade Fudge Recipe
Once the chocolate is nice and smooth, pour the contents into your prepared and greased 9×13 glass baking dish. Smooth out the top so it’s nice and level but work fast since the fudge will start to set quickly.
Allow the fudge to sit undisturbed until it comes to room temperature. Then, cover and refrigerate for a few hours or overnight. Once it is set, you can slice it into 1″ cubes for serving. (I normally remove the fudge from the fridge and allow it to come to room temperature before slicing and serving. This results in a softer, smoother fudge in my opinion.)

This recipe produces homemade chocolate fudge that will last about 1 to 2 weeks at room temperature. As an alternative, keep it in your refrigerator for around 2 to 3 weeks.
You can also freeze the fudge as well. Tightly wrap set-up fudge in plastic wrap, then wrap in a few layers of foil. Place the block in a freezer-safe bag or container and remove all of the air. The fudge will freeze well for 2 to 3 months before it starts to deteriorate in quality.
Troubleshooting & Other Sweet Recipes
If your fudge looks like it has separated, is hard, or is grainy, return it back to the pan. Turn the heat on low and add a few teaspoons of water or heavy whipping cream. Add one at a time, mixing well after each addition. Usually, around 6 to 8 teaspoons is all you need.
Stir continually while the chocolate heats back up slowly. Before long, the fudge should be smooth and the ingredients will be incorporated back together properly.
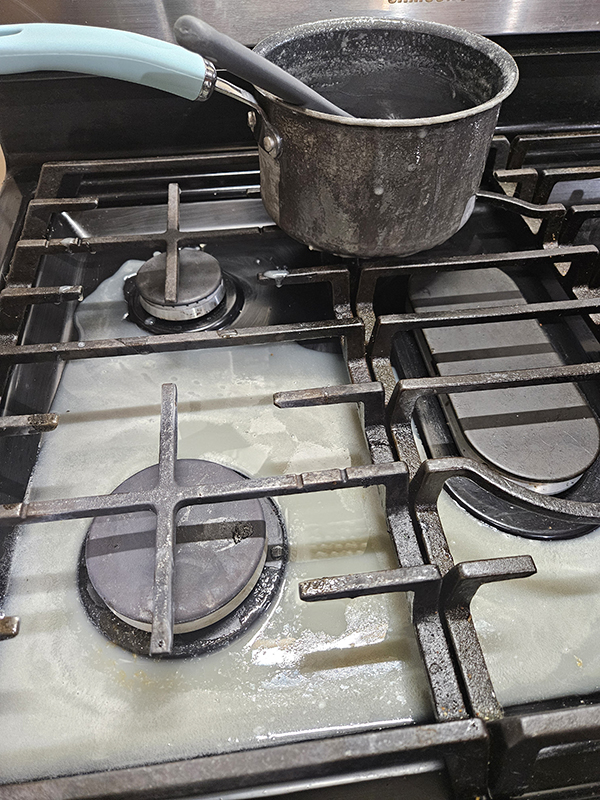
In all honesty, I’ve only had this recipe separate once while making it. My issue was likely because I used too small of a pot when boiling the sugar and evaporated milk. The contents ended up boiling over, causing a huge mess! It also likely caused me to heat the mixture for too long getting it back up to a rolling boil. Oh well, live and learn!
Looking for other sweet treat recipes to try? Try some of my other favorite desserts and sweet breakfasts:
–Sourdough Discard Chocolate Chip Cookies
–Cinnamon Roll Muffins
–Soft and Chewy Scotcheroos
I hope you enjoy this simple homemade chocolate fudge recipe as much as we do!
Until next time, thanks for stopping by!
– Chelsea
*This post may contain affiliate links. These are products I have used personally and highly recommend. As an Amazon Associate, I may earn a small commission from qualifying purchases if you purchase items through my links. These links and the ads on this page help to support my family and our semi homestead, so Thank You!
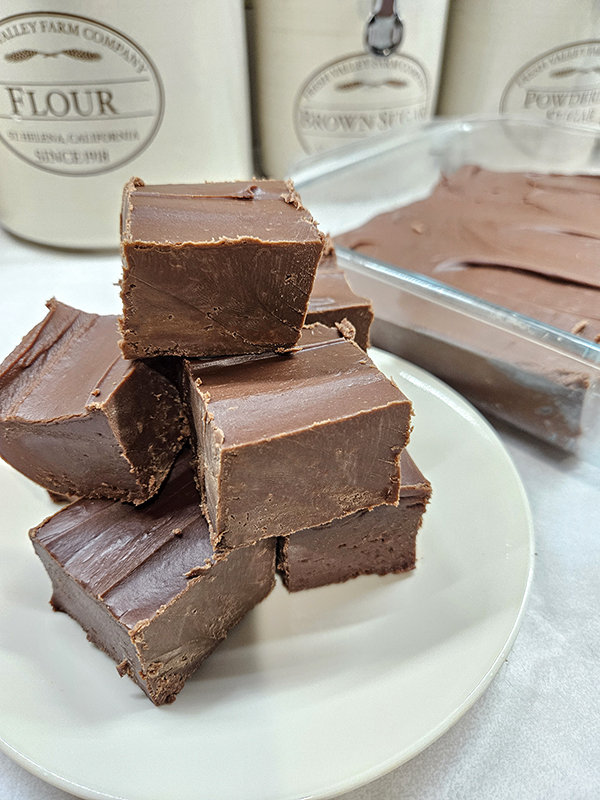
Homemade Fudge Recipe
Ingredients
- 16 ounces milk chocolate chips
- 24 ounces semi-sweet chocolate chips
- ½ cup butter room temperature
- 7 ounce jar marshmallow fluff
- 4-1/4 cups granulated sugar
- 12 ounces evaporated milk
- 1-2 cups nuts (optional) chopped walnuts or pecans
Instructions
- Prepare a glass 9×13 baking dish by coating it in butter. Or, add a layer of aluminum foil with a few inches overhanging the dish. Then spray with non-stick spray. Set aside.
- In a large bowl, combine both types of chocolate, room temperature butter, and marshmallow fluff. If adding nuts, do so now. Set aside.
- In a large saucepan, combine the sugar and evaporated milk. Over medium heat, bring the mixture to a rolling boil. Stirring constantly and continue to boil for 4 minutes.
- After 4 minutes, slowly pour the mixture over the chocolate in the bowl in 4 to 6 intervals, stirring constantly until smooth.
- Pour the mixture into the prepared 9×13 baking dish. Allow the fudge to come to room temperature somewhere undisturbed. Cover and place the dish into the refrigerator for a few hours or overnight until the fudge has set. Bring the fudge back to room temperature before cutting and serving.
- The fudge will keep for 1 to 2 weeks at room temperature or around 2 to 3 weeks in the refrigerator. It can also be frozen (see notes below). Enjoy!
Notes
Discover more from Semi Homestead Life
Subscribe to get the latest posts sent to your email.