Fall has arrived, which means that it’s the end of the gardening season for most of your tomato plants, but what do you do with the plants and the tomatoes still growing on the vine?
Most home gardeners have a tomato plant or two (or 20!) growing in their backyard or container garden. All summer long, the plants grew big and healthy, producing loads of fresh, juicy tomatoes for you to harvest.
However, once the cooler weather and shorter days of fall arrive, tomato plants start to slow way down on growing and ripening. This can leave you with tons of green tomatoes still left on the vine, wondering what you should do with them all.
Fall is also when the first frost and freeze warnings are issued for those of us living in the Midwest or locations North. In fact, here in Illinois, we’ve experienced several early-season frost or freeze warnings as early as late September! Without proper care taken with your tomato plants, this can cause an early end to your growing season.
Taking steps to prepare your tomato plants now can help extend your growing season long into fall and keep those plants protected if a surprise frost were to take place. It also helps you prepare your garden and the soil for when spring arrives next year, so you will have less work to do for the next growing season!
5 Things To Do With End Of The Season Tomatoes
1. Prune For Faster Ripening
About a month before your first expected frost, it’s time to prune back your indeterminate tomato plants. These are tomato plants that continually grow and produce fruit all summer long. (You can read about the difference between determinate and indeterminate plants here, “Determinate And Indeterminate Tomatoes – All You Need To Know”.)

To help speed up the ripening process on the fruit already set on your plants, give them a little haircut! What I mean by that is to remove or prune off the top growth from each vine.
This will cause the plants to stop putting energy and nutrients towards growing new stems, foliage, and blooms. Instead, it will redirect those resources towards ripening the fruit already on the vines. Just be sure to leave some foliage above the top fruit to help protect it from sunscald.
In addition, remove any new flower buds as well as small fruit that won’t have enough time to ripen properly. This will also help to speed up the ripening process for the larger fruit already on the plant.
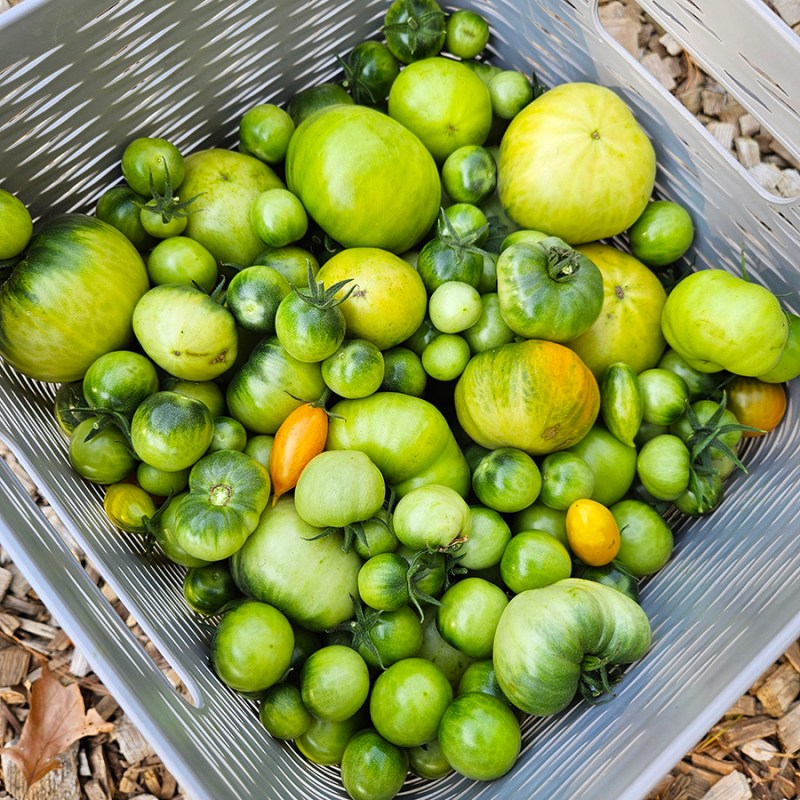
2. Harvest All The Tomatoes – End Of The Season Tomatoes
Once that first frost is predicted, it’s time to harvest all the tomatoes from your plants. Unfortunately, tomato plants aren’t meant to withstand temperatures below 35º Fahrenheit. While crops like peas and carrots aren’t bothered by colder temperatures, warm-weather-loving crops like tomatoes can’t.
Pick any tomatoes that are showing signs of ripening (i.e., a slight blush coloring on the green skin) and set them on your kitchen counter. They should ripen within just a few days without any issues.
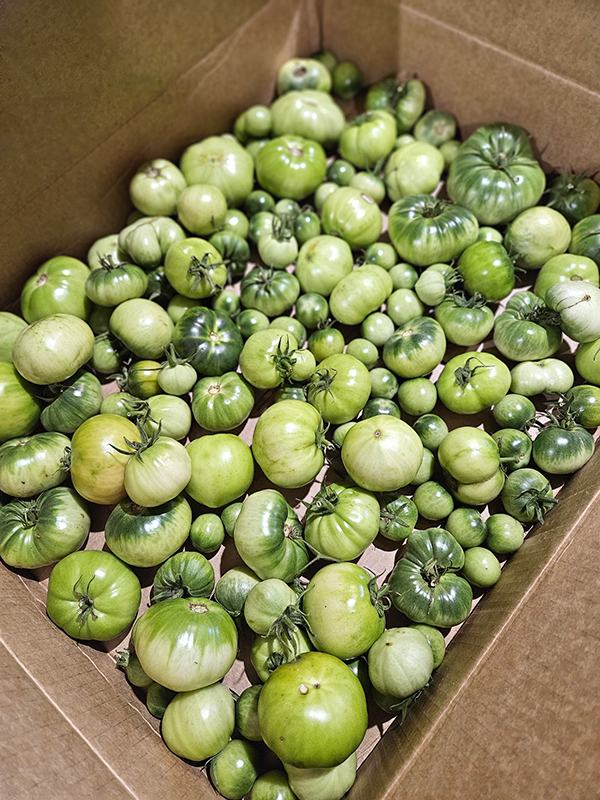
Some green tomatoes will still be able to ripen over time as well, even without showing any signs of blushing. Place the green tomatoes in a single layer in a cardboard box and set the box in a location that is dark and cool. Check the tomatoes every few days, removing any that are starting to rot.
If you want to speed up the ripening process, place an apple in the box with the tomatoes and close the lid. The apple will produce ethylene gas, which is the plant hormone that ripens tomatoes.
If any of the tomatoes start to blush, remove them immediately and set them on your kitchen counter to finish ripening. While ripened green tomatoes won’t have quite the same consistency and bright flavor as tomatoes that started to ripen before harvesting, they will still likely be better than any tomatoes you can buy in the grocery store!
3. Save Any Seeds
If you haven’t yet, now is the time to save those tomato seeds from open-pollinated or heirloom plants for next year’s gardening season. For this process, I like to ferment the tomato seeds. It might sound difficult, but it’s actually extremely easy.
Tomato seeds are covered in a protective gel that needs to be removed to store the seeds long-term. Fermenting is a simple way that tackles this process for you.

To ferment tomato seeds, choose the biggest and best tomatoes from healthy plants. Remove the seeds and place them into a small jar. It’s ok if a bit of the pulp is included in the jar.
Add a few inches of water to the jar and gently stir. Cover the jar with a light lid, such as a paper towel or coffee filter secured with a rubber band. Place the jar in a spot away from direct sunlight where it can be left undisturbed for a few days.
After a few days, you will start to see mold growth appear. That is normal. The mold helps to break down that gel covering. At this point, add a bit more water and stir gently. After the seeds settle, pour off as much of the liquid and tomato pulp as possible. Add more water and repeat until only clean seeds are left behind.
Allow the seeds to dry on a paper plate for about two weeks. Store the dry tomato seeds in a paper envelope labeled with the variety and date saved.
4. Remove The Plants & Debris
When you remove the tomato plants is completely up to you, but I advise doing it sooner rather than later. If the plants are mostly healthy, you can choose to leave them in the garden until the first frost or freeze kills the plants. However, they are usually much easier to remove prior to a freeze.

With damaged or diseased tomato plants, remove them as soon as possible. Healthy plants can stay in the garden a bit longer. Just don’t wait until the ground freezes solid, as then it will be too late and you might as well wait until early spring.
If you have an unusually early first frost predicted, you can try to cover your tomato plants to keep them alive for a bit longer. This isn’t always a foolproof method, but it can allow you to extend your growing season against light frosts.
Use a sheet, light blanket, floating row cover, or frost blanket to cover your tomato plants fully. It’s also a good idea to water tomato plants ahead of a predicted frost. Just keep in mind that these covers can only do so much.
Removing Tips
To remove the plants, I like to cut off any vines that are growing out of my tomato cages first. This makes it easier to lift the cage off the plants. I can then remove the rest of the plant, roots and all. Also, pick up any leaves or plant debris left behind, as well as any tomatoes that have fallen onto the soil.
This helps prevent overwintering pests from overwintering and reduces the chances of unwanted soil-borne diseases. In addition, it stops lingering tomato seeds from taking root next year and creating loads of unwanted volunteer plants.

Do not compost your tomatoes or the plant matter. Since tomato plants are susceptible to tons of different pests and diseases, they are best left out of your compost pile. Home compost piles just can’t heat up high enough to kill off those pathogens and seeds.
I like to toss my plant matter into a nearby pile to decompose naturally. I don’t use the “compost” created from that pile in my garden or around my home.
Store the unused tomato cages in a protected location to keep them in top shape for a longer period of time. Repair any damaged cages at this time. (Your spring-self will thank you come May!)
5. Prepare The Soil – End Of The Season Tomatoes
The last step of preparing your tomatoes and the garden at the end of the season is to prepare your soil for next year’s gardening season. Taking the few extra steps now will make the prep work much easier when spring arrives.
The first step I take is to remove any weeds or other debris that might be left in the garden. Pull all your annual plants and prep any perennials as needed. Then it’s time to tackle the soil.

There are many different ways to prepare your garden or raised bed soil. You can till, not till, add a cover crop, mulch, and/or a few other things. Whatever you do or don’t do, the main tip I can give you is not to leave the soil bare.
Bare soil is just asking for weed seeds and other issues to land and take root. Covering the soil with either mulch or a living cover crop is a great way to protect the soil and add organic matter back after a long growing season.
By the time spring arrives, your soil and garden will be in top shape and ready for planting a new batch of healthy and productive tomato plants, thanks to the work you put into the end of the season tomatoes!
Until next time, thanks for stopping by!
– Chelsea
*This post may contain affiliate links. These are products I have used personally and highly recommend. As an Amazon Associate, I may earn a small commission from qualifying purchases if you purchase items through my links. These links and the ads on this page help to support my family and our semi homestead, so Thank You!
Discover more from Semi Homestead Life
Subscribe to get the latest posts sent to your email.