
Want to know how to use antique galvanized buckets and tubs as growing containers for your favorite flowers or vegetables?
If you are like me, you might have one of those old galvanized buckets or wash tubs lying around your home just collecting dust. Maybe you inherited a few from your grandparents or other family members. Or maybe you found a steal of a deal at a local yard sale or estate sale.
Wherever you find it (or them!), you can turn that old bucket into the perfect growing container for flowers and vegetables! Galvanized containers are typically inexpensive and fairly easy to find, especially if you live in a rural location.

I don’t know about you, but love the look that worn and dented galvanized buckets can bring to your home. Sure you can purchase new ones at a lot of home improvement stores as well as hobby stores, but there’s just something about the history and patina of antique ones. They have a story to tell and add character to your space.
While you do have to make one small alteration to the buckets or tubs, they can easily be turned into excellent planters. These buckets can be left in the elements and their rough patina only gets better as they age.
The Buckets I Used
I had a smaller galvanized bucket that I received when my grandma passed. For most people, the old bucket was worthless. But I couldn’t help to wonder about all the ways that old bucket was used on their farm. (I’ve often wondered about all the stories that antiques and older homes could tell us if only they could talk!)
I used to keep the bucket inside my home to hold some of my houseplants. However, it just didn’t seem to fit the aesthetics of my home and it seemed like it needed to be outside.
I also purchased a larger wash bucket at a local estate sale this year to use as well. It was much bigger and would be able to hold a few more plants than my Grandma’s smaller one. Both would be excellent additions to my garden space.

I have quite a bit of empty space next to my raised beds where the bucket and tub would work perfectly. I already have a few grow bags that I typically use for growing potatoes, but the more growing containers the merrier, right?!
How To Turn Galvanized Buckets Into Growing Containers
The first step is to gather your tools and items. As I mentioned earlier, it doesn’t really take a lot of equipment. You need your buckets or tubs, a drill, a large drill bit or step bit, a few rocks or small branches, and your potting soil. I also used a metal file, but that isn’t a requirement.
Making Drainage Holes
Now it’s time to make your drainage holes. As with any container that holds growing plants, you need to have good drainage. Most plants do not do well when they are sitting in constantly wet soil.
This is where the drill comes into play. You can just use a large drill bit, but my husband happened to have some step bits so I could control the size of the holes a bit better. But honesty, a large bit that works with metal would work just fine. (Product Link: Step Bits)
Create multiple holes in the bottom of your container evenly spaced apart. I ended up making about 9 holes for my smaller bucket and probably around 20 for the larger one. They don’t have to be spaced perfectly, but try to leave some space between the holes so you don’t end up with one big unwanted hole.

You might want to lay the buckets down on a piece of cardboard or a towel before starting. This will help to catch the metal shavings as you are creating your holes. Don’t just leave these on your garage floor or wherever you are doing this because the shavings can be sharp.
Also, be aware that the holes you create will have very sharp edges. The opposite side that you drill into will leave rough raised metal edges. If you have one, use a metal file to smooth those down some. If not, just be careful when handling it.
Filling Your Buckets – Galvanized Buckets As Growing Containers
Before I started adding soil, I wanted to make sure there was a layer between the soil and the holes so the soil wouldn’t just leak out as easily. Especially since I made larger holes in the containers.
So I filled the bottom with a layer of rocks before adding in my potting soil. You can also use small twigs, straw, or other organic material in the bottom as well. Avoid using leaves though because those can mat up and create a solid overlapping layer that won’t allow water to drain through.

Next, add your potting soil. I like to mix in some compost and/or worm castings as well into the soil. This just gives the plants an extra boost of energy right from the start.
Add Plants Or Seeds
Now it’s time to add your plants. Create holes in the potting soil that are slightly larger than your transplant’s root ball. Add the plants and backfill with the soil.
You can also directly sow seeds into the potting soil mix as well. Check the seed packet to know how deep you need to add the seeds and cover them with soil. Water the containers well.
Plant Varieties To Grow In Galvanized Buckets
There are some plants that work better than others when growing in containers. Larger plants, vining plants, or those that like to spread out will likely overtake and topple over galvanized containers as well as any smaller containers for that matter.
In most instances, avoid plants like indeterminate tomatoes, vining cucumbers, squash plants, corn, etc. Instead, stick to smaller, more compact plants for best results.
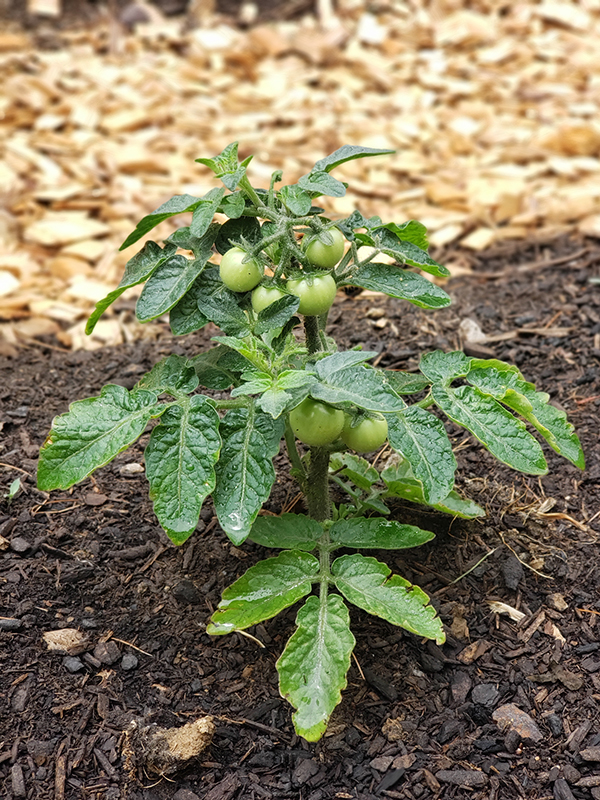
There are some smaller determinate tomato varieties that are perfect for growing in containers. (Orange Hats are one of my favorites!) You can also grow almost any type of lettuce or leafy vegetable. Herbs are another great choice. If your container is deep enough, grow root vegetables like carrots or radishes.
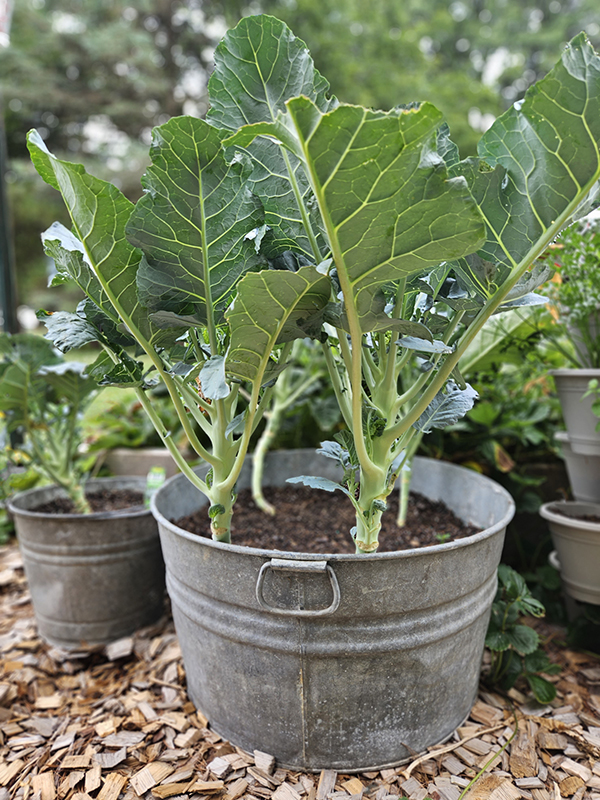
For my own setup, I chose to grow broccoli. I transplanted four plants in the larger wash tub and one in the smaller bucket. No, I am not using the “standard” recommended spacing for these plants, but some rules were meant to be stretched!
Maintenance – Galvanized Buckets As Growing Containers
With all container plants, you need to make sure you are watering them thoroughly and often. As opposed to plants that are growing directly in the soil, those planted in containers will often dry out a lot quicker. This is especially the case during hot, dry spells.
You can use a soil moisture meter to help identify whether you need to water or not, or just use your finger. Press your index finger as deep into the soil as possible a few inches away from the stem of the plant. If the soil feels dry, it’s time to water. If it still feels damp, hold off for a day or two. (Product Link: Soil Moisture Meter)
Don’t forget to fertilize your plants once they become established and are growing well. Even though you might have started with compost, you need to replenish the nutrients in the soil since there is only a limited amount for all container plants. Once those nutrients get used up, the soil can no longer feed the growing plants.
Hopefully, instead of those galvanized buckets and tubs sitting in the corner of your garage or shed, you will be able to give them new purpose and life by growing a few garden vegetables and plants in them!
Until next time, thanks for stopping by!
– Chelsea
*This post may contain affiliate links. These are products I have used personally and highly recommend. As an Amazon Associate, I may earn a small commission from qualifying purchases if you purchase items through my links. These links and the ads on this page help to support my family and our semi homestead, so Thank You!
Discover more from Semi Homestead Life
Subscribe to get the latest posts sent to your email.