
If you are looking for a way to still enjoy crispy, juicy homemade chicken tenders but want less guilt, try making them using a pork panko breading for an easy and healthy air fryer dinner alternative.
I never really realized just how easy it was to make homemade chicken tenders before recently. It just wasn’t something I had tried before. It was my husband who made these pork panko chicken tenders for the first time, so all the credit goes to him. Not only were they nice and crispy, but they were extremely tasty as well with so few ingredients!
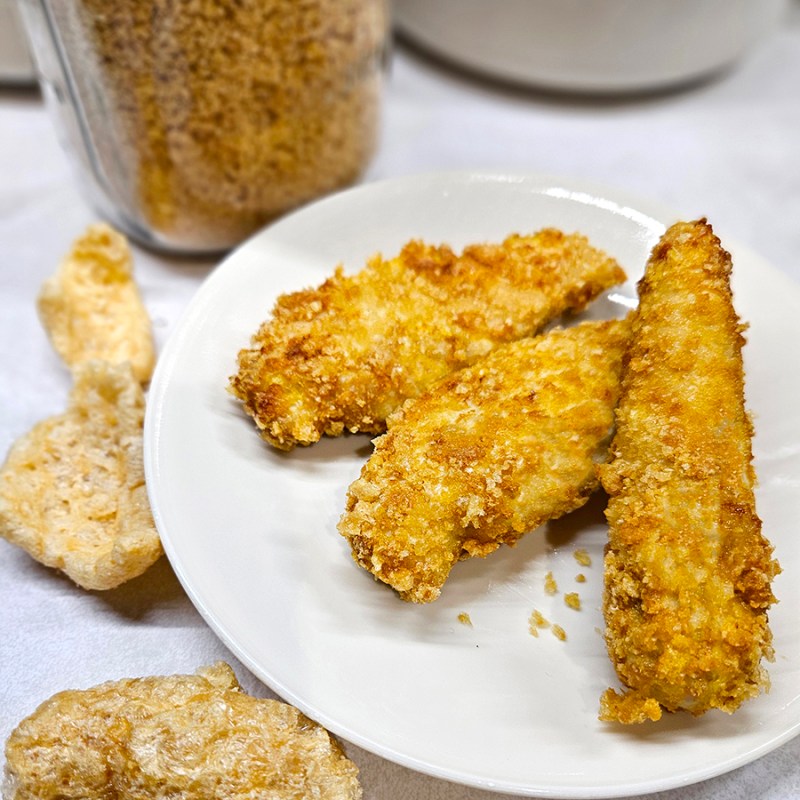
Earlier this year, my husband went on a carnivore diet. That meant no fruit, no vegetables, no sugar, no bread, no carbs, no fun! (Actually, he handled it really well since he was able to eat all the meat, cheese, milk, eggs, and fish he wanted.) However, he was tired of missing out on some of our typical meals like breaded chicken tenders.
That’s where pork panko came into play. We learned that turning pork rinds into a carb-free panko could be used to bread chicken tenders. Add in the air fryer and we had a quick and easy, carnivore and keto-friendly meal that the entire family could enjoy.
Since they are so easy to make, I wanted to share the recipe with you. Even if you decide to use regular bread crumbs or panko instead of the pork rinds, the process is still the same. The result is crispy, juicy, delicious chicken tenders that can be on your table in about 30 minutes.
How To Make Pork Panko Crispy Chicken Tenders
*Scroll down to the bottom of this post to see the full recipe, including exact measurements and amounts. You can also print out the instructions. I go into a bit more detail about the recipe here first, just in case you need it.
Ingredients
There are only three simple ingredients in these Pork Panko Crispy Chicken Tenders:
Eggs – The eggs act as the binding ingredient that helps the pork panko crumbs stick to the tenders. The egg wash works a bit easier if you have your eggs at room temperature before using.
Pork Panko Crumbs – We make our own pork panko crumbs, but you can purchase them in some stores pre-made. It’s really simple to make them yourself and usually quite a bit cheaper, depending on how much the bags of pork rinds are. You can read more about making the crumbs in my article, “Pork Panko Crumbs – Keto & Carnivore Diet Friendly Breadcrumbs”.
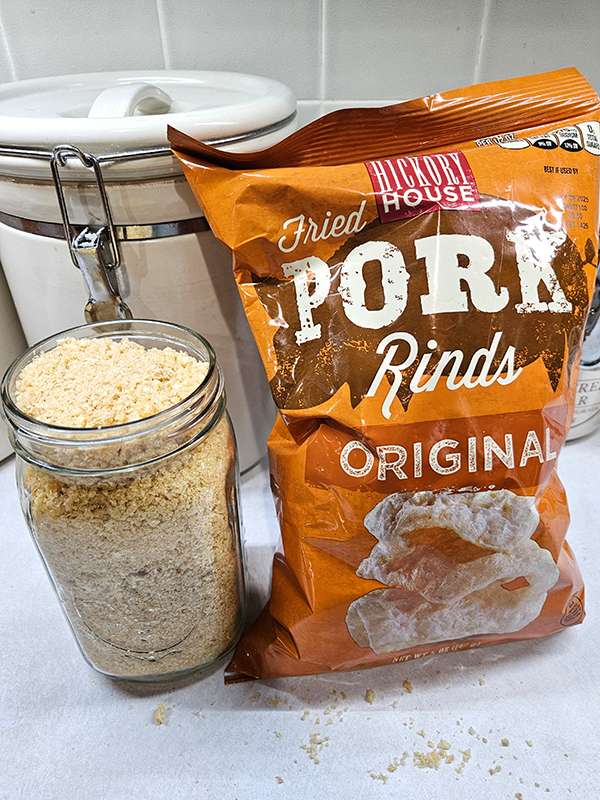
The panko can be used for all sorts of recipes, including making meatballs, breading mozzarella sticks, topping chicken parmesan, and so much more. If you are trying to go completely carnivore or keto-friendly, just make sure to check the ingredient list. Some pork rinds have added ingredients. Find one that only has pork skin and salt.
Chicken – The last ingredient, of course, is chicken. You can buy meat that is specifically labeled as chicken tenders, or you can make your own from chicken breasts. Both work just fine. You can usually get around 4 to 5 chicken tenders from each breast. If using tenders, use them as is. Just remove the white tender before cooking if preferred.
Chicken Tenders vs Strips vs Nuggets
Upon writing this article, I started to wonder what the difference was between chicken tenders and chicken strips. Turns out, there is more to it than just the name or title.
Chicken tenders are made from specific parts of a chicken, called the pectoralis minor muscle. It runs right underneath the chicken breast. Chicken strips, on the other hand, are usually breast meat cut up into strips.
Chicken nuggets are usually made from a combination of any meat from the chicken. They can contain white meat, dark meat, rib meat, breast meat, etc., and can be a chopped-up or processed mixture of it all. (Here is my Pork Panko Chicken Nuggets recipe if you are interested.)
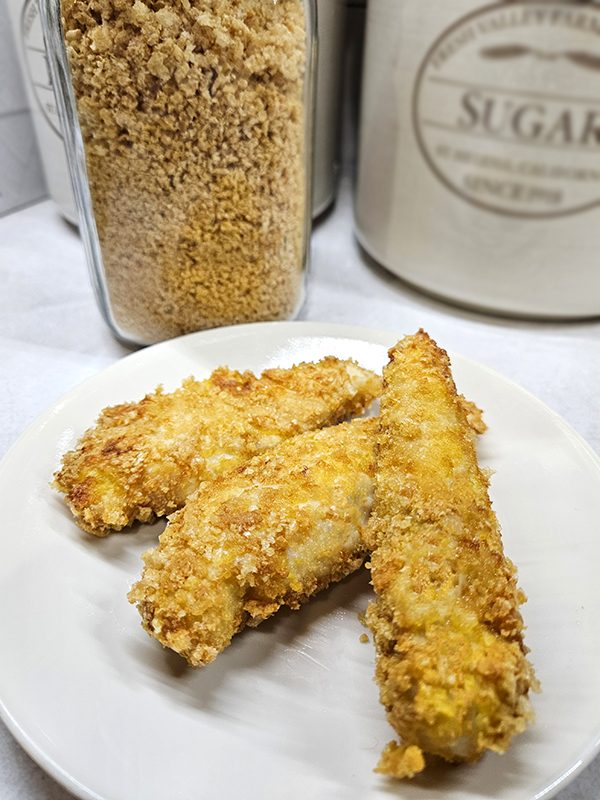
Obviously, there are exceptions to these “rules,” and some companies or restaurants call their products whatever they want. Since you can use both sliced up chicken breasts or the meat labeled as “tenders” for this recipe, I’m just going to stick with using chicken tenders for simplicity’s sake for this article! Hopefully, the meat pros won’t come after me!
Anyway, on to the Instructions!
Instructions For Pork Panko Crispy Chicken Tenders
Make The Pork Panko
The first step is to make your pork panko crumbs if that is the route you are going. You can also use any other type of breading or panko you prefer. The recipe will be the same either way.
We like to make a big batch all at once and store it in quart-sized jars so we always have some on hand. If you need, you can follow the in-depth instructions I linked in the ingredients above.
Essentially, all you do is place the pork rinds into a high-power blender or food processor. Pulse until they reach your desired consistency. Set these pork panko crumbs aside to use in a few minutes.
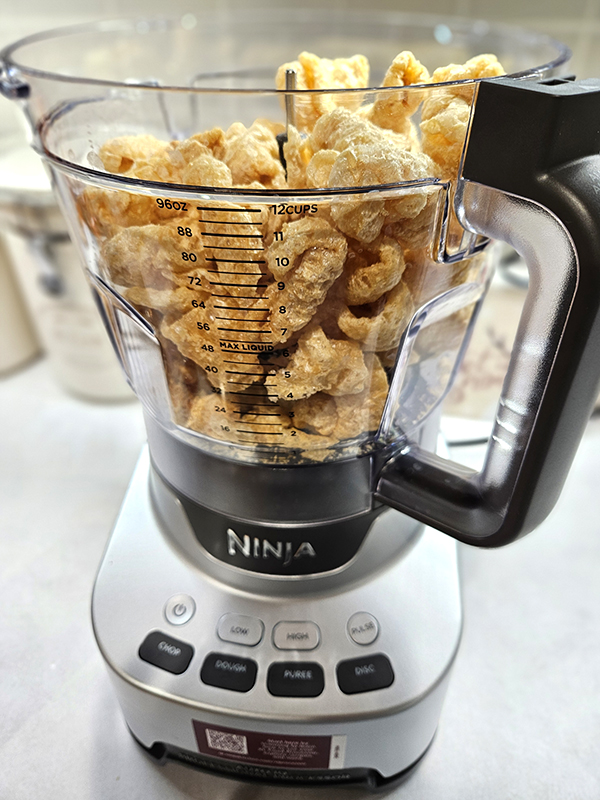
If you want, add seasoning to the panko crumbs like garlic powder, Italian seasoning, etc. That allows you to play around with the flavor combinations and create your own breading.
We typically don’t add seasonings and allow the dipping sauces to be where the additional flavors come from. That way, each person in the family can enjoy them their way. (For example, using ketchup, ranch, mayonnaise, or no dipping sauce at all.)
Prepare The Chicken
Next, it’s time to prepare the chicken. If you are using specific chicken tenders, remove the tough tendon. (This is optional, but the tendon can sometimes be unpleasant to eat.)
To do this, place the top part of the tendon through the tines of a fork. Grab the tendon with a paper towel with your dominant hand. (The paper towel gives you a better grip.) Firmly but slowly pull the tendon while using the fork to keep the meat in place with your other hand. The tendon should pull out with a bit of force.
If you are using chicken breasts, cut the meat up into strips of equal size. You want them to be as similar in size as possible so they cook up evenly. This might involve pounding the chicken breast flat before cutting if needed.
The Breading Station
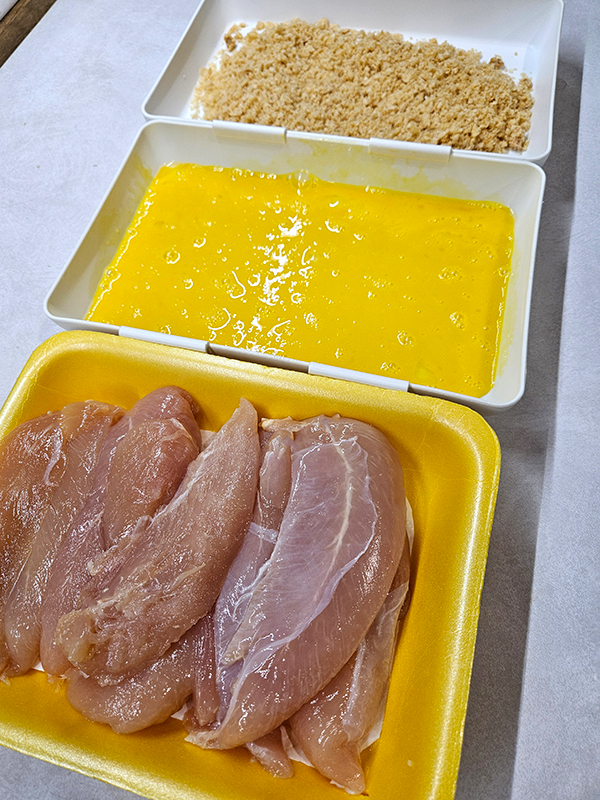
Now you need to set up a breading station with two containers that have raised sides and are slightly longer than the chicken tenders. We have these trays I got back from a Pampered Chef party years ago that work perfectly for this. (I did find them on Amazon, actually – Product Link: Pampered Chef Coating Trays.)
In the first tray, crack the two eggs. Take a fork to break up the yolks and mix the eggs together.
In the other container, add the pork rind crumbs. Only add about half the crumbs to begin with, or just enough to fully cover the bottom of the tray. Add more as needed, usually about halfway through coating the chicken.
Add The Breading & Bake
Take one of the chicken tenders and dredge it in the egg wash. Make sure all sides of the meat get dipped in the egg. Allow any excess egg to drip off.
Next, place the chicken on top of the pork panko in the second tray. Gently press the chicken into the panko to help it stick. Flip the chicken tender over and do the same with the other side until evenly coated.
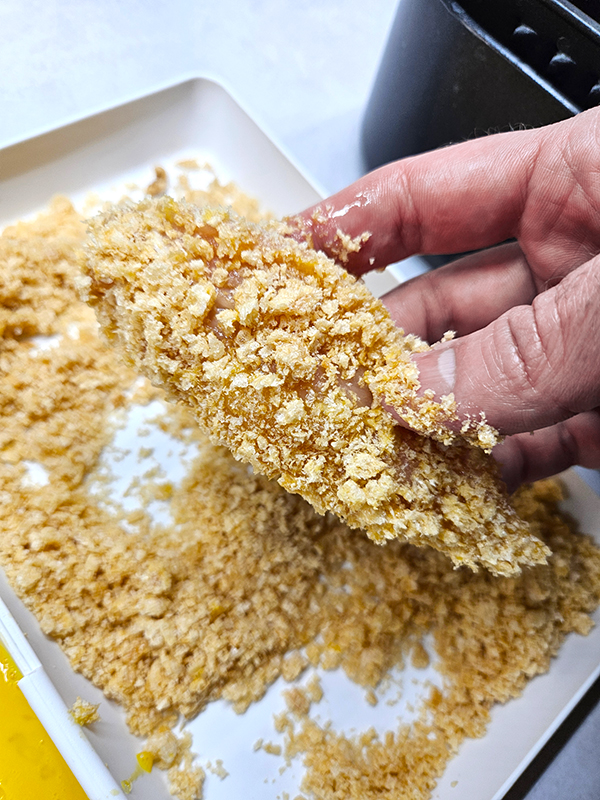
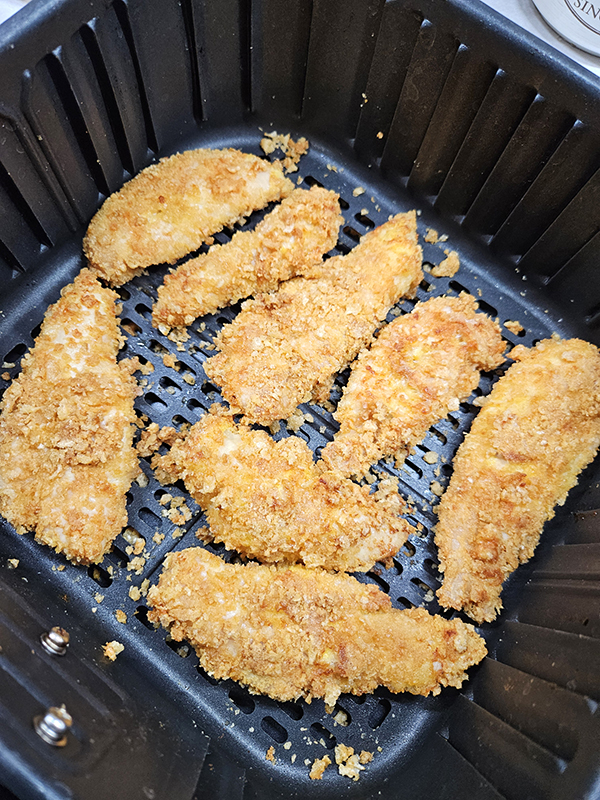
Place the breaded chicken tender into the air fryer basket. Continue this breading process until all of the chicken is done. Space the tenders slightly apart if there is room in the air fryer basket. It’s ok if they are touching some, but do not overlap them. Make two batches if needed if your air fryer is smaller. (Here is the newer version of the one we use – Product Link: COSORI 12-in-1 Air Fryer 5.8QT)
Set the air fryer to 400º Fahrenheit (F) and bake for 20 minutes. After the first 10 minutes are up, flip the tenders so both sides cook evenly.
Cook until the chicken reaches an internal temperature of at least 165º Fahrenheit, adding more time if needed. (We actually like to cook ours until they are more around 180 to 190º F because they are a lot crispier at that temperature.) Keep in mind that the cooking time may vary depending on the size and width of your chicken pieces. Enjoy!
Until next time, thanks for stopping by!
– Chelsea
*This post may contain affiliate links. These are products I have used personally and highly recommend. As an Amazon Associate, I may earn a small commission from qualifying purchases if you purchase items through my links. These links and the ads on this page help to support my family and our semi homestead, so Thank You!
Pork Panko Crispy Chicken Tenders
Ingredients
- 1 to 1.5 lbs chicken tenders (can also use 2 to 3 breasts)
- 2 large eggs
- 2 cups pork panko crumbs (or other breading of choice)
Instructions
- If needed, make the pork panko. Place all of the pork rinds into a high-power blender or food processor. Pulse until they reach your desired consistency. Set aside.
- If using chicken breasts, cut each one into 3 to 4 strips, depending on the size of the chicken breast. You may need to pound the chicken breast first to keep the strips as even as possible. If using chicken tenders, use them as is, removing the tendon if desired.
- Next, set up a breading station with two containers with raised sides that are slightly longer than the chicken tenders. In the first one, crack the eggs, scrambling them slightly. In the other container, add half of the pork rind crumbs so the bottom of the container is evenly covered.
- Take one of the chicken tenders and dredge it in the egg wash. Make sure all sides are dipped in the egg. Allow any excess to drip off. Next, place the chicken on top of the pork panko crumbs. Gently press the chicken into the panko to help it stick. Flip the chicken tender and do the same with the other side.
- Place the breaded chicken tender into the air fryer basket. Continue until all of the chicken is breaded, adding more panko into the container when needed. Space the tenders slightly apart if there is room. (It's ok if they are touching some, but do not allow them to overlap. Cook in batches if you have a smaller air fryer.)
- Set the air fryer to 400º Fahrenheit (F) and bake for 20 minutes. After the first 10 minutes, flip the tenders so both sides cook evenly. Cook until the chicken reaches at least 165º F. (We cook ours until 180 to 190º F produces crispier tenders). Enjoy!
Discover more from Semi Homestead Life
Subscribe to get the latest posts sent to your email.
Very delicious and crispy good.
Glad you enjoyed the recipe!