When it comes time for planting your garden, following a few simple tips will go a long way in ensuring that your vegetables and flowers germinate easily, establish quickly, and grow into strong and healthy plants.

There are two main ways to plant your garden: either by sowing seed or by transplanting seedlings. Normally, most people plant a combination of both, depending on where you live and what crops you are going to grow.
Seedlings are just young plants that have been started ahead of the growing season. This is done either for crops that are a bit of a pain to start by seed, that grow from propagating, or because you live in a location with a shorter growing season (like me!). You can grow seedlings yourself by starting seeds indoors, or you can purchase seedlings from local garden centers, nurseries, and even big box stores.
For example, indeterminate tomato plants require a long growing season. In order for gardeners like me to be able to harvest tomatoes during our shorter growing season, they need to be started indoors long before our last frost date. Because of this, I would transplant tomato seedlings in my garden as opposed to seeds. Other crops, like green beans, are quicker to germinate and have a shorter growing season and can be sown directly in the garden.
To help get your freshly planted garden off to the best start possible, here are a few tips to keep in mind, no matter what you are planting.
Wait For Proper Soil Temperature
So many people get hung up on the air temperature when it comes to the right planting time. Of course, the air temperature is important, but so is the temperature of the soil.
Spring usually brings about up and down temperatures. One day, it can be beautiful 70s outside while the next it’s in the 40s. (At least that is how it often is here in Illinois!) While the temperatures might go up and down, the soil temperature tends to stay a bit steadier.
In order to have the best success with having seeds germinate as well as allowing seedlings to establish, wait until the soil has warmed up to whatever the ideal temperature is for the particular crop you are growing. Cold crops can handle colder soil temperatures while summer-loving crops require warmer soil.
Prepare The Soil – Garden Planting Tips
Before a single seed or plant goes into the ground, you first want to prepare the soil. All winter long, the soil has stayed dormant and asleep, waiting for spring to arrive. It will need a bit of TLC in order to be ready for the upcoming growing season.
If you planted a cover crop, that might mean killing it off. If you didn’t use a cover crop, that might mean tilling to remove any weeds and to help loosen up the soil. It also might mean adding additional soil to your raised beds, containers, growing rows, etc., and adding fertilizers.
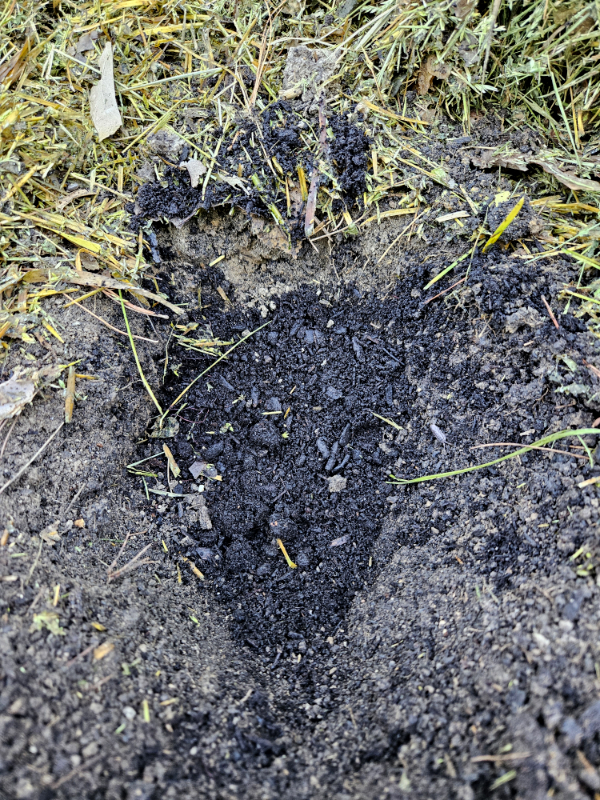
No matter what preparing the soil looks like for your garden, it’s always best to do the process before planting. One of the ways I like to do this is by adding loads of compost. The compost helps to loosen the soil, improve the soil composition, and provides the newly planted seeds and seedlings with easy-to-absorb nutrients they can use right away.
Check Planting Depth

All varieties of crops should be planted at the ideal depth. This is especially important for seeds because planting them too deep or too shallow can cause seeds to fail to germinate. As much as I would love to just stick plants and seeds in the ground without regard to depth, it’s not the best practice.
Some seeds require light in order to germinate. Plants like cosmos, dill, lavender, lettuce, mint, rosemary, and more should be planted with little to no soil overtop so they can access the bright sunlight. On the other hand, plants like cucumbers, green beans, nasturtium, peas, pumpkins, and squash need to be planted about an inch below the soil’s surface.
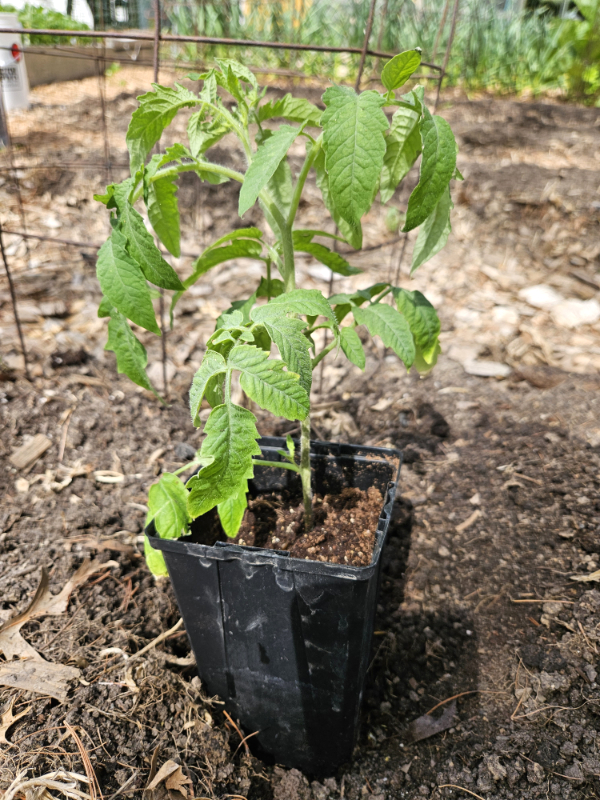
The same goes for seedlings. Most of the time, you can plant seedlings at the same level that the plants were in their containers. Some can be planted deeper, like tomatoes. So be sure to plant each type of crop at the proper depth for best success.
Space Crops Accordingly

There are recommended spacing requirements for all crops and varieties. These distances are the ideal space the plants need to grow and mature.
However, I don’t follow the recommended spacing down to a “T”. I take into consideration the plant’s mature size and then space them according to that and my garden layout. So there is a bit of wiggle room with spacing. Just keep in mind that the closer you grow your crops, the higher the chances of diseases like powdery mildew and pest infection.
When you are planting seeds like peas and green beans, it’s best to plant the seeds closer together. Then, once the seedlings sprout and are about an inch or two tall, thin them to create better spacing.
Label Everything – Garden Planting Tips

This might seem like a no-brainer, but label your plants! When it comes to seeds, there is no way to know what plants you sown where since they are under the ground. Even when the seeds germinate, a lot of very young seedlings look almost identical.
As for transplants, labeling is mainly important if you are growing different varieties of the same crop. For example, I usually grow at least 10 different tomato varieties. Without labeling, I would be lost as to which plants were what. I also like to take notes on how the plants grew and produced for future years, and I wouldn’t be able to do that if I didn’t know what plant I was talking about.
You can use whatever you want for labels, but make sure the pen or marker is weatherproof. I use these Plastic Plant Name Tags (Product Link) when I start my seeds indoors as well as for seeds and plants in my garden. As for plants that use cages, I use these Wrap Around Hanging Tags (Product Link).
Add Supports Early
At the same time that you plant your seedlings, get those supports into the ground. You can also do this at the same time as planting seeds if needed, but it’s better to wait until the seedlings germinate so you know where exactly they are.
Once plants become established, they will start to put out roots and expand. You don’t want to risk damaging those tender roots when you go to add your supports if you wait to do so later.
Yes, it might seem silly to have a huge cage around a tiny green pepper seedling. However, that plant will soon take off and grow, making it hard to add a support or cage later on. In addition, it will also help make sure you have the right spacing in your garden since supports can take up additional room you might not be planning for.
Water The Soil Often

After planting both seedlings and seeds, you want to keep the soil moist. Seeds require moisture in order to germinate, so if the soil is dry, they won’t germinate. (Otherwise, you would have loads of mini plants growing in your seed packets!)
As soon as you get those transplants and seeds into the ground, give them a good drink. For lighter seeds that are surface sown, use a gentle mist setting so you don’t risk displacing the seeds.
Continue to water seeds and seedlings frequently to help them germinate and establish. After they have started pushing out new growth, you can back off on the watering.
Add Mulch – Garden Planting Tips

Mulch is my #1 suggestion for keeping both your plants and your soil happy in your garden. It helps to regulate soil temperature, retain moisture, and keep weeds at bay. (See my article, “Why To Use Mulch In Your Garden – Weed Less & Improve The Soil” for more information.)
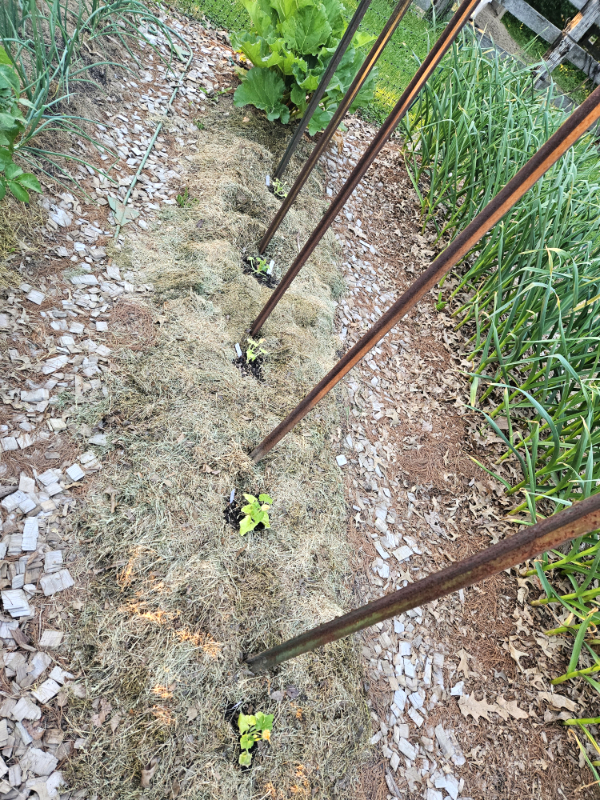
As soon as you can after transplanting the seedlings, mulch around them using an organic material like straw, shredded leaves, or my favorite, grass clippings. The mulch should be around 4 to 6 inches deep in order to get all of the benefits.
Wait to add mulch around any seeds you planted until they germinate. Otherwise, you risk snuffing out their growth.
By implementing these simple tips when you are planting either seeds or seedlings in your garden, you will be on your way to having plants that germinate easily, establish quickly, and grow into healthy, happy plants you can harvest from and enjoy all summer long!
Until next time, thanks for stopping by!
– Chelsea