
If you want to keep your hosta plants looking healthy, strong, and beautiful long into fall, then you should be removing their blooms. This simple task only takes a few quick minutes to do, but it can make a huge difference in the way the foliage on your hosta plants looks and lasts throughout the rest of summer and until the first frost!

During the late summer months, hostas start to produce tall flower stalks with multiple blooms in shades of white and purple. These flowers aren’t really anything impressive to look at, so many gardeners prefer to chop them off. This allows the plant to focus its energy on its beautiful foliage as opposed to the blooms.
Because unlike most annuals and perennials, hostas are grown for their stunning foliage. You can find hostas in all different shades of green and blue and even some with eye-catching variagations. Not only does their color vary, but so does their overall size, leaf shapes, and leaf textures.
This unique foliage makes hostas one of the most popular, low-maintenance perennials to have around. But by the middle or end of summer, these foliage plants can start to look less than ideal, especially if they are allowed to bloom.
Why You Should Be Removing Hosta Blooms & How
No matter what type of hosta variety you are growing, removing the blooms should be on your list of “to-dos” this summer. All hosta plants flower for about a three-week timeframe during the summer months.
Some bloom in May while others wait until September or any time in between. This timeframe will depend on the variety you are growing and your location/climate. (I have some plants that bloom during late July, while others don’t bloom until late August.)

The blooms themselves aren’t really anything special (at least in my and several homeowners’ opinions). In fact, many people think the blooms take away from the beautiful foliage the plants are typically grown for.
The flowers grow on the ends of tall green stalks (also called “scapes”) that shoot out above the foliage. Each hosta plant puts out multiple scapes at a time.
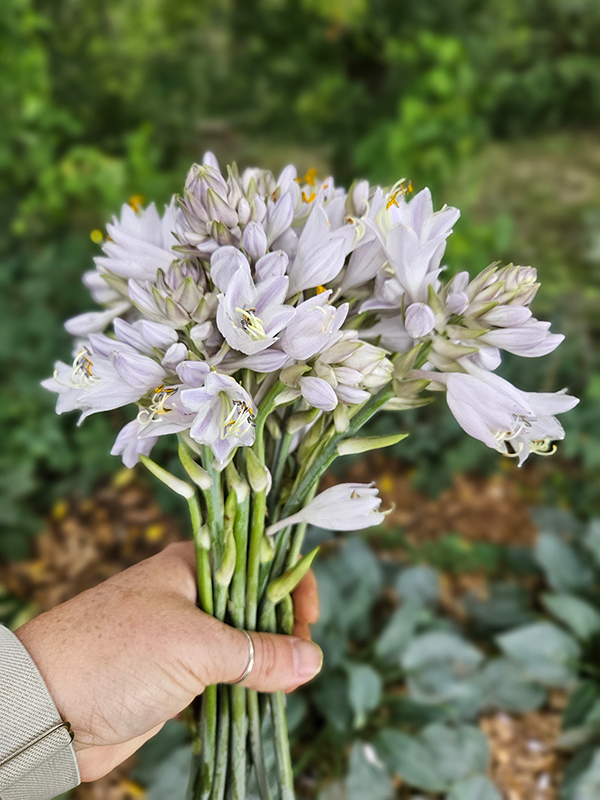
There are several individual blooms at the top of each scape. The blooms are typically white or different shades of purple, and some produce a light floral scent. Each bloom only opens for about a day or so before starting to die back. Once that happens, the petals turn brown and start to fall off. The plant then shifts its energy from the blooms to the maturing seeds.
Why Deadhead The Blooms
After the flowers finish blooming, the plants’ foliage naturally starts to die back. This is because it takes a lot of energy and resources to produce blooms and eventually seeds. Once those resources are used up, there is simply nothing left for creating and maintaining new foliage.
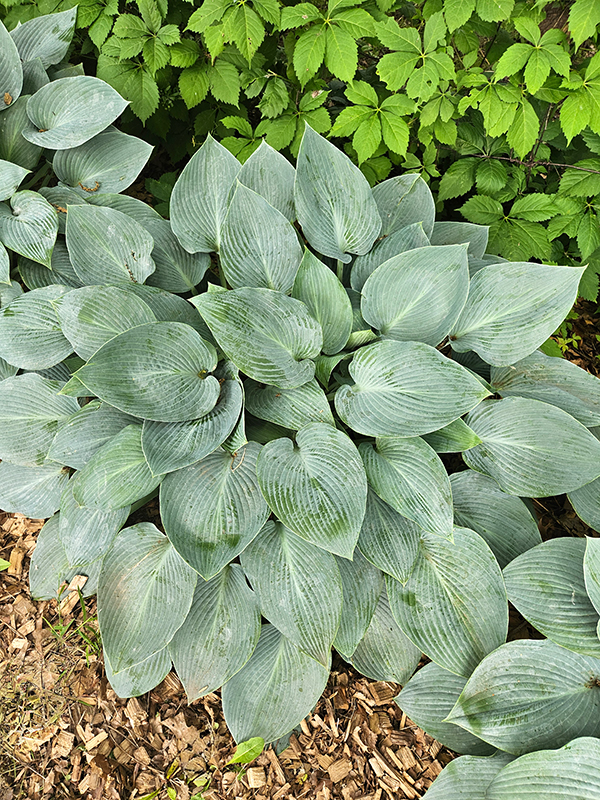
But you can help the plants refocus that energy back to producing new foliage by simply removing the blooms. Even if you decide to let the flowers bloom, you should still remove the tall scapes as the flowers fade. Not only does this keep the plants looking tidy, but it prevents the plants from maturing the seeds.
This whole process of removing the flowers and seed heads is called “deadheading.” There are many other annuals and perennials that benefit from deadheading like petunias, marigolds, and zinnias. The only difference is that most of those plants are deadheaded to allow them to produce more blooms, whereas hostas are deadheaded to produce more foliage.
How To Remove Hosta Blooms
Do not attempt to just pull the scapes off of the hosta plants. They are usually attached pretty well, and you risk damaging the rest of the plant by doing so.
Instead, take a pair of pruners and deadhead at the base of the flower stalk. Just follow the scape all the way down to where it attaches to the plant and make the cut there. (These are my favorite pruners for deadheading larger plants or pruning plants like tomatoes – Product Link: Fiskars Bypass Pruning Shears.)
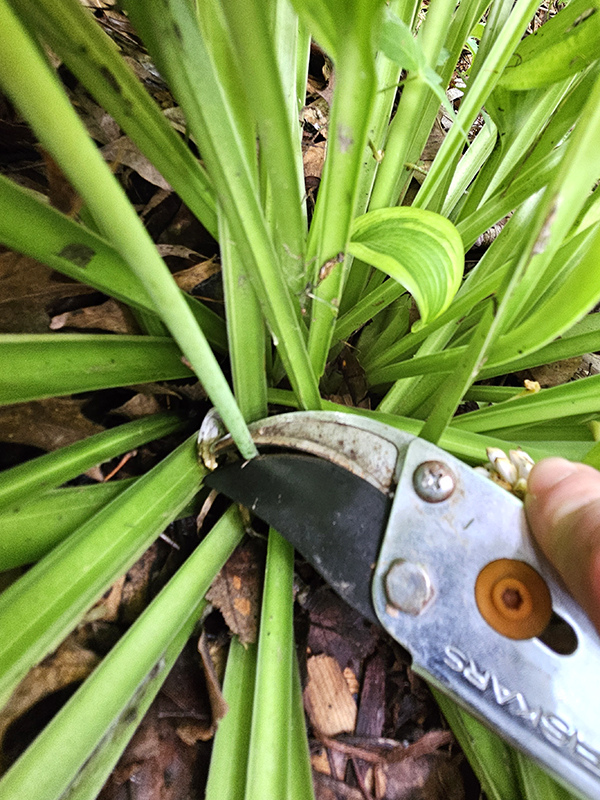
If you want, the cut flowers make for really pretty long-stemmed flower arrangements. For cut flowers, wait to deadhead until just a couple of the blooms have opened and the rest are still closed buds. The remaining buds will start to open during the next two weeks or so.
You can remove the flower stalks at any point after they appear. However, it’s best to do so as soon as you start to see them growing up from the plant and before the blooms start to open.
Provide Some Food – Removing Hosta Blooms
After removing the blooms from the hosta plants, it’s a good idea to provide the plants with a bit of additional nutrients. This will give the plants an extra boost to get them through until the first frost. (Yes, removing the blooms allows the plants to redirect their energy and resources to the foliage, but it never hurts to add additional support and to get the plants geared up for next growing season.)
Give your plants a light dose of a balanced, all-purpose granular fertilizer. A granular fertilizer is best because it releases nutrients slowly over time as opposed to all at once, like liquids tend to do.

Look for a fertilizer that has the same number of nutrients across the board, like 14-14-14. This will allow the plant to have equal nutrients for strong root growth, healthier new foliage, and overall plant strength and health. Be sure to follow the instructions for your particular fertilizer when applying. (I like to use Osmocote for a balanced granular fertilizer – Product Link: Osmocote Smart-Release Plant Food Flower & Vegetable.)
(For information about gardening and fertilizers, check out my article, “Understanding Fertilizers – What Does NPK Mean & How To Use It.”)
Why Are My Hostas Not Blooming?
While all hostas are capable of blooming, not all do so each and every year. This could be because of a variety of reasons.
One of the reasons is that the plant is young. If you just planted a new hosta, don’t be surprised if it doesn’t bloom in its first year. The plant is focusing its energy on creating a strong root system and becoming established as opposed to pushing out blooms. (If you do see blooms during this first year, I would definitely recommend snipping them off!)
Another reason why your hosta might not be blooming is that it is getting too much shade. While hostas are shade-loving perennials, they still require indirect sunlight to produce blooms. Dappled sunlight is even better at times.
Lastly, another reason for not blooming might be a lack of water. While most hostas don’t usually require watering after they’ve become established, an excessively dry summer might prevent flowers from appearing. Try to aim for around one inch of hand watering or rainfall each week.
For more information about growing hostas and what to do with plants before fall hits, check out “How To Grow Hostas – The Shade Loving Perennial.” Hopefully you will be able to enjoy your stunning hosta foliage long into the fall months after removing the plant’s blooms as they appear!
Until next time, thanks for stopping by!
– Chelsea
*This post may contain affiliate links. These are products I have used personally and highly recommend. As an Amazon Associate, I may earn a small commission from qualifying purchases if you purchase items through my links. These links and the ads on this page help to support my family and our semi homestead, so Thank You!
Discover more from Semi Homestead Life
Subscribe to get the latest posts sent to your email.