This article is about everything you need to know when it comes to saving strawflower seeds – from selecting the best blooms to collecting the seeds to storing them properly! Saving seeds is a great way to ensure you can enjoy their stunning blooms year after year!

One of my favorite ways to save money in the garden while at the same time ensuring that I am able to grow my favorite plants and flowers the following year is to save seeds. It’s a simple task that takes little time to do, doesn’t require a lot of special equipment, and allows you to already have seeds on hand for the next growing season.
Sure, you’ve probably read all about saving tomato seeds and marigold seeds, both popular options if you are growing open-pollinated plants. But have you ever considered saving seeds from some of your other favorite annuals that are a little less popular?
Strawflowers are a unique flower because the plants produce multiple blooms that have a paper-like feel to them. You can harvest their blooms right as they are opening and dry them out. They will look just as vibrant and pretty as the day you picked them! You can then use the dry blooms as decorations, in bouquets, in crafts, and more.
However, if you allow the blooms to stay on the plant until they fade, you can then save the seeds to plant the following year. While it’s pretty easy to save their seeds, there are still a few things to keep in mind in order to end up with success next growing season.
A Little About Strawflowers
Strawflowers are one of my favorite flowers to grow in my vegetable garden. They are great at pushing out multiple vibrant blooms in shades of reds, oranges, pinks, burgundies, yellows, and white, which help add color to my garden. In addition, those same blooms also help to draw in loads of pollinators.
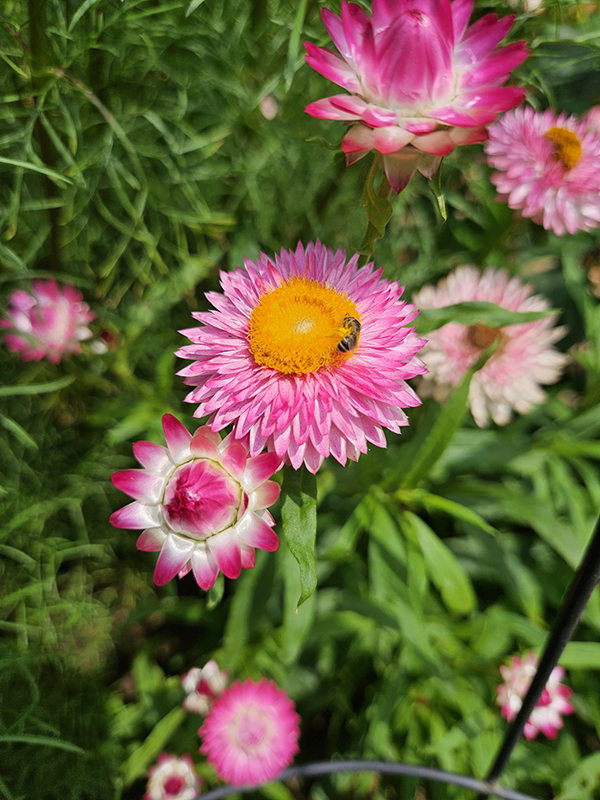
These flowering plants are considered to be perennials in growing zones 8 to 10. However, most people treat them as annuals that need to be replanted each year. Once established, strawflowers are drought and heat-tolerant. This makes them a great option for people who live in warmer climates. (Or for those who hate to water their plants!)
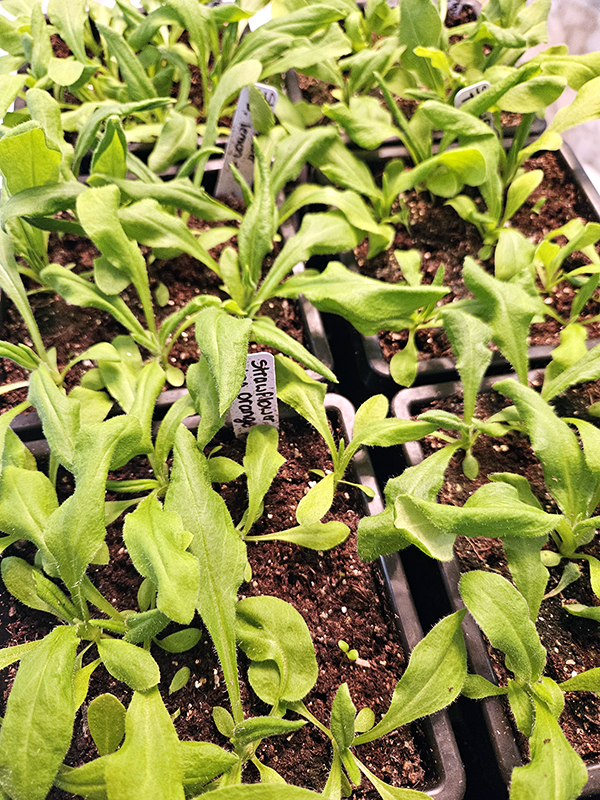
For those of us here in the Midwest and north, we either have to purchase seedlings to plant in the spring, or we have to start the seeds indoors during the late winter months. This gives the plants plenty of time to start growing and maturing since they are a bit slow to go from planting to blooming. Then, once summer hits, they are off to the races, producing bloom after bloom!
If you want to read more details on planting and growing strawflowers, check out my article, “Growing Strawflowers – The Everlasting Flower With Paper Blooms”. As for this article, let’s get into saving those seeds!
The Process Of Saving Strawflower Seeds
Picking The Right Plants
When you save any type of seeds for replanting, you want to choose the best genetics possible. This will give you the best chance at having healthy, strong plants the following season.
Look at the strawflower plants currently growing in your garden. Find the ones that are tall, healthy, have lots of vigor, and produce multiple large blooms. The foliage should be lush and a vibrant green color. If there is some slight pest damage to the leaves, that’s ok. You just want the majority of the plant to be healthy and 100% disease-free.
Be selective about this part of the process. You don’t want to pick blooms from a plant that has disease issues, thin and wimpy branches, and produces few blooms. If you do, the chances of your future plants having issues are much greater. Again, starting with healthy, vibrant plants gives you the best chances that those strong genetics are carried through to the seeds.
Once you find the ideal plant, make a mental note of which one it is. You can even mark it with a garden tie if needed. As the plant produces blooms, mark the best ones as well based on their size, color, and uniform shape.
Drying Out Naturally
Now, for this part of saving strawflower seeds, you have to be patient. Allow the blooms you’ve selected to dry out completely while still on the plant.
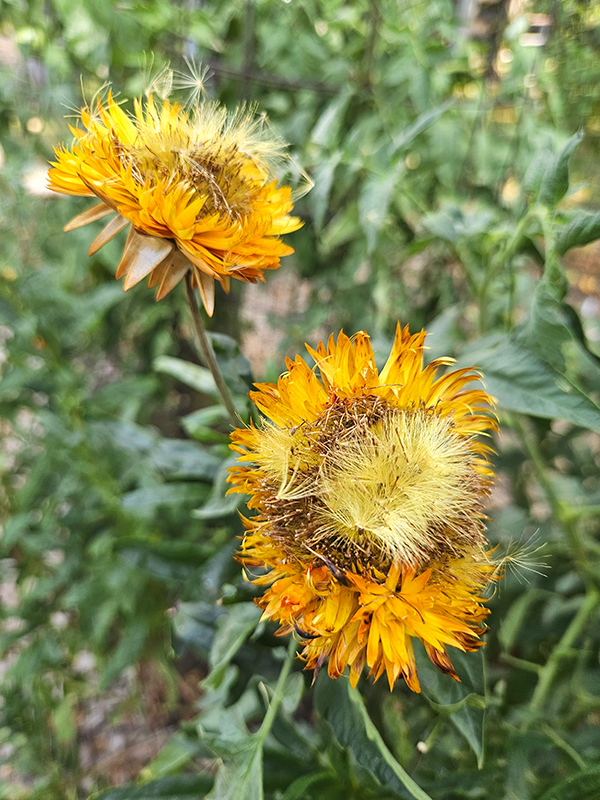
As the blooms start to fade, the petals will open up wide, and the center will begin to dry out. As it dries, it turns fluffly in appearance, similar to how a dandelion bloom turns fluffy. At the same time, most of the once colorful petals will start to turn brown as the bloom dies and the seeds mature.
Underneath the center fluff are tiny brown, long oval seeds. These seeds are attached to a small amount of the fluff – again, similar to dandelion seeds. This fluff is what helps lift the seed off the bloom and float to the ground when the wind blows or an animal/human walks by.
You might see some of the seeds detach from the bloom, indicating the seeds are fully mature and ready for harvesting. That’s ok! Each bloom produces tons of seeds, so there should still be plenty left behind for harvesting.
Collecting The Seeds & Blooms – Saving Strawflower Seeds
Choose a day that is nice and dry to harvest the seeds. If it has recently rained or you have heavy dew in the mornings, wait a few hours until the blooms are nice and fully dry.
Mature dry seeds are easy to remove from the bloom. Use your fingers to pinch the fluff and place it in a bowl, paper plate, or other container. Be careful if it is a windy day because those tiny seeds can easily lift off and take flight! Harvesting from just a few blooms should give you more than enough seeds to save for next year.
Note: If you are harvesting seeds from different colored blooms and want to keep those genetics separate, take care to store the seeds in different containers and label each one. You won’t be able to tell a yellow strawflower seed from a pink one after harvesting. Trust me on this one!
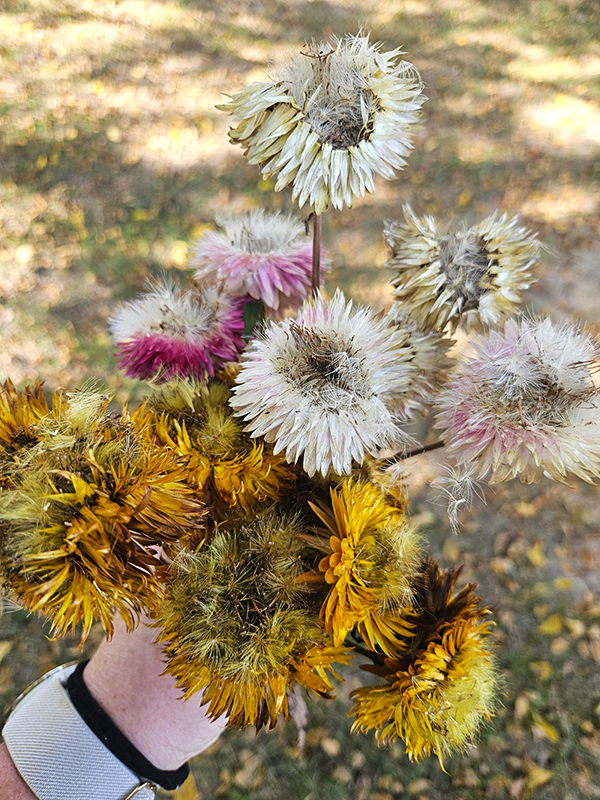
Alternatively – and the way I like to do it – cut the entire bloom off the stem. Then place the whole thing in a paper bag or container using a pair of small snips or pruners. This method helps to keep the plants looking tidy and free for new blooms to appear. (These are my favorite pruners for deadheading and pruning – Product Link: Fiskars Micro-Tip Pruning Shears.)
Drying Out The Seeds – Saving Strawflower Seeds
Once you have your seeds harvested, it’s time to allow the seeds to 100% fully dry out indoors before storing. Choose a location that has good airflow but no breeze (for obvious reasons).
I like to spread the seeds out on paper plates. The plates are easy to label with the date and color of the blooms. Allow the seeds to dry out for at least a week or two.
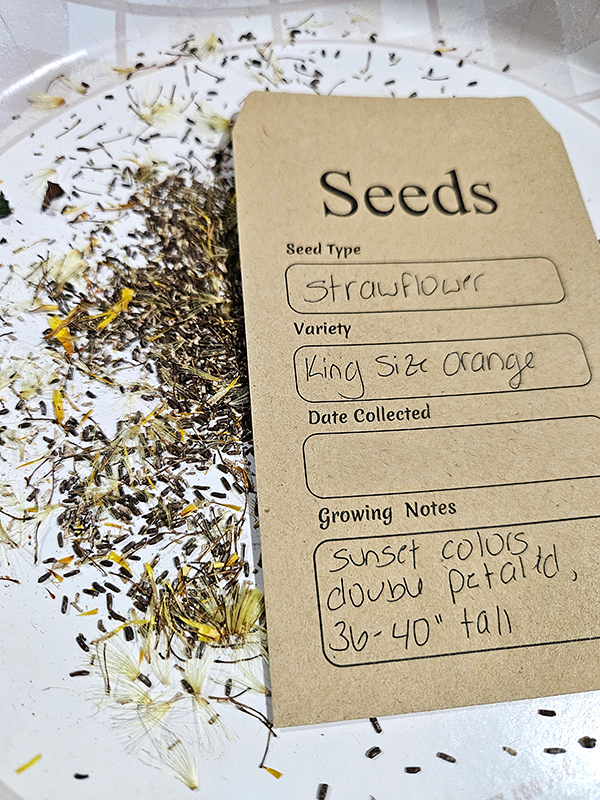
When the seeds are fully dry, separate the fluff and the rest of the plant matter from the seeds. You don’t have to be perfect doing this, just get as much of the fluff removed as you can. Only the tiny, long, dark oval-shaped seeds should be left behind, ready for storing.
Storing The Seeds
The next step for saving strawflower seeds will make a huge difference in whether you have success with germination the following year. You need to keep the seeds in a dry, cool location until you are ready for planting.
I like to store my seeds in these inexpensive brown paper seed packets I got online. You can also use regular envelopes or brown paper bags. The seed packets are great for storing all sorts of seeds that I collect over the growing season. I try to save open-pollinated seeds from tomatoes, nasturtiums, marigolds, etc. (I can’t find the exact envelopes I have, but these are close to the same ones – Product Link: Kraft Seed Saving Storage Envelopes.)
Then, I place those kraft seed packets, as well as any leftover seeds I have from planting this year, in a photo storage container. While that isn’t the intended purpose of the container, it works great for separating out my seeds into groups and helps keep them nice and dry. (I’ve had the same container for years, and it works perfectly for saving seeds! Product Link: novelinks Clear Photo Organizer with Handle)
Now, when the next growing season rolls around, you will have plenty of strawflower seeds you can plant, all because you took the time to save the seeds this year!
Until next time, thanks for stopping by!
– Chelsea
*This post may contain affiliate links. These are products I have used personally and highly recommend. As an Amazon Associate, I may earn a small commission from qualifying purchases if you purchase items through my links. These links and the ads on this page help to support my family and our semi homestead, so Thank You!
Discover more from Semi Homestead Life
Subscribe to get the latest posts sent to your email.