A great way to save money in your gardening budget while also ensuring you can grow beautiful flowers for next year’s gardening season is to save the seeds from your zinnia plants. It’s a simple process that takes no time at all and leaves you with plenty of seeds for planting the following year – and for many years, for that matter!
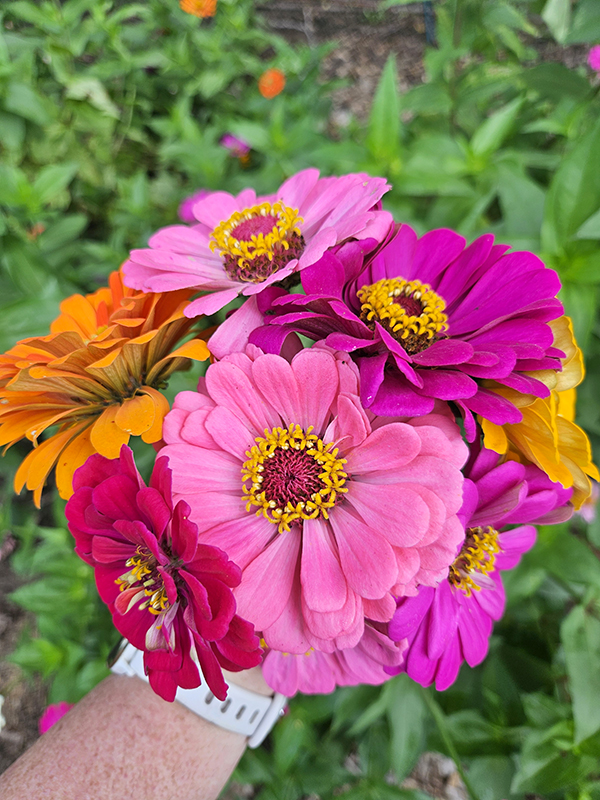
One of the easiest yet most rewarding annual flowers to grow in your garden is zinnias. These cut-and-come-again flowers produce bloom after bloom in a stunning array of colors like pinks, purples, reds, whites, yellows, oranges, and more.
Not only are the blooms packed full of nectar and perfect for attracting all sorts of pollinators like bees, butterflies, and hummingbirds, but they also make great cut flowers. The more you cut these beautiful blooms, the more blooms the flowers produce.
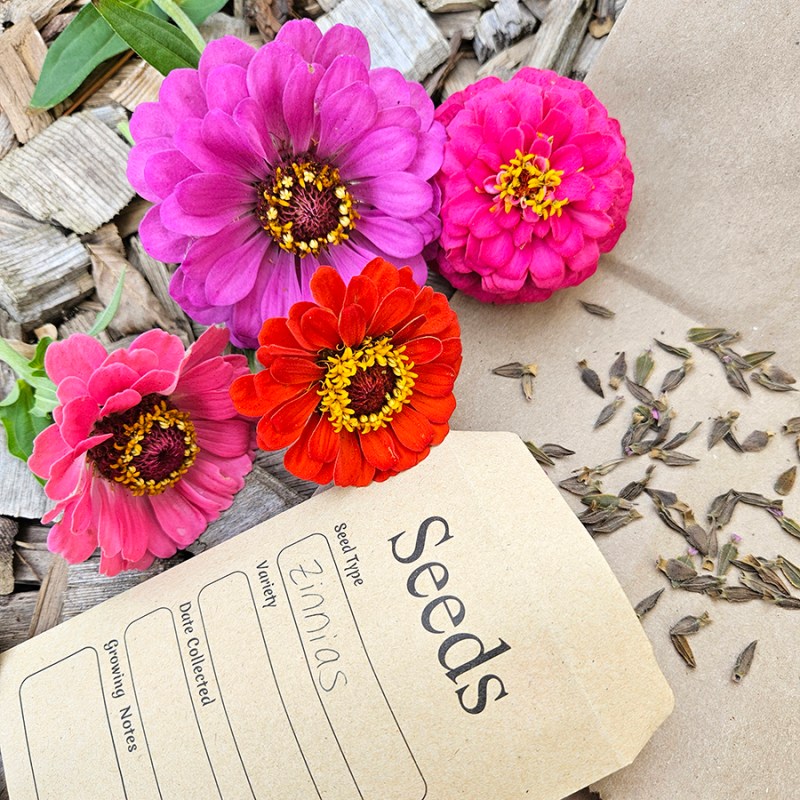
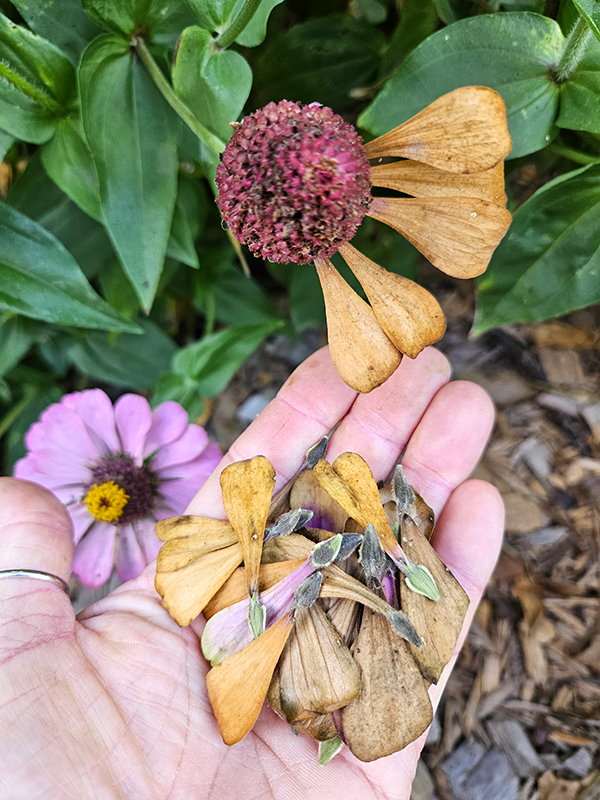
Inside each one of those mature blooms are loads of small seeds – seeds that you can harvest, dry out, store, and use to grow even more flowers the following year! The key is to make sure you harvest from the right plants at the right time and take steps to keep the seeds dry and protected until they are ready for planting.
As long as you follow these few basic tips, you will be left with more than enough seeds for next year’s (any beyond’s) zinnia patch!
How To Save Zinnia Seeds
Open-Pollinated Plants Only
The first step in saving seeds of any plant from your garden is to make sure you are choosing the right varieties. Only seeds saved from open-pollinated plants will produce true copies of the parent plants. So what do I mean by that?
Open-pollinated plants, also called heirlooms in some instances, produce seeds that contain exact copies of the parent plant. These seeds will have the same exact attributes that the parent plants have. For instance, if your plant produces pink flowers with orange tips that are around 3″ wide, the open-pollinated seeds will do the exact same for any plant grown from their seeds.
The other main type is a hybrid plant. With most of these plants, two different plant varieties are crossed together to create a brand new plant. Usually, this is done to obtain favorable traits like disease resistance or high yields.
When the seeds are saved from these plants, they contain attributes from one of the original plants used to create the hybrid. Often, the result is a plant that looks nothing like you were hoping. The seeds might even be sterile in some cases, or the plants might not produce blooms at all.
So, ensure that the zinnias you want to save the seeds from are open-pollinated plants. You can usually look at the original seed packet or source to get that information. If you know the name of the zinnia variety, a quick Google search should also be able to tell you what you need to know.
Healthy Plants – Save Zinnia Seeds
Now that you know which varieties to save the seeds from and which to skip, it’s time to identify the best plants. Choose blooms on plants that are healthy, pest-free, and without any diseases or damage. These plants will have the best chances of passing down healthy genes into the seeds.
Don’t save the seeds from any plants that have seed-borne diseases. Some of these diseases include leaf spot, blight, and grey mold. This only sets the next generation of zinnias up for failure.
Powdery mildew does not get passed down through the seeds, though, so those plants are fine to save seeds from. However, if you have healthy zinnia plants, it’s best to choose those plants instead.
Harvesting Blooms In Two Ways
You can harvest the seeds in two main ways. First, you can allow the blooms to fully dry out naturally on the plant, or you can cut off the bloom while it is still colorful and allow it to dry out indoors.
For either method, wait a day or two after watering or rainfall. Harvest the blooms during the afternoon or at least after the morning dew has had a chance to evaporate. This will reduce the amount of time that the blooms (and thus seeds) need to dry out.
1. Harvesting Naturally Dried Blooms
If you allow the zinnias to dry on the plant naturally, I highly suggest tagging the blooms. Each zinnia plant produces loads of blooms. It can be hard to remember which zinnia blooms you want to save for seeds and which you don’t. Once dried, zinnia blooms can look identical to the next, so tagging makes sure you are harvesting the best ones.
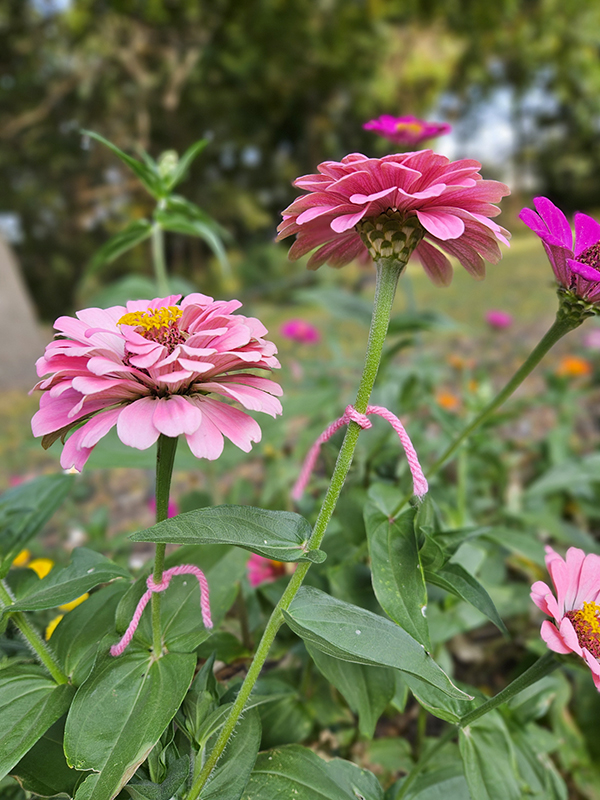
I like to use a small piece of colorful yarn or thread to tie loosely around the base of each bloom I want to save. Once you cut off the bloom, you can easily slip off the yarn and dispose of it.
Allow the blooms to naturally get brown and dry. The petals will turn crispy and may start to fall out if you wait too long. Once dry, cut or pull off the bloom from the plant using a pair of scissors or pruners. Remember to dispose of your tag if you used one. Keep different varieties or even colors separate if desired. (There are the small snips I use to prune flowers: Product Link: Fiskars Micro-Tip Pruning Shears.)
2. Harvesting Fading Blooms
Another option is to cut the blooms off while they are still colorful. Even though I can still tell the blooms are the ones I want to harvest, I still like to tag them early on so I can keep an eye on them.
Wait until the blooms have reached their peak beauty and have just started to fade. The bottom petals may start to brown slightly. Use a pair of pruners or snips to cut off the bloom and about an inch or so of the stem. Again, remember to toss the tag if you used one.
Drop the flower heads into brown paper bags. Since they still have color on the petals, you can sort and arrange them later. If you have multiple varieties with the same color or style of blooms, then of course, keep them separate if desired.


Drying Out Harvested Blooms – Save Zinnia Seeds
Whichever method you used to harvest your zinnia seeds for saving, you still need to make sure the seeds are fully dry before storing.
For Naturally Dried Blooms: Place the blooms on a screen, paper plate, or some place where they can dry fully. (Label as needed.) The location should be free from moisture and have good airflow around the blooms.
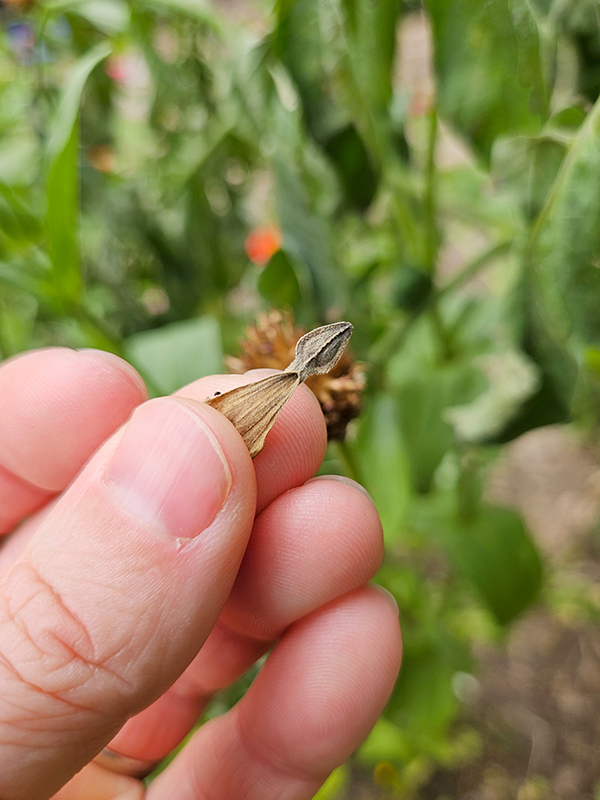
After about a week, separate out the seeds from the rest of the blooms. Discard the chaff and the rest of the zinnia blooms, only keeping the seeds. The seeds will be small, flat, and somewhat arrowhead-shaped. If the petals are still attached to the seeds, pull them off.
Even though the blooms are fully dried, we still need to make sure the seeds are as well. Place the seeds back onto a labeled paper plate or paper towel in a dry location that is out of direct sunlight and has good airflow. Allow them to dry out for a few days. They are then ready for long-term storage.
For Faded Blooms: I like to keep the blooms in labeled brown paper bags to allow them to dry out fully. This can take a couple of weeks. Check the blooms weekly. Unlike naturally dried blooms, the early-harvested ones might still retain some of their color and not be fully brown once dry.
Once the petals feel crispy, try gently pulling out a few. The seeds should easily slide out of the bloom attached to the petals. Separate the petals from the seeds and place the seeds on a labeled paper plate or paper towel to continue drying for a few more days. You can then store them.
Long-Term Storage – Save Zinnia Seeds
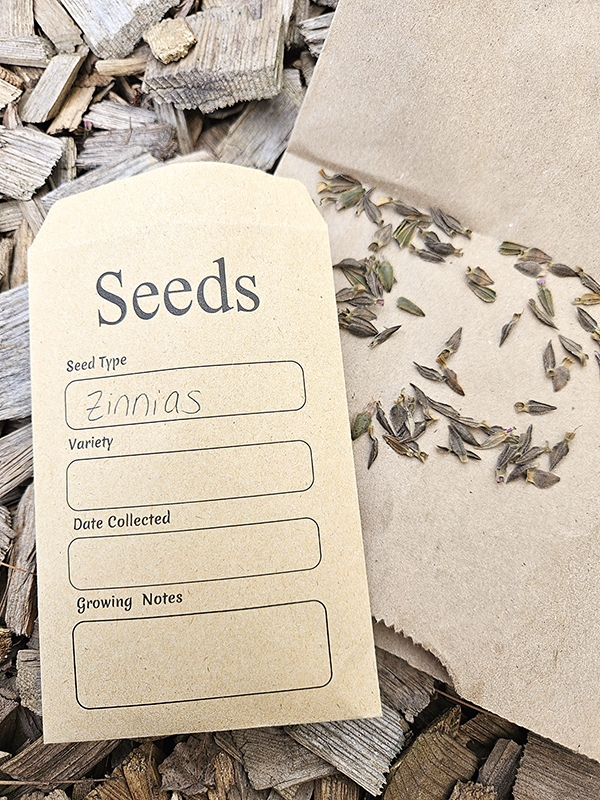
Once the seeds are completely dry, store them for long term. Under the right conditions and proper storage, zinnia seeds can last five years or more! The key is to store them properly, though. Here’s how I go about storing my saved seeds:
First, place the seeds in a small brown kraft paper envelope. Any old envelope will work, though. You can even use old seed packets. You can also use paper bags. Just make sure to label whatever it is you use! (Here is the newer version of the ones I have – Product Link: Joyberg Kraft Seed Saving Storage Envelopes.)
Don’t just toss the seeds into a plastic zip-lock bag. If there happens to be any residual moisture at all in the seeds, the plastic will only make it worse, likely ruining your seeds in the process.
You can then place the paper envelopes into a plastic storage container. A glass container with a lid also works well. What I use is actually meant for photos, but it works perfectly for organizing my saved and extra seeds. It’s also great for hauling down to my seed starting area or out to the garden for planting! (Product Link: Novelinks Clear 4″ x 6″ Photo Organizer with Handle.)
You can also toss in a desiccant packet if you are still worried about moisture. They will help draw out any excess moisture. While I don’t use them for my seeds, I do use them with my dehydrated foods. (Here are the ones I use – Product Link: Dry & Dry Silica Gel Packets Desiccants.)
Place the container of seeds in a dry, dark location, and you will have healthy, viable zinnia seeds to use for years to come!
Additional Resources
For information about growing zinnias in general, check out my article, “Growing Zinnias From Start To Finish – Plant, Grow & Cut Zinnias”. To learn about saving other types of flower seeds, check out my articles:
- How To Save Marigold Seeds – Easily Harvest Seeds For Spring
- Saving Nasturtium Seeds – Grow Amazing Plants All For Free!
- Saving Coneflower Seeds – How To Save Echinacea Seeds
- Snapdragon Seeds – Saving Tiny Seeds Of These Unique Flowers
- Saving Strawflower Seeds – Selecting, Collecting & Storing
Until next time, thanks for stopping by!
– Chelsea